
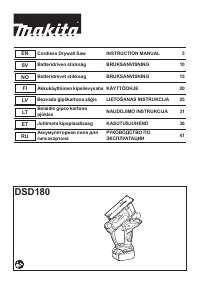
Сабельные пилы Makita DSD180Z - инструкция пользователя по применению, эксплуатации и установке на русском языке. Мы надеемся, она поможет вам решить возникшие у вас вопросы при эксплуатации техники.
Если остались вопросы, задайте их в комментариях после инструкции.
"Загружаем инструкцию", означает, что нужно подождать пока файл загрузится и можно будет его читать онлайн. Некоторые инструкции очень большие и время их появления зависит от вашей скорости интернета.


8 ENGLISH
CAUTION:
Before installing the battery car-
tridge into the tool, always check to see that the
switch trigger actuates properly and returns to
the "OFF" position when released.
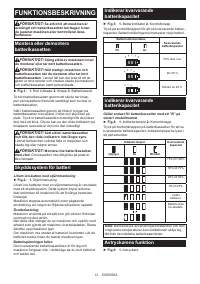
To start the tool, simply pull the switch trigger. Tool
speed is increased by increasing pressure on the switch
trigger. Release the switch trigger to stop.
The trigger can be locked off to prevent it from being
pulled accidentally. To lock the trigger off, press the
button from the side with
marking. To unlock, press
the button from the side with marking.
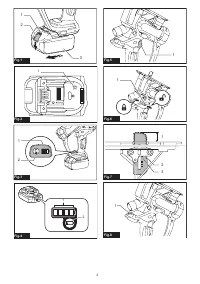
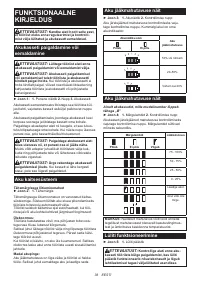
►
Fig.6:
1.
Lock-off button
CAUTION:
Always lock the tool off when
carrying or suspending the operation.
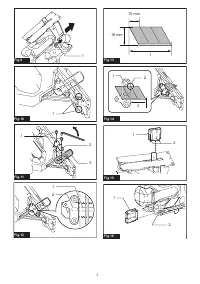
Adjusting depth of cut
The cutting depth corresponds with the scale on the
blade. Loosen the screw on the blade holder until the
blade can move freely. Align the scale on the blade with
the bottom line of the blade holder. Then tighten the
screws.
►
Fig.7:
1.
Cutting depth
2.
Bottom line of the blade
holder
3.
Scale on the blade
The maximum cutting depth depends on the type of
the saw blade. Always use the saw blade designed for
cutting the working material.
Type of saw blade
Max. cutting depth
For drywall
30 mm
For wood
15 mm
LED light
CAUTION:
Do not look in the light or see the
source of light directly.
Pull the switch trigger to light up the lamp. The lamp
keeps on lighting while the switch trigger is being pulled.
The lamp goes out approximately 10 seconds after
releasing the trigger.
►
Fig.8:
1.
Lamp
NOTE:
Use a dry cloth to wipe the dirt off the lens of
the lamp. Be careful not to scratch the lens of lamp, or
it may lower the illumination.
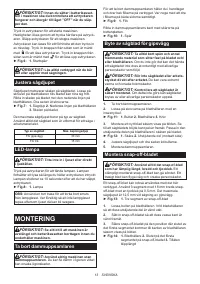
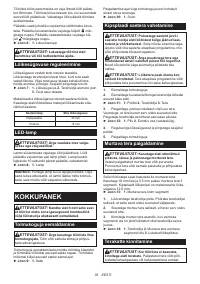
ASSEMBLY
CAUTION:
Always be sure that the tool is
switched off and the battery cartridge is removed
before carrying out any work on the tool.
Removing the dust collector
CAUTION:
Never operate the tool without the
dust collector.
Dust may come into your eyes and
cause eye injury.
To remove the dust collector, hold the tool handle and
pull back the tabs on the tool. Be sure to pull the tabs on
the both sides at the same time.
►
Fig.9:
1.
Tab
When installing, align the dust collector's edge with the
groove on the base.
►
Fig.10:
1.
Groove
Replacing drywall saw blade
CAUTION:
Always clean out all chips or for-
eign matter adhering to the blade and/or blade
holder.
Failure to do so may cause insufficient tight
-
ening of the blade, resulting in a serious personal
injury.
CAUTION:
Do not touch the blade or the
workpiece immediately after operation.
They may
be extremely hot and could burn your skin.
CAUTION:
Make sure that the blade is prop-
erly secured.
Insufficient tightening of the blade may
cause blade breakage or serious personal injury.
1.
Remove the dust collector.
2.
Remove the bolts on the blade holder with the hex
wrench.
►
Fig.11:
1.
Bolts
2.
Blade holder
3.
Blade
3.
Set a new blade as shown in the figure. Make sure
that the curved edge of the blade points forward. Fit the
protrusion of the blade holder into the slot on the blade.
►
Fig.12:
1.
Slot
2.
Protruded portion (opposite side)
4.
Adjust the cutting depth then tighten the bolts.
5.
Attach the dust collector.
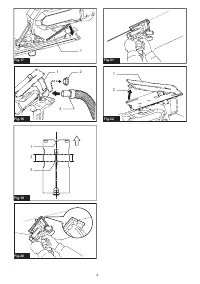
Installing snap-off blade
CAUTION:
Always use the snap-off blade with
designated length, width, and thickness.
An inap
-
propriately installed snap-off blade can be broken. A
broken blade can fly off and cause a personal injury.
A snap-off blade can also be used with this tool. Use 3
segments of 18 mm wide snap-off blade with 0.5 mm
thickness. The maximum cutting depth is 12.5 mm
when cutting a drywall.
►
Fig.13:
1.
Three segments of snap-off blade
1.
Loosen the bolts on the blade holder. Turn the
blade holder so that its protrusion faces outward.
2.
Insert the snap-off blade so that the sharp edge
faces forward.
3.
Secure the snap-off blade at the position where
the end of the first segment comes to the edge of blade
holder as illustrated.
►
Fig.14:
1.
Blade holder
2.
End of the first segment
of snap-off blade
3.
Allowable cutting length
Attaching blade cap
CAUTION:
Always attach the blade cap when
tool is not used.
A bare blade may cause personal
injury or damage to the blade itself.
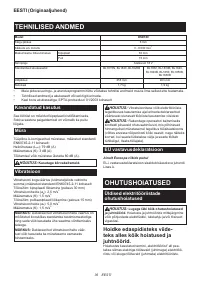
Характеристики

Остались вопросы?Не нашли свой ответ в руководстве или возникли другие проблемы? Задайте свой вопрос в форме ниже с подробным описанием вашей ситуации, чтобы другие люди и специалисты смогли дать на него ответ. Если вы знаете как решить проблему другого человека, пожалуйста, подскажите ему :)


