
Роботы-пылесосы VITEK 1806-VT-03 - инструкция пользователя по применению, эксплуатации и установке на русском языке. Мы надеемся, она поможет вам решить возникшие у вас вопросы при эксплуатации техники.
Если остались вопросы, задайте их в комментариях после инструкции.
"Загружаем инструкцию", означает, что нужно подождать пока файл загрузится и можно будет его читать онлайн. Некоторые инструкции очень большие и время их появления зависит от вашей скорости интернета.

13
ENGLISH
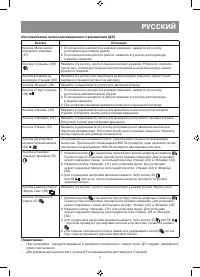
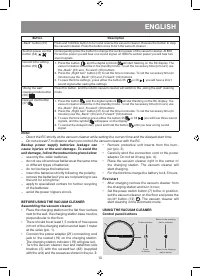
Button
Description
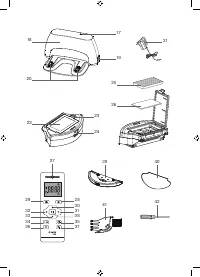
„Back“ button (33)
Press and hold this button to turn and reverse the vacuum cleaner. Release the button to stop
the vacuum cleaner. Press the button once to turn the vacuum cleaner.
Suction power control
button (34)
Consequently press the button to change the suction power of the vacuum cleaner. At 800
Pa suction power you will hear one sound signal, at 1300 Pa suction power you will hear two
sound signals.
Current time setting
button (35)
1. Press the button
, and the digital symbols
will start flashing on the RC display. The
vacuum cleaner should be in the standby mode. To set the necessary time (in hours) use
the „Back“ (33) and „Forward“ (30) buttons
2. Press the „Right turn“ button (31) to set the time in minutes. To set the necessary time (in
minutes) use the „Back“ (33) and „Forward“ (30) buttons
3. To save the time settings, press either the button 35
or 38
, you will hear a short
sound signal after saving the settings.
“Along the wall”
cleaning mode button
(36)
Press this button, and the robotic vacuum cleaner will switch to the „Along the wall“ cleaning
mode
Delayed start button
(37)
1. Press the button
, and the digital symbols
will start flashing on the RC display. The
vacuum cleaner should be in the standby mode. To set the necessary time (in hours) use
the „Back“ (33) and „Forward“ (30) buttons
2. Press the „Right turn“ button (31) to set the time in minutes. To set the necessary time (in
minutes) use the „Back“ (33) and „Forward“ (30) buttons
3. To save the time settings press either the button 35
or 38
, you will hear three sound
signals, and the symbol
will appear on the display
4. To cancel the delayed start, press and hold the button
until you hear a long sound
signal
Note:
– Direct the RC strictly at the vacuum cleaner while setting the current time and the delayed start time.
– Do not exceed 7 m distance when you control the vacuum cleaner with the RC.
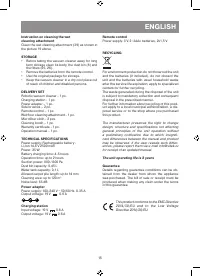
Backup power supply batteries leakage can
cause injuries or the unit damage. To avoid the
unit damage, follow the instructions given below:
– use only the «AAA» batteries;
– do not use old and new batteries at the same time
or different types of batteries;
– do not recharge the batteries;
– insert the batteries strictly following the polarity;
– remove the batteries if you are not planning to use
the unit for a long time;
– apply to specialized centers for further recycling
of the batteries;
– avoid the power nippers circuit.
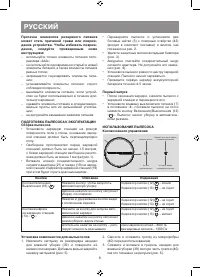
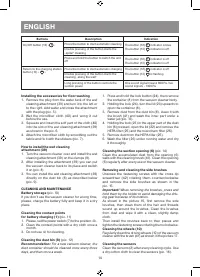
BEFORE USING THE VACUUM CLEANER
Assembling the vacuum cleaner
•
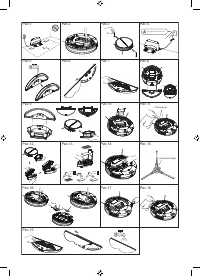
Place the charging station on the flat floor surface
next to the wall, the charging station base must be
perpendicular to the floor.
•
There should be at least 1,5 meters of free space
in front of the charging station and at least 1 meter
at the sides (pic. 1).
•
Connect the power adapter (21) connecting cord
jack to the socket (19) on the charging station.
The charging station indicator (19) will glow red.
•
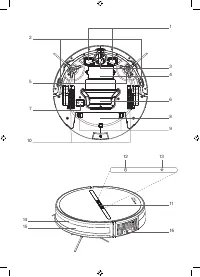
Turn the vacuum cleaner over and install two side
brushes (5) with the screwdriver (42) (supplied
with the unit) and the screws as shown in the pic. 2.
•
Remove protective soft inserts from the bum-
per (pic. 3).
•
Carefully wind the connection cord of the power
adapter. Do not let it hang (pic. 4).
•
Place the vacuum cleaner right in the center of
the charging station. The vacuum cleaner will
start charging.
•
For the first time charge the battery for 4-5 hours.
First start
•
After charging remove the vacuum cleaner from
the charging station and turn it over;
•
Set the power switch button (7) to the «I» position,
set the vacuum cleaner on the floor and press the
on/off button (12)
. The vacuum cleaner will
start cleaning in the automatic mode.
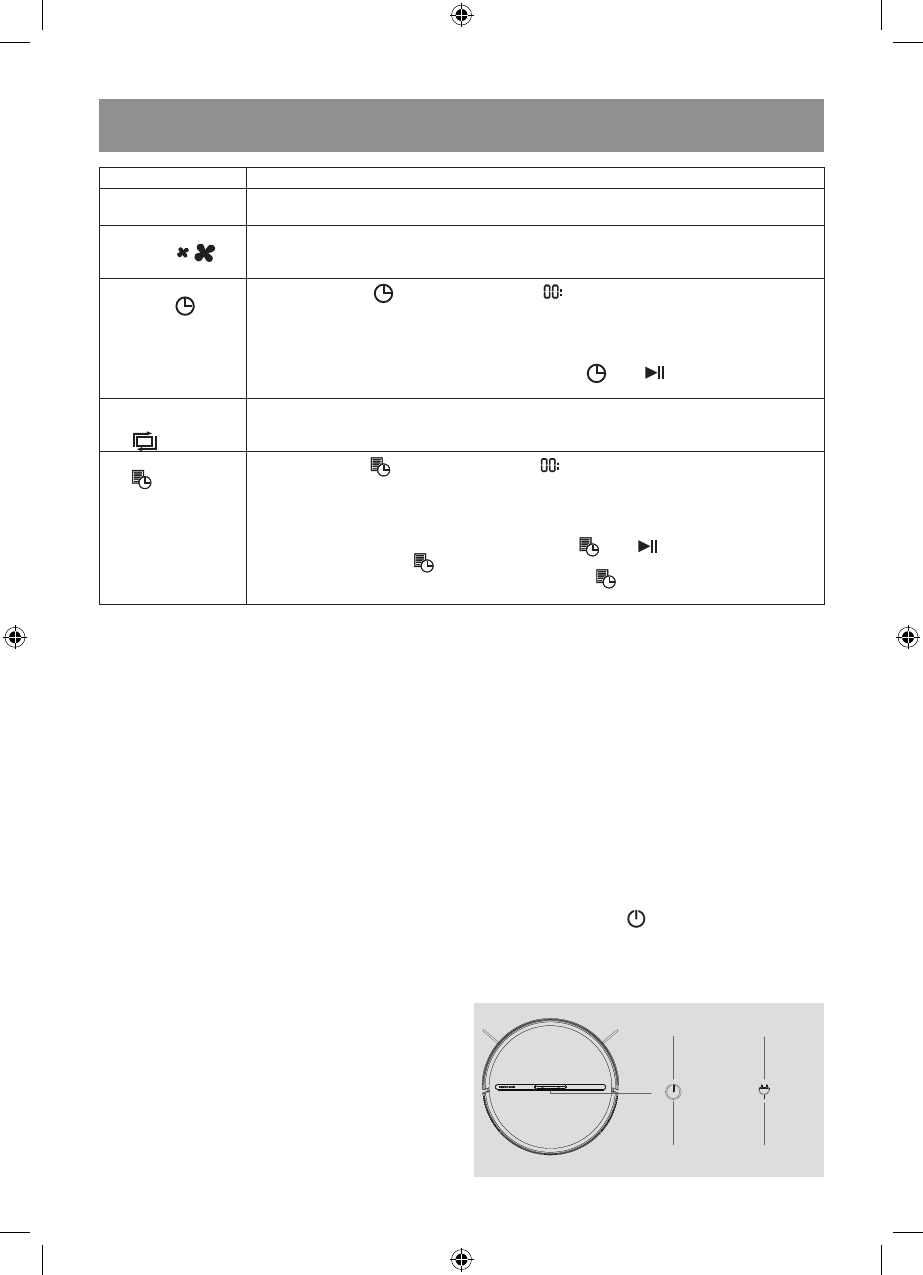
USING THE VACUUM CLEANER
Control panel buttons
Индикатор сети
Кнопка
включения сети
Индикатор кнопки возврата
на зарядную станцию
Кнопка возврата
на зарядную станцию
Power indicator
Return to the charging
station indicator
Return to the charging
station button
Power
on button


