Роботы-пылесосы Hoover HGO320H 011 - инструкция пользователя по применению, эксплуатации и установке на русском языке. Мы надеемся, она поможет вам решить возникшие у вас вопросы при эксплуатации техники.
Если остались вопросы, задайте их в комментариях после инструкции.
"Загружаем инструкцию", означает, что нужно подождать пока файл загрузится и можно будет его читать онлайн. Некоторые инструкции очень большие и время их появления зависит от вашей скорости интернета.


77
MAX
Fig. 12
Fig. 13
Fig. 14
Fig. 15
Fig. 16
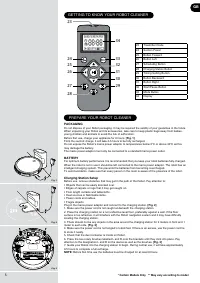
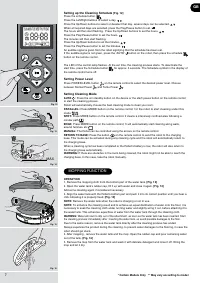
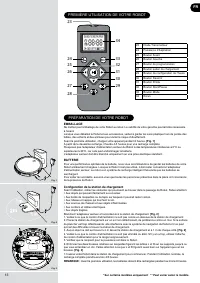
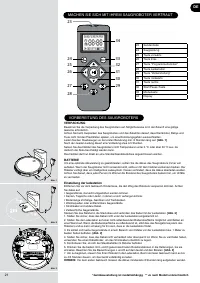
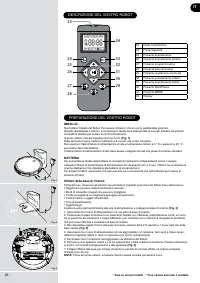
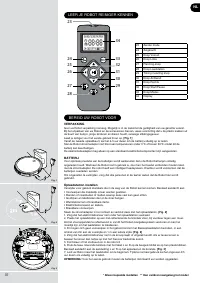
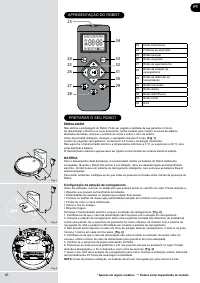
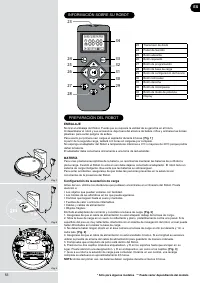
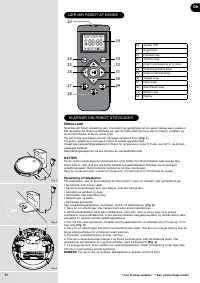
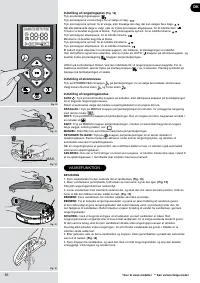
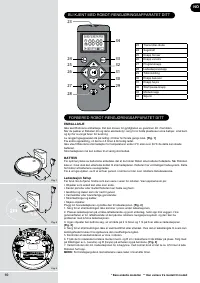
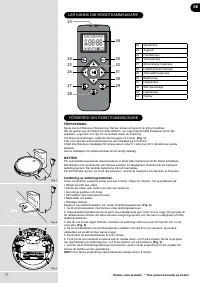
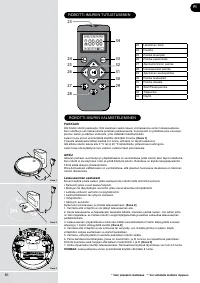
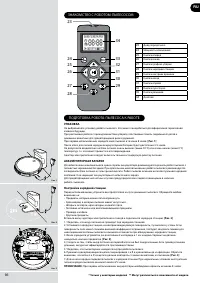
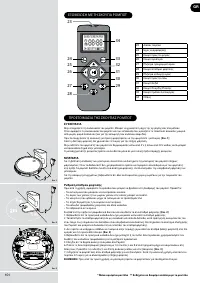
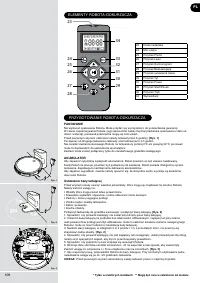
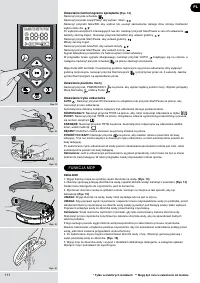
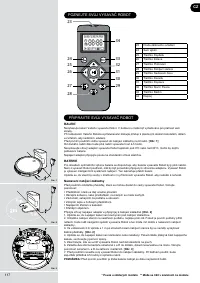
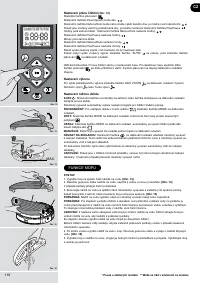
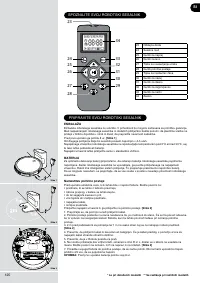
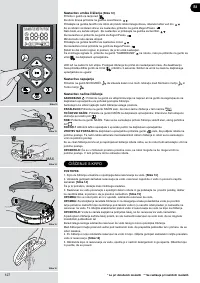
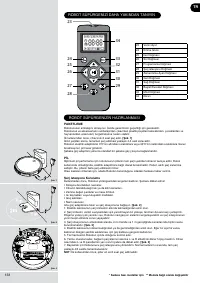
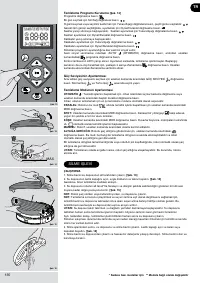
Setting up the Cleaning Schedule
[Fig. 12]
Press the schedule button.
Press the Left/Right buttons to select a day.
Press the Up/Down buttons to select or deselect that day, several days can be selected.
When all required days are selected, press the Play/Pause button to set.
The hours will then start flashing. Press the Up/Down buttons to set the hours.
Press the Play/Pause button to set the hours.
The minutes will then start flashing.
Press the Up/Down buttons to set the minutes.
Press the Play/Pause button to set the minutes.
An audible signal is given from the robot signifying that the schedule has been set.
If the audible signal is not given, press the ‘AUTO’
button on the robot, then press the schedule
button on the remote control.
The LED of the control lamp flashes. At the set time, the cleaning process starts. To deactivate the
start time, press the Schedule button
for approx. 3 seconds. The Schedule symbol in the display of
the remote control turns off.
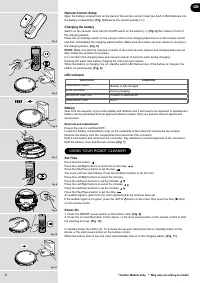
Setting Power Level
Press POWER LEVEL button
on the remote control to select the desired power level. Choose
between Normal Power
and Turbo Power
.
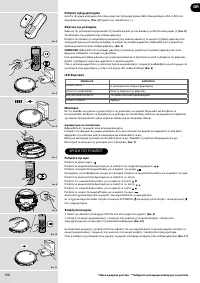
Setting Cleaning Mode
AUTO
: Press the on/ standby button on the device or the start/ pause button on the remote control
to start the cleaning process.
Robot will automatically choose the best cleaning mode to clean you room.
PARALLEL:
Press MODE button on the remote control for the robot to start cleaning under this
mode
.
SPOT:
Press MODE button on the remote control. It cleans a intensively confined area following a
circular path
.
EDGE:
Press MODE button on the remote control, It will automatically start cleaning along walls,
around furniture etc
.
MANUAL:
The Robot can be controlled using the arrows on the remote control.
RETURN TO BASE:
Press the button
on the remote control to send the robot to the charging
base. This mode can be activated during any cleaning cycle and the robot will automatically return to
the charging base.
When a cleaning cycle has been completed or the R
obot’s battery is low, the robot will also return to
the charging base automatically.
WARNING:
If there are obstacles in the room being cleaned, the robot might not be able to reach the
charging base. In this case, take the robot manually.
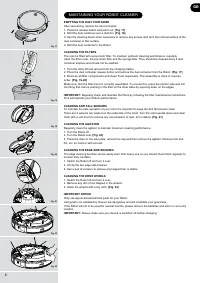
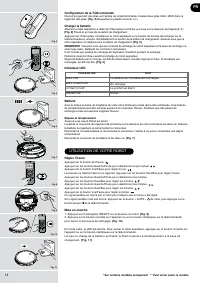
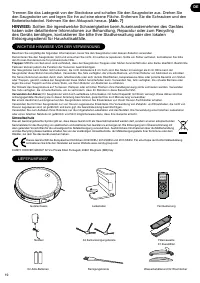
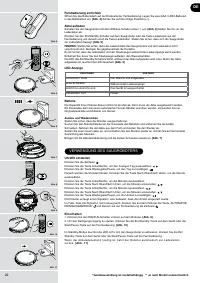
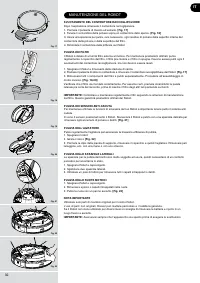
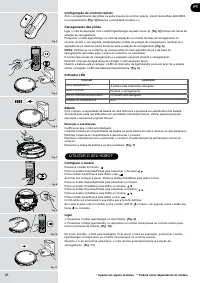
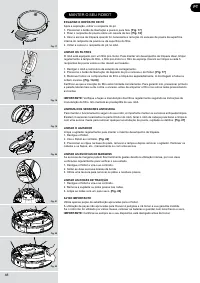
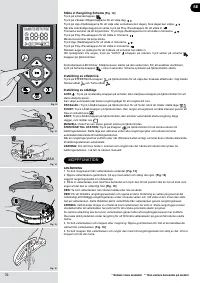
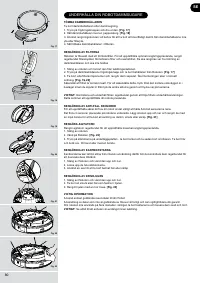
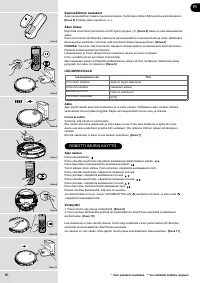
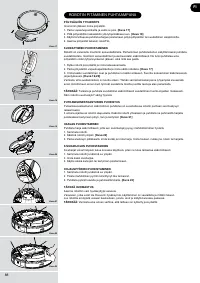
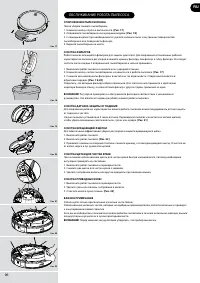
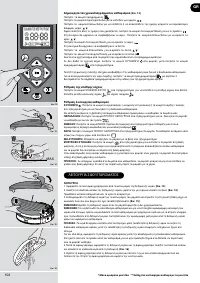
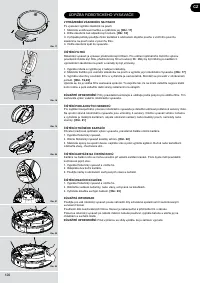
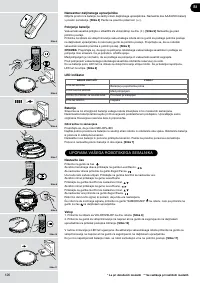
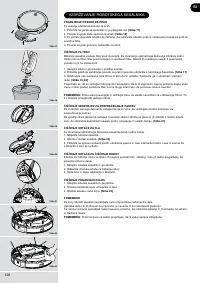
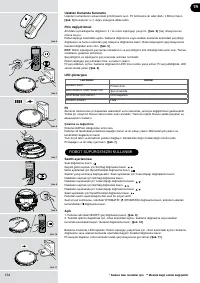
MOPPING FUNCTION
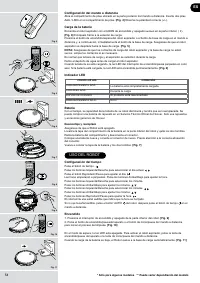
OPERATION
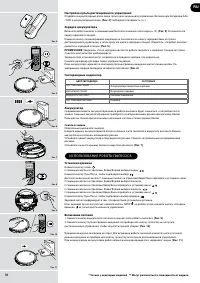
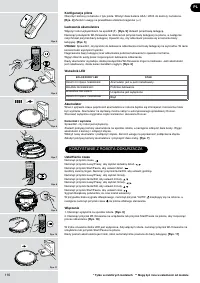
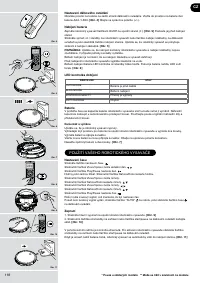
1. Remove the mopping cloth from the bottom part of the water tank.
[Fig. 13]
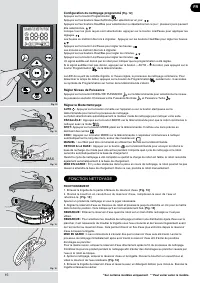
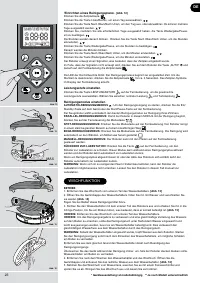
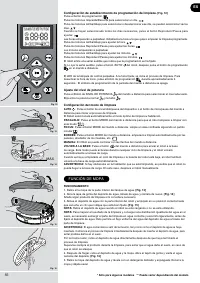
2. Open the water tank’s rubber cap, fill it up with water and close it again.
[Fig. 14]
Add some cleaning agent if considered necessary.
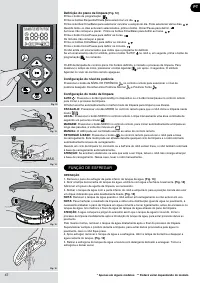
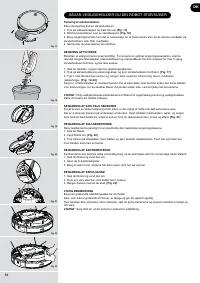
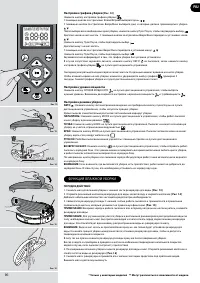
3. Align the water tank with the R
obot’s bottom part and push it into its correct position until you hear a
click indicating it is properly fixed.
[Fig. 15]
NOTE:
Remove the water tank when the robot is charging or not in use.
NOTE:
To enhance the cleaning result and to achieve an equal distribution of water onto the floor, it is
necessary to soak the cleaning cloth under running water and slightly wring it out, before attaching it to
the water tank. This enhances equal flow of water from the water tank through the cleaning cloth.
WARNING:
Water will start to drip out of the attachment, as soon as the water tank has been inserted. Start
the cleaning process immediately after inserting the water tank, so avoid possible damages to the floor.
Due to the same reason, remove the water tank directly after the cleaning process has ended.
Always supervise the product during the cleaning, to prevent water damages to the flooring, in case the
robot should get stuck.
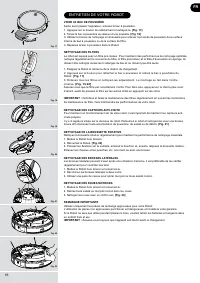
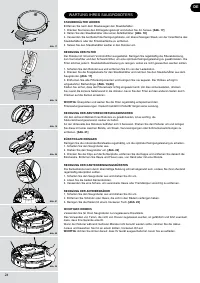
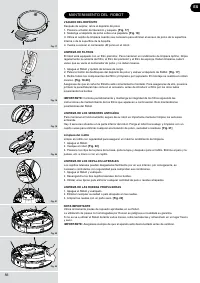
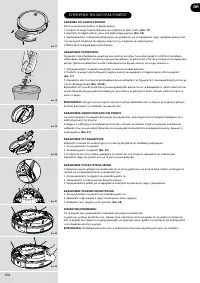
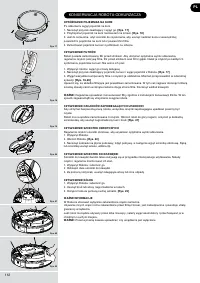
4. After mopping , remove the water tank and the mop. Open the rubber cap and pour remaining water
out of the tank.
[Fig. 16]
5. Remove the mop from the water tank and wash it with delicate detergent and rinse it off. Wring the
mop and let it dry.
* Certain Models Only ** May vary according to model
GB
Содержание
- 91 Использование батарей:; Окружающая среда
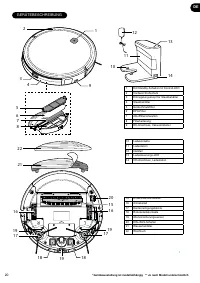
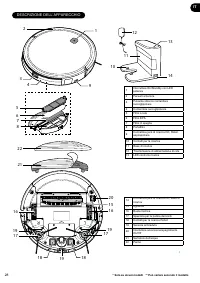
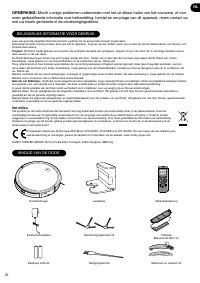
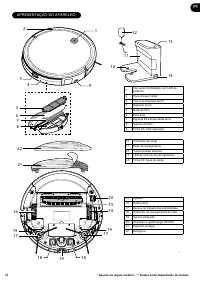
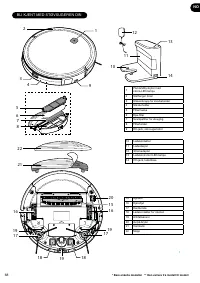
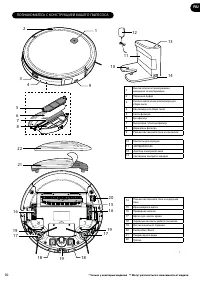
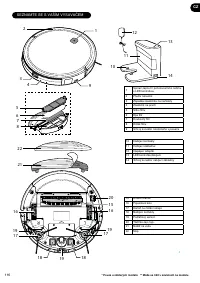
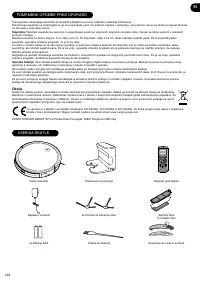
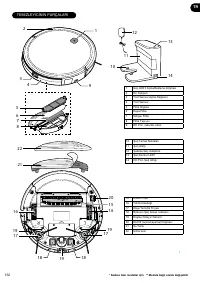
- 92 ПОЗНАКОМЬТЕСЬ С КОНСТРУКЦИЕЙ ВАШЕГО ПЫЛЕСОСА
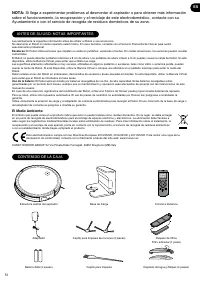
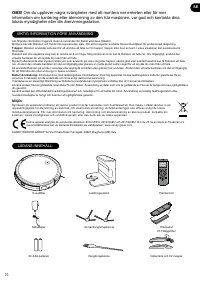
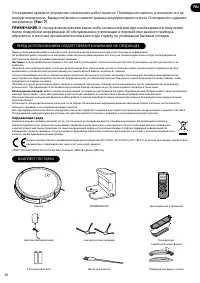
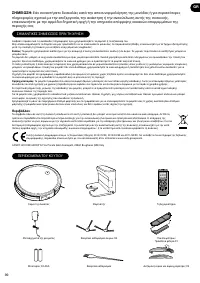
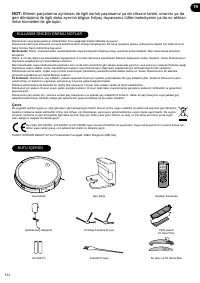
- 93 УПАКОВКА
- 94 ИСПОЛЬЗОВАНИЕ РОБОТА-ПЫЛЕСОСА; Снятие и замена
- 95 Настройка графика уборки; АВТО; ФУНКЦИЯ ВЛАЖНОЙ УБОРКИ; ПОРЯДОК ДЕЙСТВИЙ
- 96 ОБСЛУЖИВАНИЕ РОБОТА-ПЫЛЕСОСА
- 97 ВАЖНАЯ ИНФОРМАЦИЯ; Запасные части и расходные материалы компании Hoover; УСТРАНЕНИЕ НЕИСПРАВНОСТЕЙ
Характеристики

Остались вопросы?Не нашли свой ответ в руководстве или возникли другие проблемы? Задайте свой вопрос в форме ниже с подробным описанием вашей ситуации, чтобы другие люди и специалисты смогли дать на него ответ. Если вы знаете как решить проблему другого человека, пожалуйста, подскажите ему :)


