Роботы-пылесосы Hoover HGO320H 011 - инструкция пользователя по применению, эксплуатации и установке на русском языке. Мы надеемся, она поможет вам решить возникшие у вас вопросы при эксплуатации техники.
Если остались вопросы, задайте их в комментариях после инструкции.
"Загружаем инструкцию", означает, что нужно подождать пока файл загрузится и можно будет его читать онлайн. Некоторые инструкции очень большие и время их появления зависит от вашей скорости интернета.


55
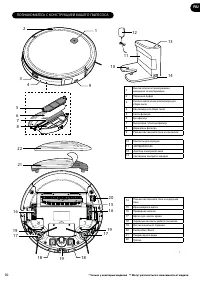
1 2
4
9
18
18
19
10
1
15
12
11
13
14
16
17
19
3
5
23
24
25
26
27
28
33
34
32
31
29
30
16
19
20
21
22
17
6
7
8
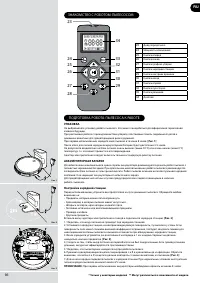
23
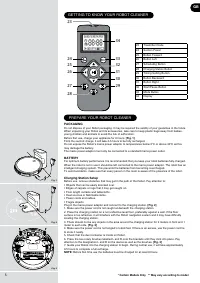
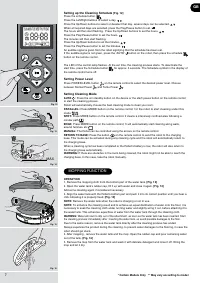
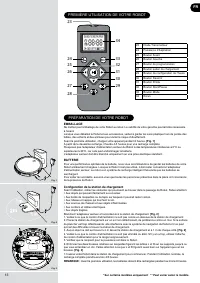
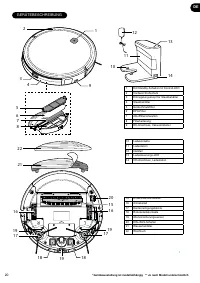
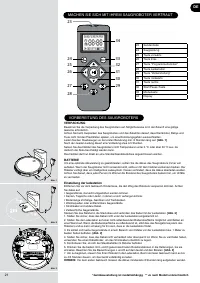
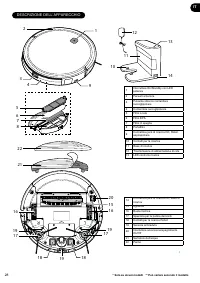
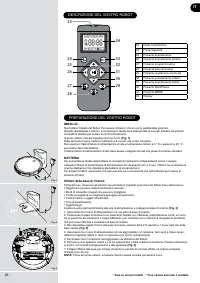
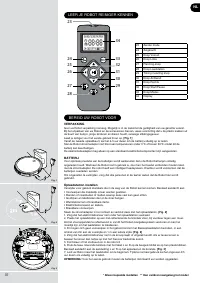
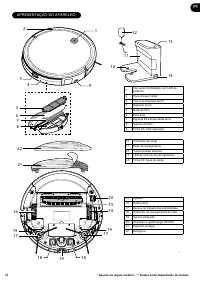
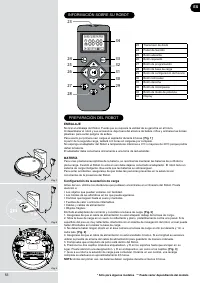
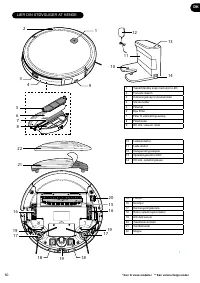
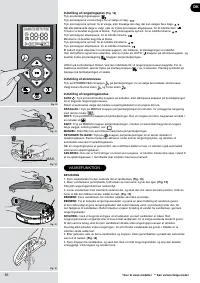
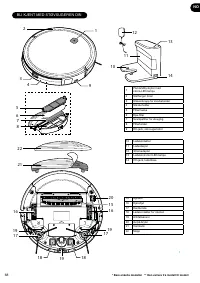
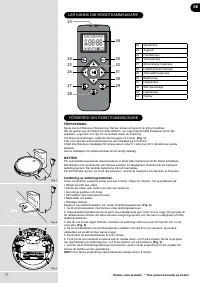
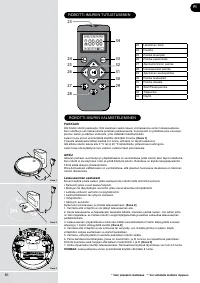
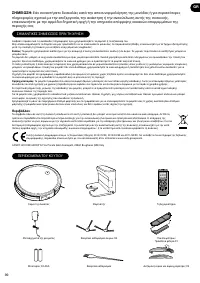
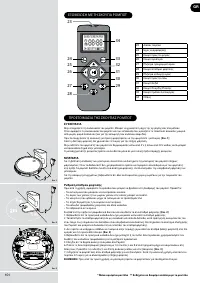
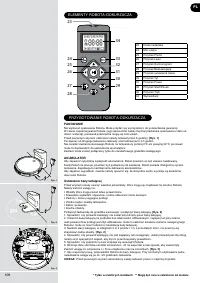
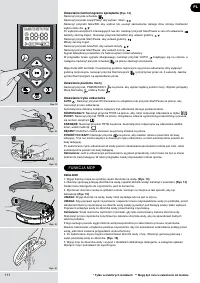
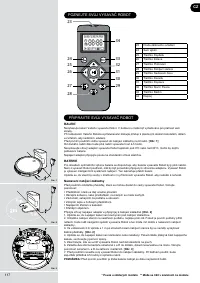
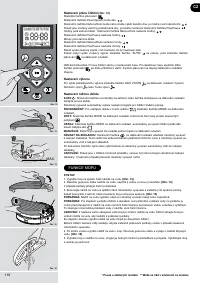
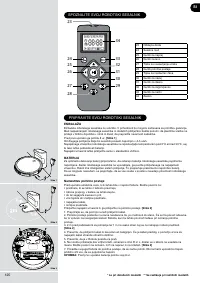
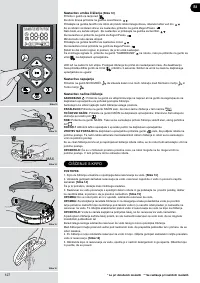
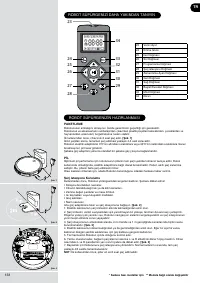
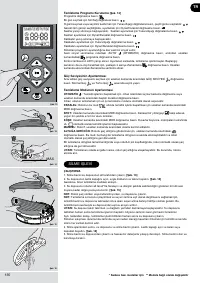
Trasmitter Diode
24
Suction Power
25
Button Forward
26
Button Left
27
Scheduling Button
28
Charging Station Button
29
Timing Setting Button
30
Button Backward
31
Button Right
32
Start/Pause Button
33
Mode Button
34
Display
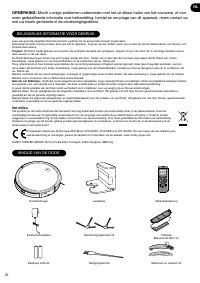
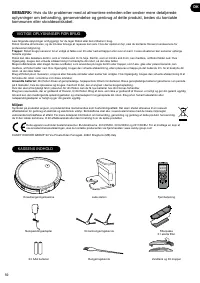
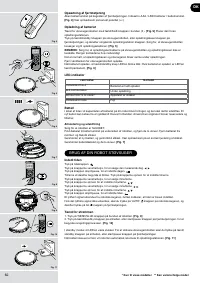
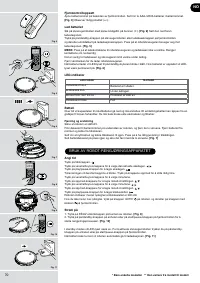
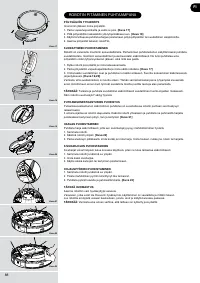
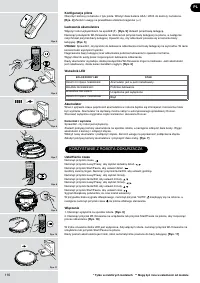
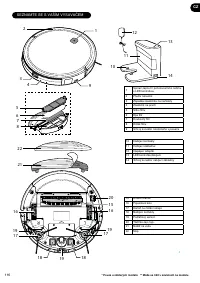
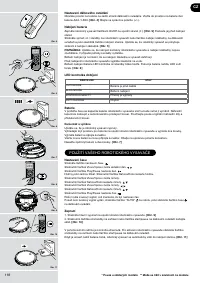
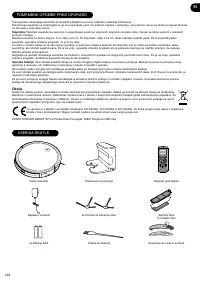
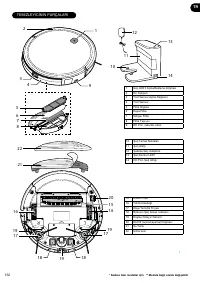
GETTING TO KNOW YOUR ROBOT CLEANER
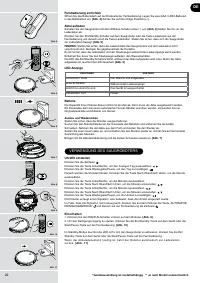
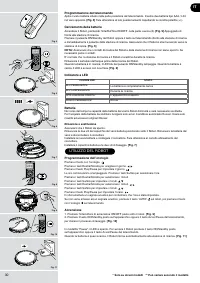
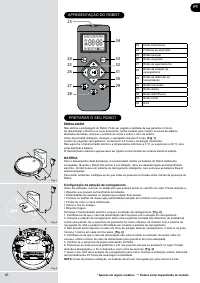
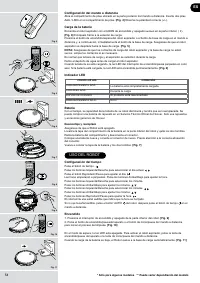
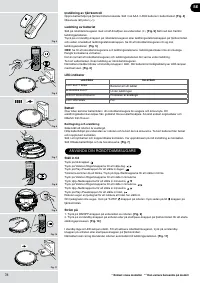
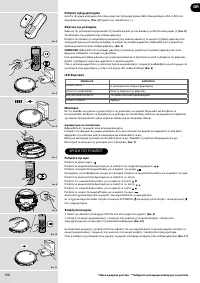
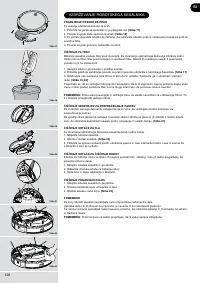
PREPARE YOUR ROBOT CLEANER
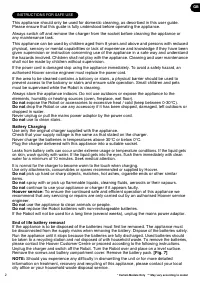
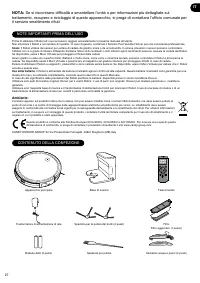
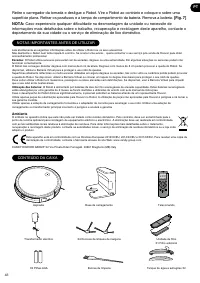
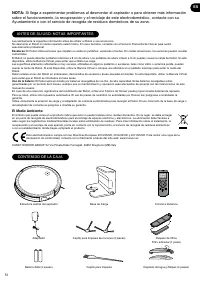
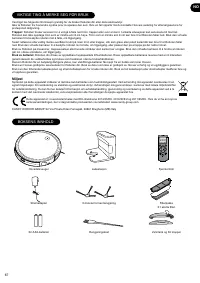
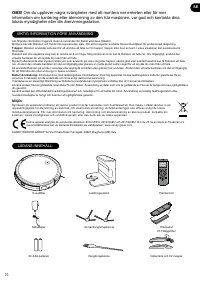
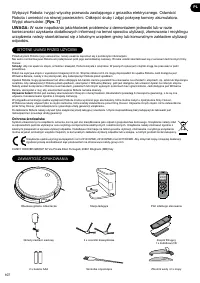
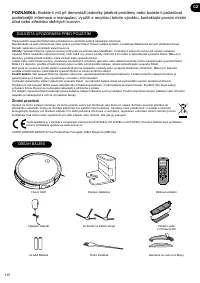
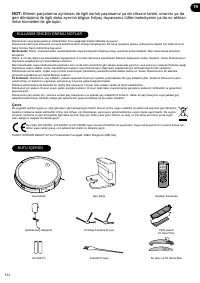
PACKAGING
Do not dispose of your Robot packaging. It may be required the validity of your guarantee in the future.
When unpacking your Robot and its accessories, take care to keep plastic bags away from babies,
young children and animals to avoid the risk of suffocation.
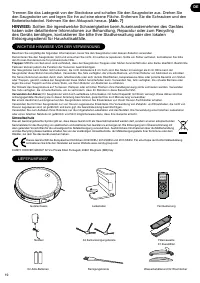
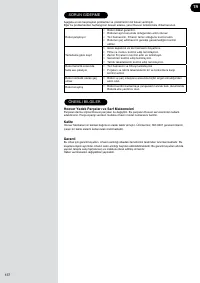
Before first use, charge your appliance for 8 hours.
[Fig. 1]
From the second charge, it will take 4-5 hours to be fully recharged.
Do not expose the Robot’s mains power adaptor to temperatures below 0°C or above 30°C as this
may damage the battery.
The mains power adaptor must only be connected to a standard mains power outlet.
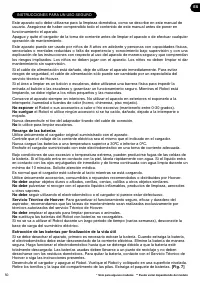
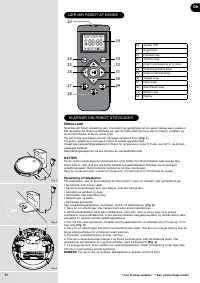
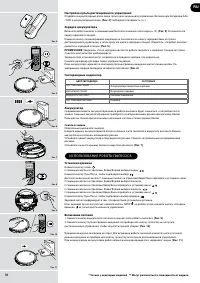
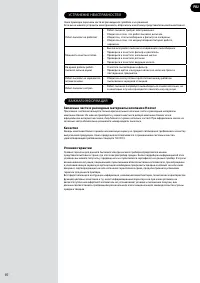
BATTERY
For optimum battery performance it is recommended that you keep your robot batteries fully charged.
When the robot is not in use it should be left connected to the mains power adaptor. The robot has an
intelligent charging system. This prevents the batteries from becoming overcharged.
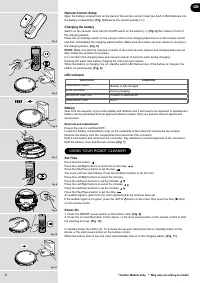
To avoid accidents, make sure that every person in the room is aware of the presence of the robot.
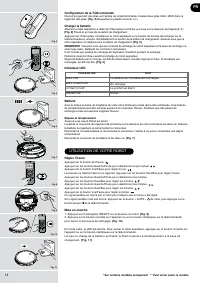
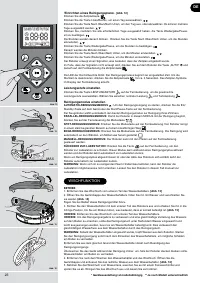
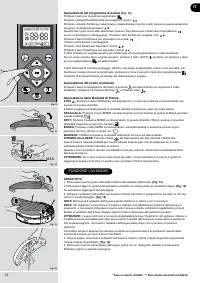
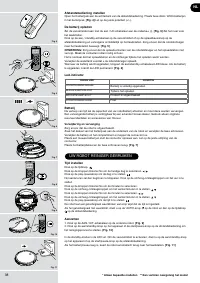
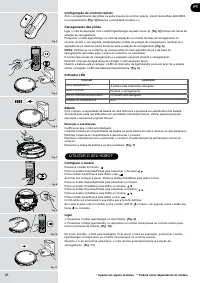
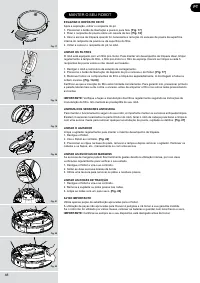
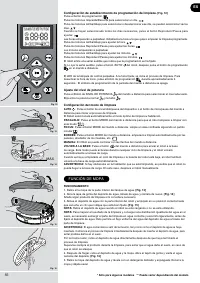
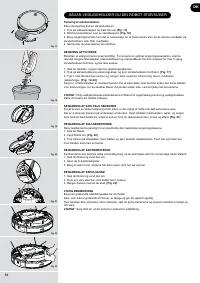
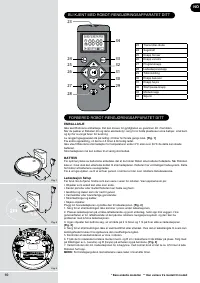
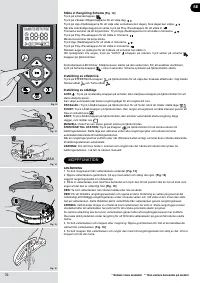
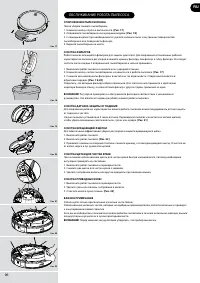
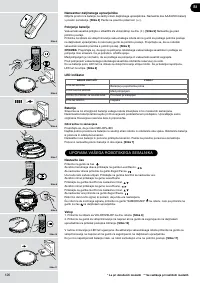
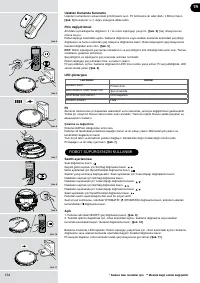
Charging Station Setup
Before use, remove obstacles that may get in the path of the Robot. Pay attention to:
• Objects that can be easily knocked over.
• Edges of carpets or rugs that it may get caught on.
• Floor length curtains and tablecloths.
• Heat sources or flammable items.
• Power cords and cables.
• Fragile objects.
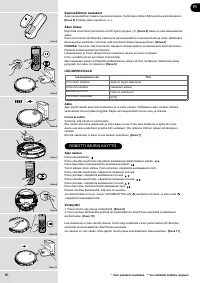
Plug in the mains power adaptor and connect to the charging station.
[Fig. 2]
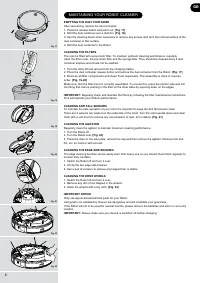
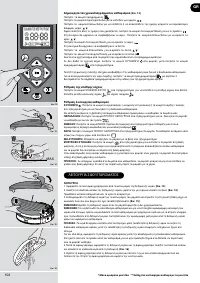
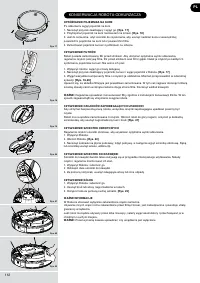
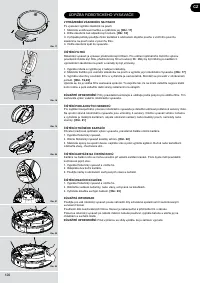
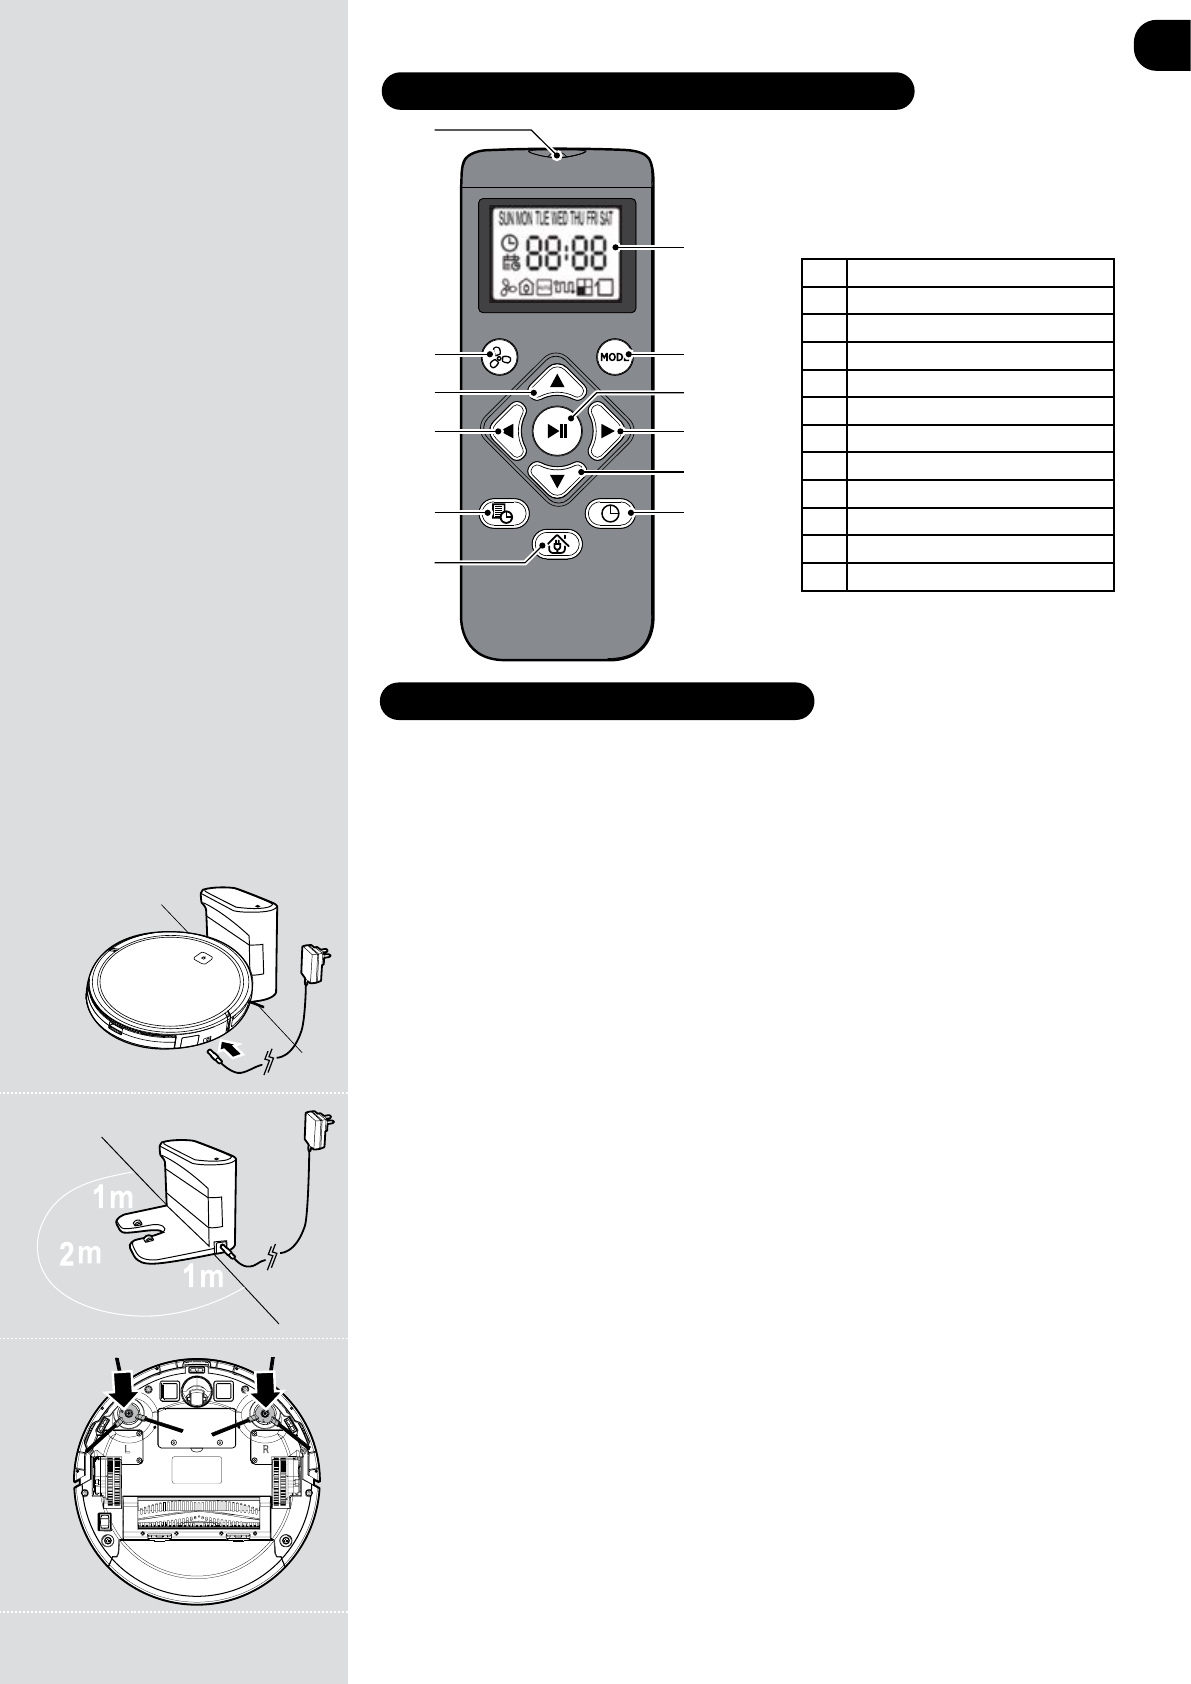
1. Make sure the power cord is not caught underneath the charging station.
2. Place the charging station on a non-reflective level floor, preferably against a wall. If the floor
surface is too reflective, it will interfere with the Robot navigation system and it may have difficulty
locating the charging station.
3. There should not be any objects in the area around the charging station for 2 meters in front and 1
meter to each side.
[Fig. 2]
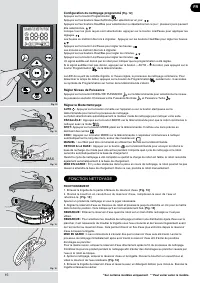
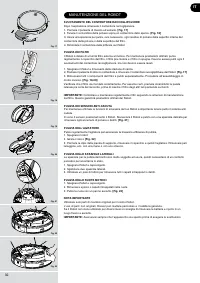
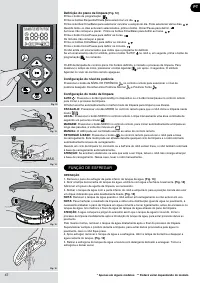
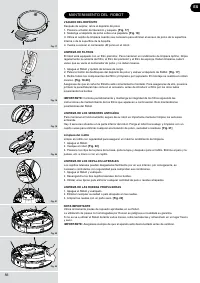
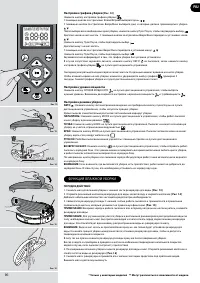
4. Make sure the power cord is not tangled or stretched. If there is an excess, use the power cord tie
to store it neatly.
5. Check that the dust container is inside on Robot.
6. Press the two rotary brushes labelled L and R onto the brackets until they click into place. Pay
attention to the designation L and R on the device as well as the brushes.
[Fig. 3]
7. Guide your Robot into the charging station to begin. During normal use, it will take approximately
4/5 hours to complete a full recharge.
NOTE:
Before first time use the batteries must be charged for at least 8 hours.
Fig. 3
Fig. 2
Fig. 1
* Certain Models Only ** May vary according to model
GB
Содержание
- 91 Использование батарей:; Окружающая среда
- 92 ПОЗНАКОМЬТЕСЬ С КОНСТРУКЦИЕЙ ВАШЕГО ПЫЛЕСОСА
- 93 УПАКОВКА
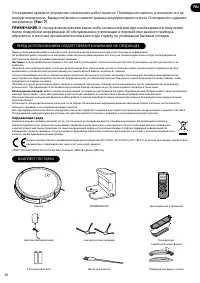
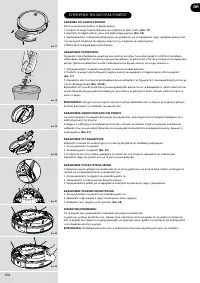
- 94 ИСПОЛЬЗОВАНИЕ РОБОТА-ПЫЛЕСОСА; Снятие и замена
- 95 Настройка графика уборки; АВТО; ФУНКЦИЯ ВЛАЖНОЙ УБОРКИ; ПОРЯДОК ДЕЙСТВИЙ
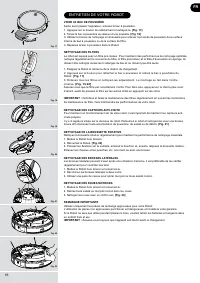
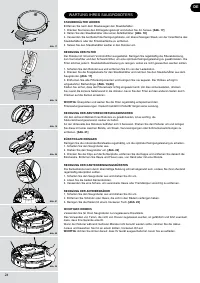
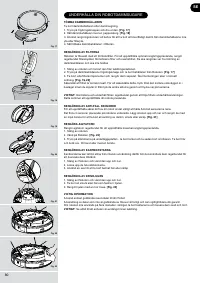
- 96 ОБСЛУЖИВАНИЕ РОБОТА-ПЫЛЕСОСА
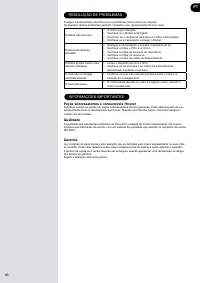
- 97 ВАЖНАЯ ИНФОРМАЦИЯ; Запасные части и расходные материалы компании Hoover; УСТРАНЕНИЕ НЕИСПРАВНОСТЕЙ
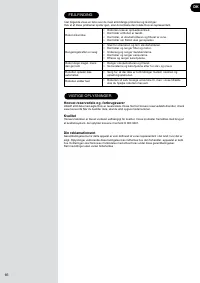
Характеристики

Остались вопросы?Не нашли свой ответ в руководстве или возникли другие проблемы? Задайте свой вопрос в форме ниже с подробным описанием вашей ситуации, чтобы другие люди и специалисты смогли дать на него ответ. Если вы знаете как решить проблему другого человека, пожалуйста, подскажите ему :)


