
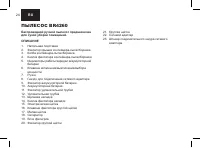
Пылесос BRAYER BR4260 - инструкция пользователя по применению, эксплуатации и установке на русском языке. Мы надеемся, она поможет вам решить возникшие у вас вопросы при эксплуатации техники.
Если остались вопросы, задайте их в комментариях после инструкции.
"Загружаем инструкцию", означает, что нужно подождать пока файл загрузится и можно будет его читать онлайн. Некоторые инструкции очень большие и время их появления зависит от вашей скорости интернета.


10
EN
CLEANING AND CARE
Attention!
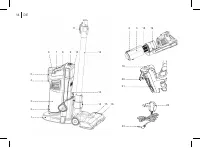
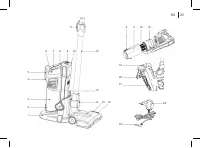
Provide that the dust bin, the separator (18) and
the filter block (19) are always clean, because the
overall performance of the vacuum cleaner depends
on it.
• It is recommended to clean the dust bin after every
• use of the vacuum cleaner. Regularly clean the
separator (18) and the filter block (19).
• To remove dust and garbage place the dust bin (3)
above the garbage bin,
• pull the clamp (2) and open the lid, remove the
garbage and dust and close the lid until the clamp
(2) clicking.
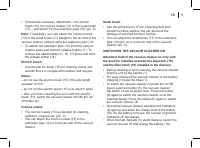
Cleaning the dust bin
• Before removing the dust bin remove dust and
garbage from it as described above.
• Remove the dust bin by pressing the release button
(4).
•
Remove the filter block (19), take out the foam filter
and clean the filters from dust and garbage.
•
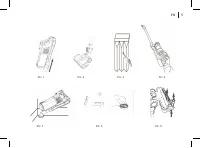
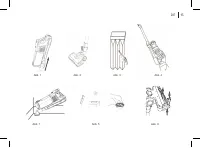
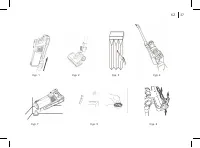
Wash the filters under a warm water jet and dry them.
Do not dry the filter block (19) with a hairdryer or
similar appliances (pic. 6).
•
Turn the separator (18) clockwise and remove it from
the flask (3). Clean the separator (18) from dust and
garbage, wash it and dry.
•
Wash the dust bin flask (3) and dry it.
•
Do not wash all removable parts in a dishwashing
machine.
Note:
before assembling the dust bin make sure that all
removable parts are clean and dry.
Assembling of the dust bin
•
Install the separator (18) in the dust bin flask (3) and
turn it counterclockwise.
•
Insert the filter block (19) in the separator (18).
• Install the assembled dust bin in the installation place
until the clamp (4) clicking and make sure that the
dust bin is fixed properly.
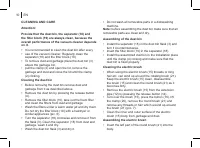
Cleaning the electric brush
•
When using the electric brush (15) threads or long
hair etc. can wind up around the rotating brush (21).
Keep the electric brush (15) clean, disassemble
the brush (15) and clean the round brush (21) as it
becomes dirty.
• Remove the electric brush (15) from the extension
pipe (12) by pressing the release button (14).
• Turn over the brush (15), press the button (16), lift
the clamp (20), remove the round brush (21) and
remove any threads or hair which wound up around
the brush (21) (pic. 7).
• Clean the inner and outer surface of the electric
brush (15) body from garbage and dust.
Assembling the electric brush
• Insert the left part of the round brush (21) into the
body.
Характеристики

Остались вопросы?Не нашли свой ответ в руководстве или возникли другие проблемы? Задайте свой вопрос в форме ниже с подробным описанием вашей ситуации, чтобы другие люди и специалисты смогли дать на него ответ. Если вы знаете как решить проблему другого человека, пожалуйста, подскажите ему :)


