
Пылесос LG CordZero A9MULTICARE - инструкция пользователя по применению, эксплуатации и установке на русском языке. Мы надеемся, она поможет вам решить возникшие у вас вопросы при эксплуатации техники.
Если остались вопросы, задайте их в комментариях после инструкции.
"Загружаем инструкцию", означает, что нужно подождать пока файл загрузится и можно будет его читать онлайн. Некоторые инструкции очень большие и время их появления зависит от вашей скорости интернета.


27
EN
EN
1
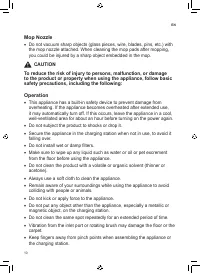
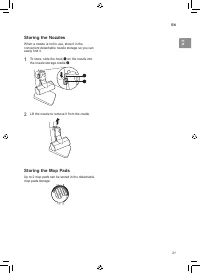
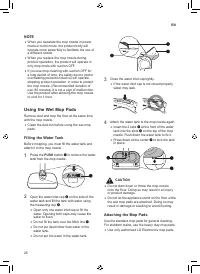
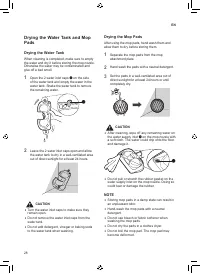
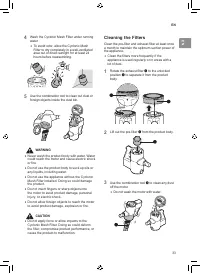
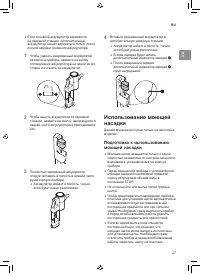
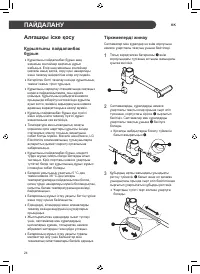
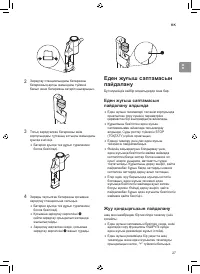
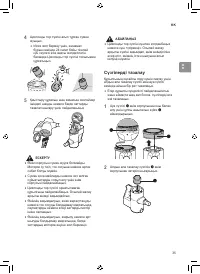
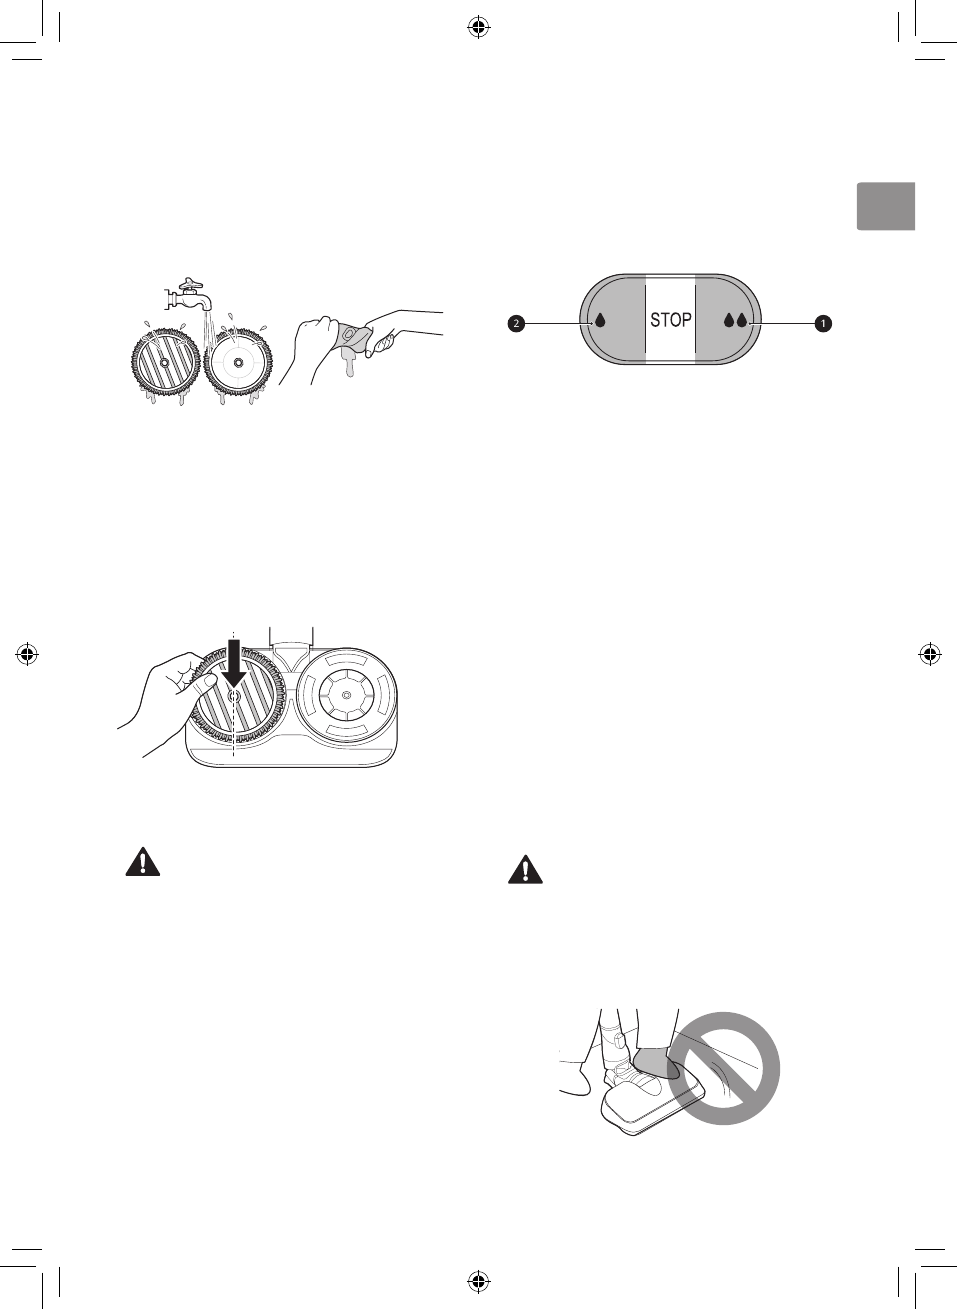
Wet both sides of the mop pads with water
then squeeze out any excess water before
attaching the pads.
•
Attaching and using mop pads in a dry state
may affect the cleaning performance.
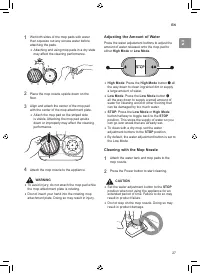
2
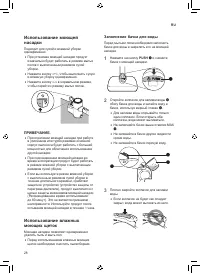
Place the mop nozzle upside down on the
floor.
3
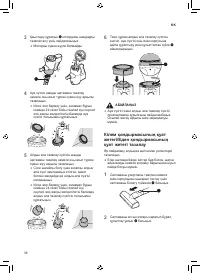
Align and attach the center of the mop pad
with the center of the mop attachment plate.
•
Attach the mop pad so the striped side
is visible. Attaching the mop pad upside
down or improperly may affect the cleaning
performance.
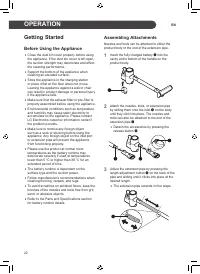
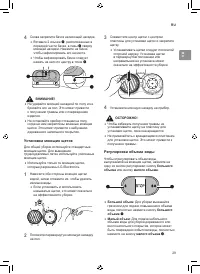
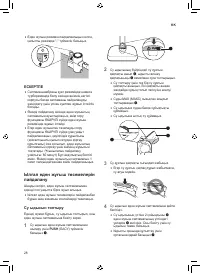
4
Attach the mop nozzle to the appliance.
WARNING
•
To avoid injury, do not attach the mop pad while
the mop attachment plate is rotating.
•
Do not insert your hand into the rotating mop
attachment plate. Doing so may result in injury.
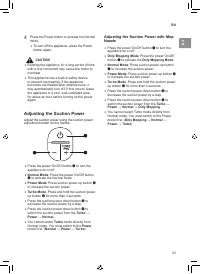
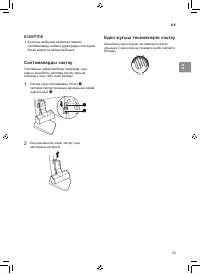
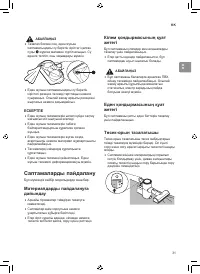
Adjusting the Amount of Water
Press the water adjustment buttons to adjust the
amount of water released onto the mop pad to
either
High Mode
or
Low Mode
.
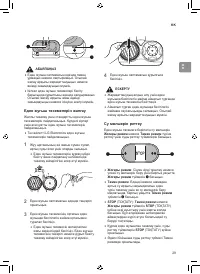
•
High Mode
: Press the
High Mode
button
a
all
the way down to clean ingrained dirt or supply
a large amount of water.
•
Low Mode
: Press the
Low Mode
button
b
all the way down to supply a small amount of
water for cleaning wood or other flooring that
can be damaged by too much water.
•
STOP
: Press the
Low Mode
or
High Mode
button halfway to toggle back to the
STOP
position. This stops the supply of water so you
can go over areas that are already wet.
•
To clean with a dry mop, set the water
adjustment buttons to the
STOP
position.
•
By default, the water adjustment button is set to
the Low Mode.
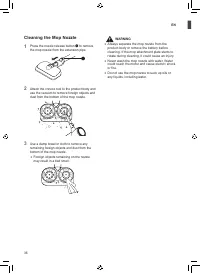
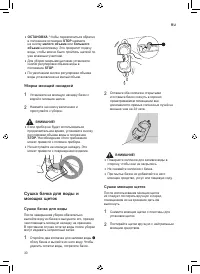
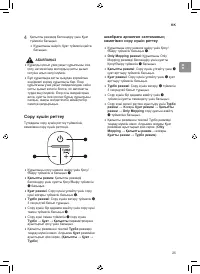
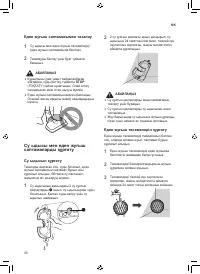
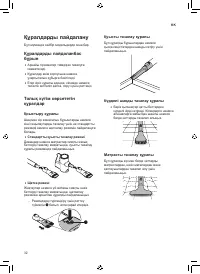
Cleaning with the Mop Nozzle
1
Attach the water tank and mop pads to the
mop nozzle.
2
Press the Power button to start cleaning.
CAUTION
•
Set the water adjustment button to the
STOP
position when not using the appliance for an
extended period of time. Failure to do so may
result in product failure.
•
Do not step on the mop nozzle. Doing so may
result in product damage.
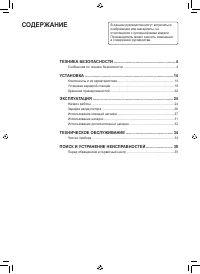
Содержание
- 43 СОДЕРЖАНИЕ; ТЕХНИКА БЕЗОПАСНОСТИ
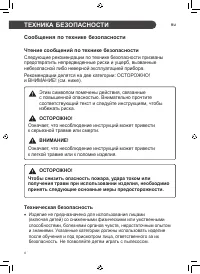
- 44 Сообщения по технике безопасности; Чтение сообщений по технике безопасности
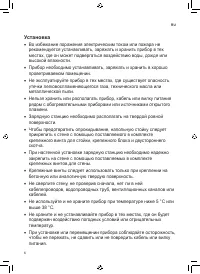
- 46 Установка
- 47 Эксплуатация
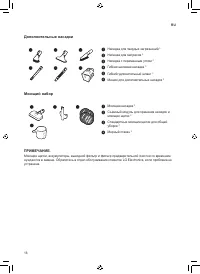
- 52 Моющая насадка
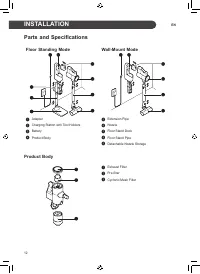
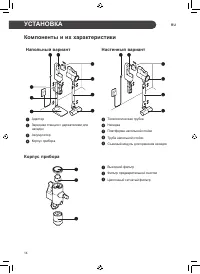
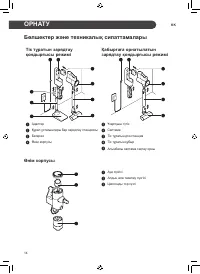
- 54 Компоненты и их характеристики; Напольный вариант; УСТАНОВКА
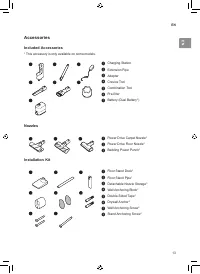
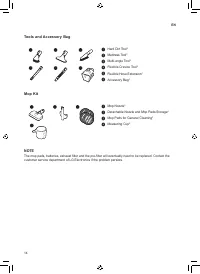
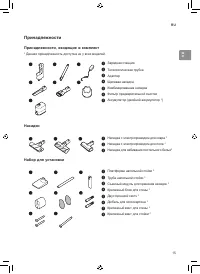
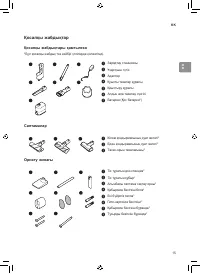
- 55 Принадлежности; Принадлежности, входящие в комплект
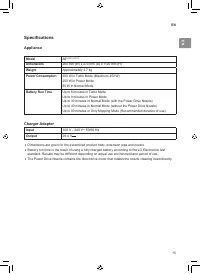
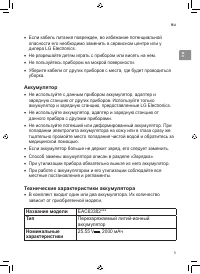
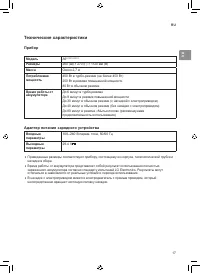
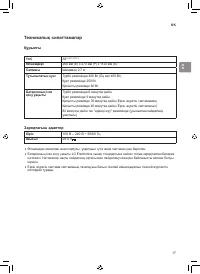
- 57 Технические характеристики; Прибор; Адаптер питания зарядного устройства
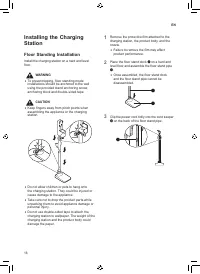
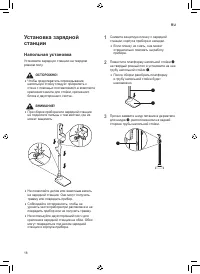
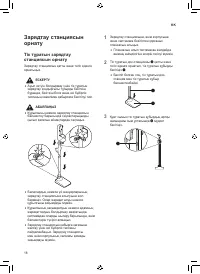
- 58 Напольная установка
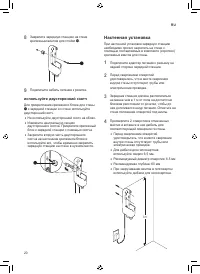
- 60 используйте двусторонний скотч; Настенная установка
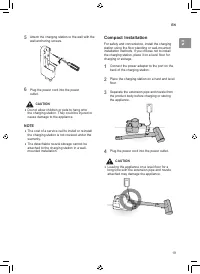
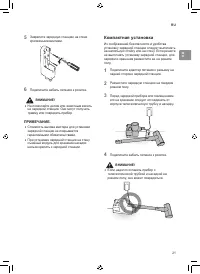
- 61 Компактная установка
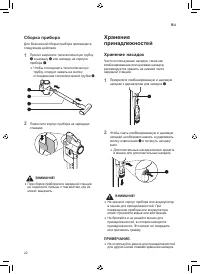
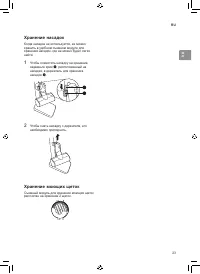
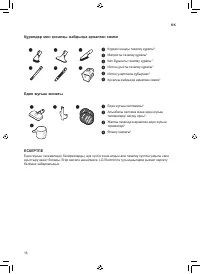
- 62 Сборка прибора; Хранение; Хранение насадок
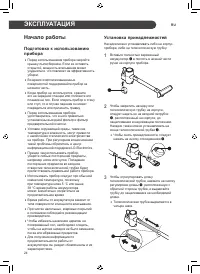
- 64 ЭКСПЛУАТАЦИЯ; Начало работы; Подготовка к использованию
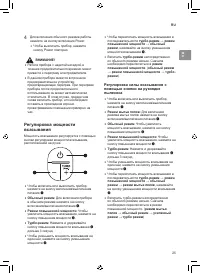
- 65 Регулировка силы всасывания с
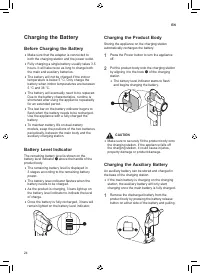
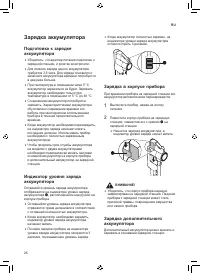
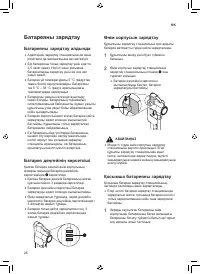
- 66 Зарядка аккумулятора
- 68 Заполнение бачка для воды
- 70 Уборка моющей насадкой; Сушка бачка для воды и; Сушка бачка для воды
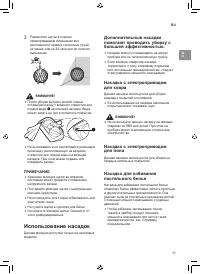
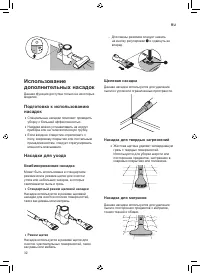
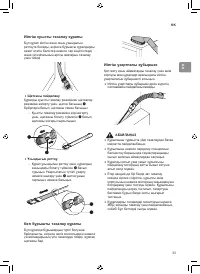
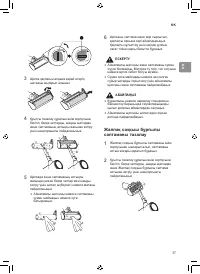
- 71 Использование насадок
- 72 Комбинированная насадка; Щелевая насадка
- 73 Гибкая щелевая насадка; Насадка с переменным углом
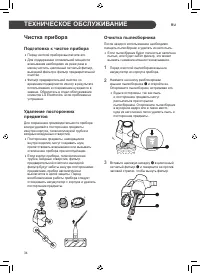
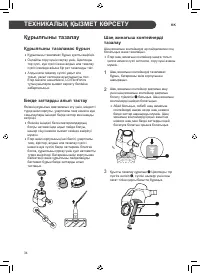
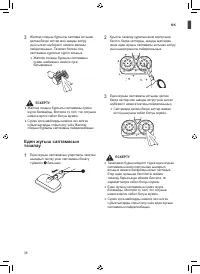
- 74 ТЕХНИЧЕСКОЕ ОБСЛУЖИВАНИЕ; Чистка прибора; Подготовка к чистке прибора
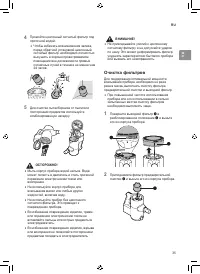
- 75 Очистка фильтров
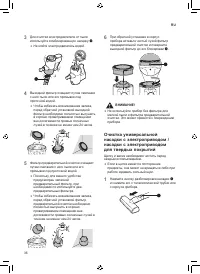
- 78 Очистка моющей насадки
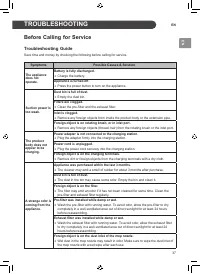
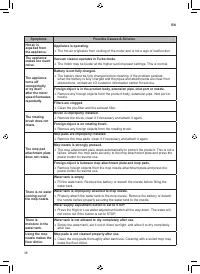
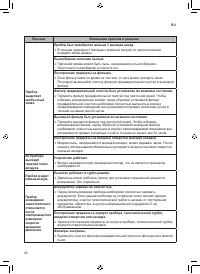
- 79 Перед обращением в сервисный центр; Руководство по поиску и устранению неисправностей; ПОИСК И УСТРАНЕНИЕ НЕИСПРАВНОСТЕЙ
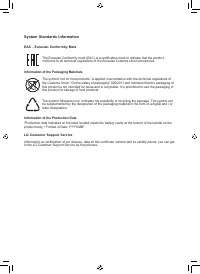
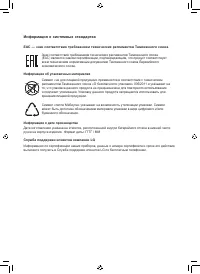
- 82 Информация о системных стандартах


