
Пылесос Dreame T20 - инструкция пользователя по применению, эксплуатации и установке на русском языке. Мы надеемся, она поможет вам решить возникшие у вас вопросы при эксплуатации техники.
Если остались вопросы, задайте их в комментариях после инструкции.
"Загружаем инструкцию", означает, что нужно подождать пока файл загрузится и можно будет его читать онлайн. Некоторые инструкции очень большие и время их появления зависит от вашей скорости интернета.


8
9
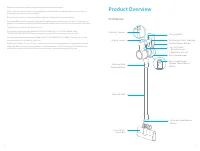
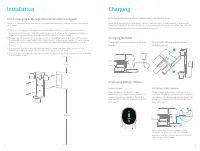
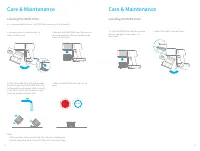
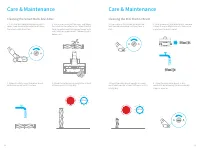
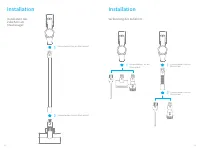
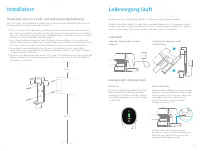
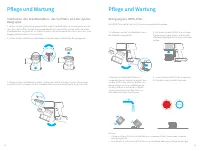
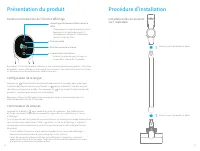
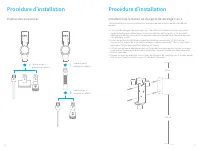
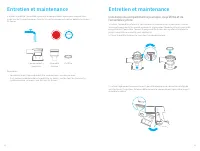
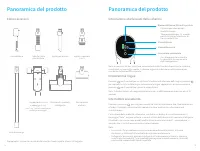
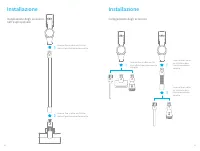
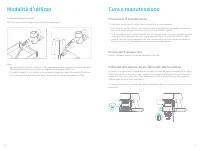
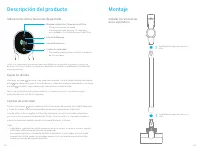
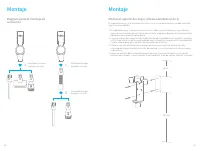
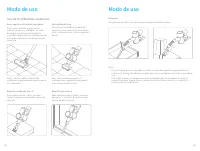
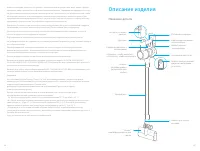
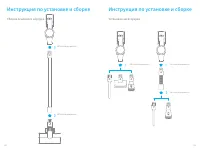
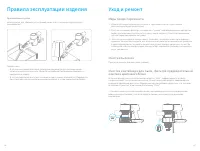
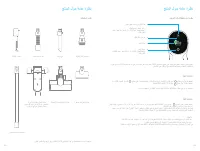
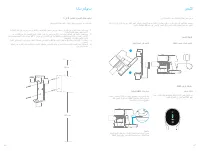
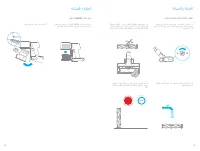
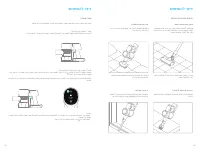
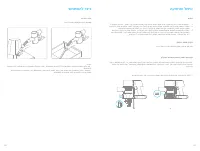
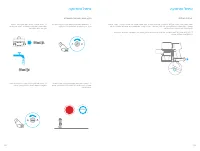
2-in-1 Charging & Storage Mount Installation Diagram
Fully charge the vacuum cleaner before using it for the first time.
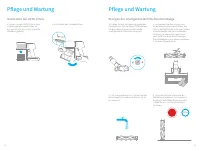
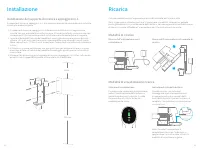
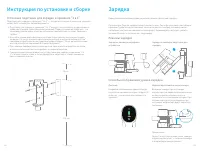
1. The 2-in-1 charging & storage mount should be installed in a cool, dry place with an
electrical outlet nearby. Prior to installing, ensure that there are no electrical wires or
pipes in the space directly behind where the mount will be installed.
2. The bottom of the mounting template sticker should be level and at least 103cm from
the ground, and its top should have at least 30cm* of clearance above it. (*30cm: Leave
enough space just in case you may need to purchase the replaceable battery in the
future.)
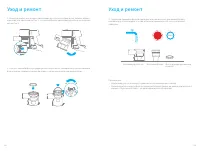
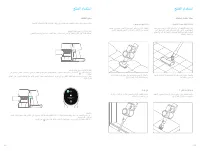
3. Use a power drill with an 8 mm drill bit to drill a hole into each hole marker on the
mounting template sticker, then insert a wall plug into each hole.
4. Align the position holes on the mount with the holes on the wall. Fasten it to the wall with
the included screws.
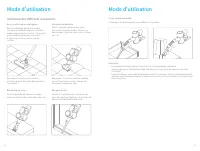
The 2-in-1 charging & storage mount is an optional accessory. You can install it based on
your needs.
103 cm
30 cm
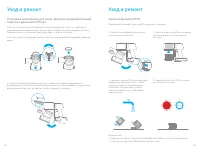
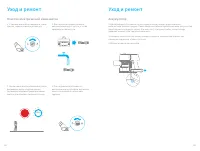
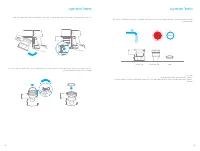
Installation
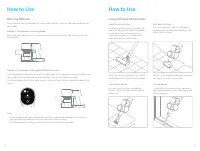
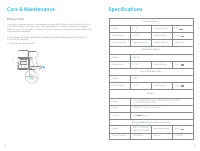
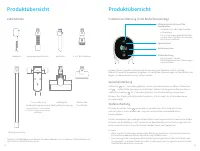
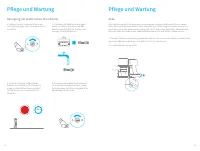
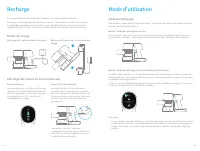
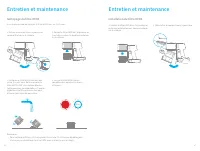
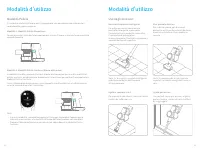
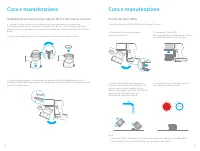
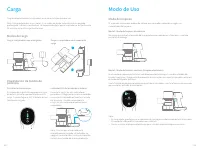
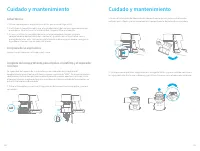
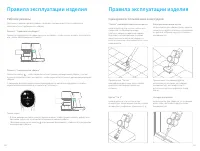
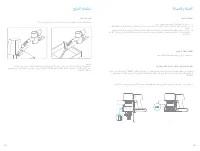
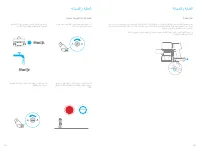
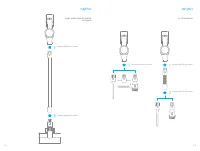
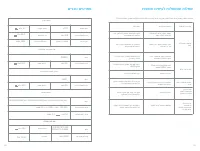
Charging
Note: Fully charging will take about 4 hours. Vacuuming at Turbo mode for a prolonged
period will cause the battery to heat up, which increases charging time. Allow the vacuum
cleaner to cool down for 30 minutes before charging it.
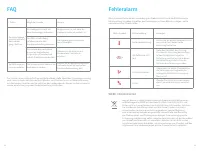
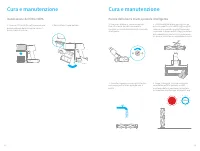
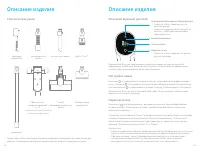
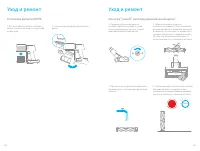
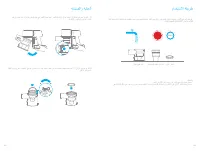
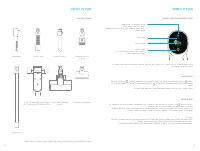
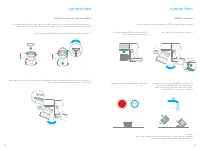
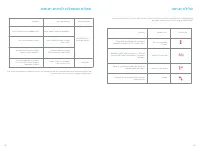
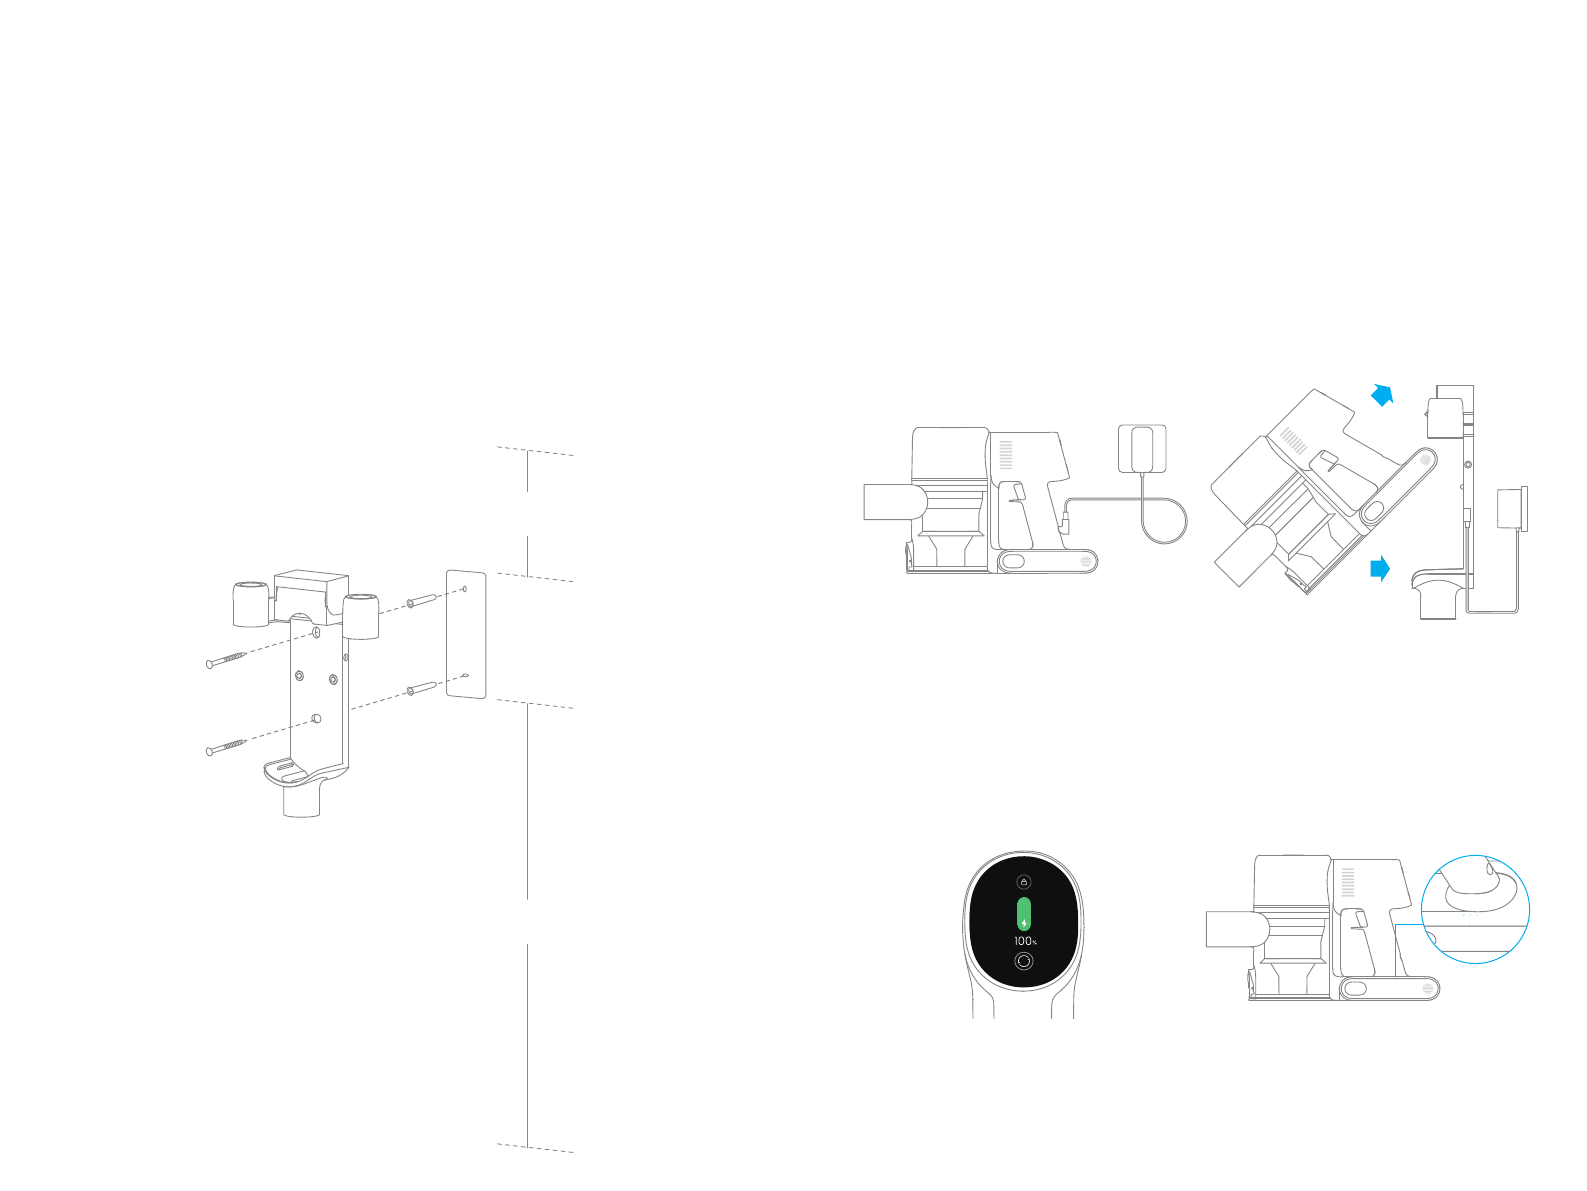
LED Battery Status Indicator
Note: Once the vacuum cleaner is fully
charged, the indicator will turn off after 5
minutes, and the vacuum cleaner will enter
the energy-saving mode.
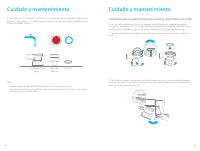
Charging the vacuum cleaner with the
charger
Charging the vacuum cleaner on the
charging mount
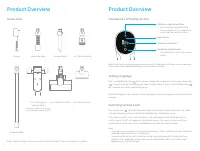
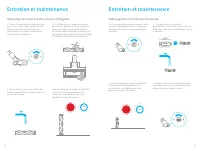
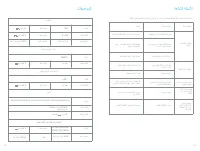
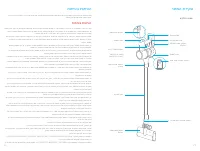
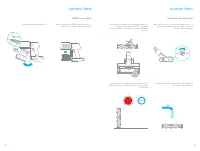
Display Screen
Charging Methods
Displaying Battery Status
1
2
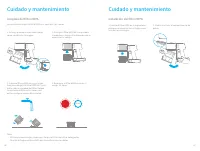
When charging, the three indicators flash
and then turn bright constantly in sequence
considering the battery condition. When the
charging is completed, the three indicators
keep solid light.
The number on the display screen
represents the current battery level in a
percentage during charging. When the
number turns into 100, the battery is fully
charged.
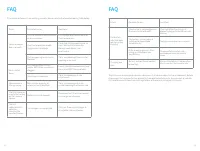
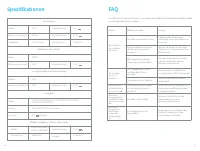
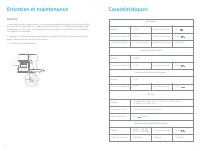
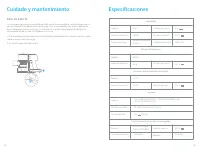
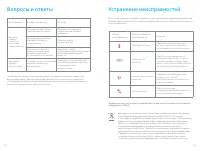
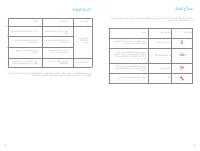
Характеристики

Остались вопросы?Не нашли свой ответ в руководстве или возникли другие проблемы? Задайте свой вопрос в форме ниже с подробным описанием вашей ситуации, чтобы другие люди и специалисты смогли дать на него ответ. Если вы знаете как решить проблему другого человека, пожалуйста, подскажите ему :)


