Плита Zanussi ZGG 643 ITN_ZGG 646 ITN - инструкция пользователя по применению, эксплуатации и установке на русском языке. Мы надеемся, она поможет вам решить возникшие у вас вопросы при эксплуатации техники.
Если остались вопросы, задайте их в комментариях после инструкции.
"Загружаем инструкцию", означает, что нужно подождать пока файл загрузится и можно будет его читать онлайн. Некоторые инструкции очень большие и время их появления зависит от вашей скорости интернета.


7
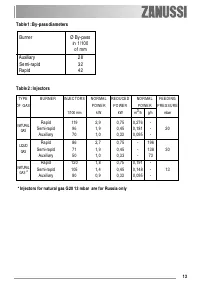
Hob Burners
To light a burner:
”
turn the re le va nt knob a nticlockwise to
maximum position and push down the knob to
ignite.
”
After lighting the flame, keep the knob pushed
down for about
5 seconds
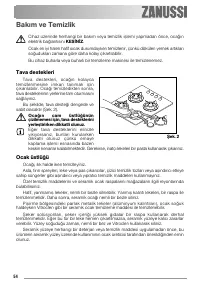
. This will allow the
"thermocouple" (F ig. 2 - lett. D) to be heated
a nd the sa fe ty de vice to be switche d off,
otherwise the gas supply would be interrupted.
Then, check the flame is regular and adjust it
as required.
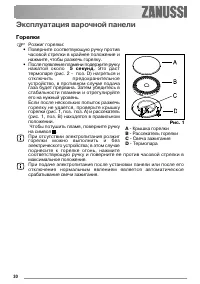
If you cannot light the flame even after several
attempts, check the "cap" (F ig. 1 - lett. A) and
“crown” (F ig. 1 - lett. B) are in the correct position.
To put the flame out, turn the knob to the symbol
.
In the absence of electricity, ignition can
occur without the electrical device; in this case approach the burner with a
flame, push the relevant knob down and turn it anti-clockwise until it reaches
the" maximum" position.
When switching on the mains, after installation or a power cut, it is quite normal
for the spark generator to be activated automatically.
Operation
H
H
H
H
H
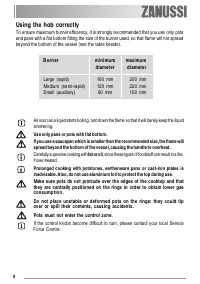
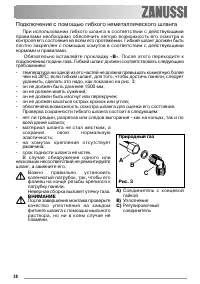
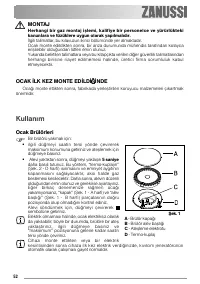
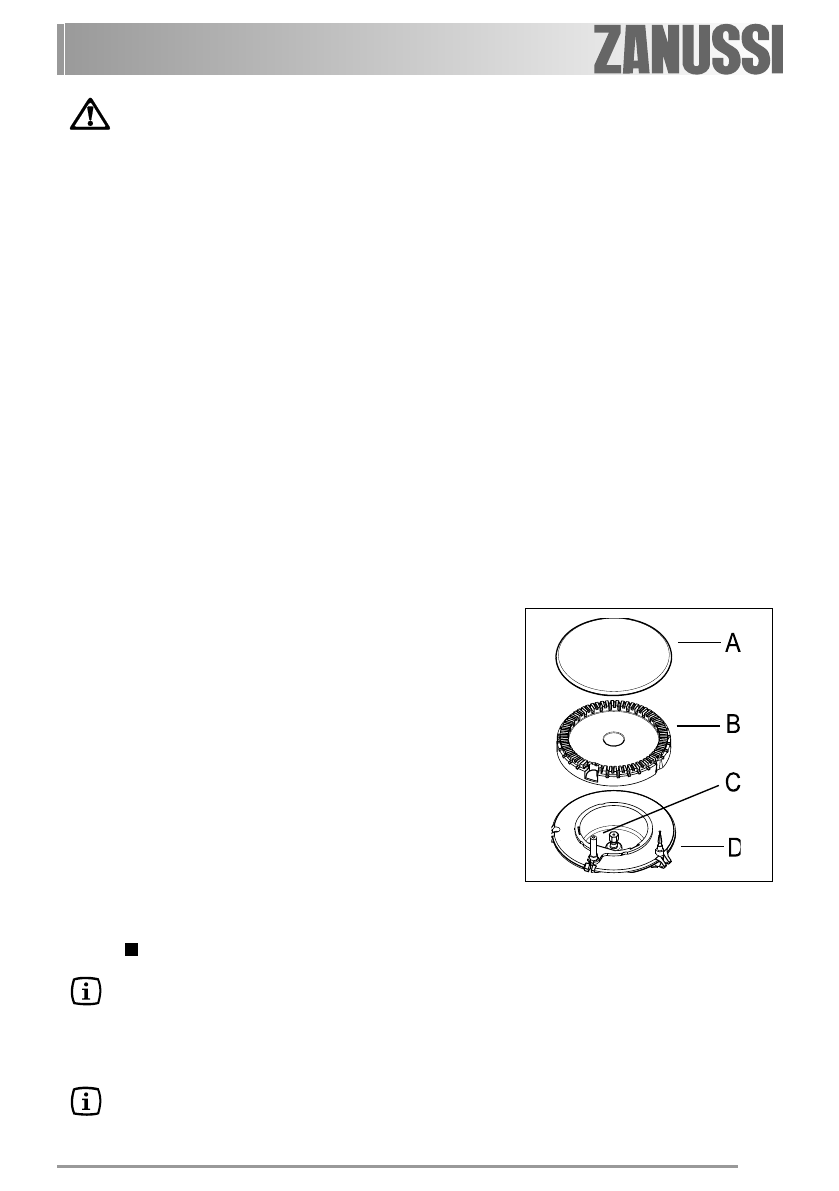
Fig. 1
A
- Burner cap
B
- Burner crown
C
- Ignition electrode
D
- Thermocouple
INSTALLATION
Any gas installation must be carried out by qualified personnel, and in
accordance with existing rules and regulations.
The relevant instructions are to be found in the second section of this manual.
Please, ensure that, once the hob is installed, it is easily accessible for the
engineer in the event of a breakdown.
The manufacturer will not accept liability, should the above instructions or any
of the other safety instructions incorporated in this book be ignored.
WHEN THE HOB IS FIRST INSTALLED
Once the hob has been installed, it is important to remove any protective materials,
which were put on in the factory.
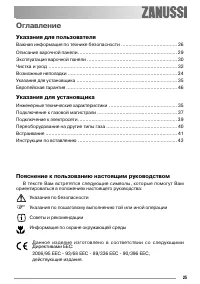
Содержание
- 25 Пояснение к пользованию настоящим руководством; Оглавление; Указания для пользователя
- 26 При эксплуатации; Важная информация по технике
- 27 Безопасность детей; Монтаж, чистка и уход
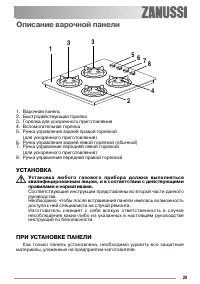
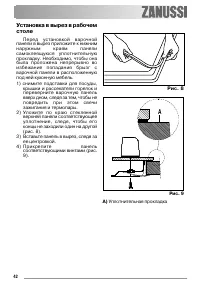
- 29 УСТАНОВКА; ПРИ УСТАНОВКЕ ПАНЕЛИ; Описание варочной панели
- 30 Горелки; Эксплуатация варочной панели
- 31 Правильная эксплуатация варочной панели
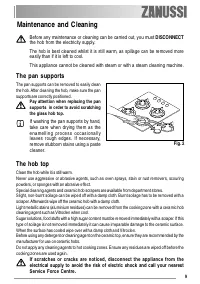
- 32 Подставки для посуды; Поверхность варочной панели; Чистка и уход
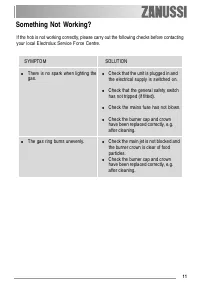
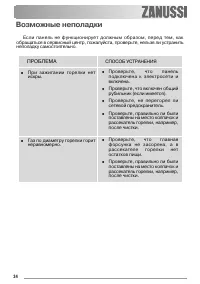
- 34 Возможные неполадки; ПРОБЛЕМА
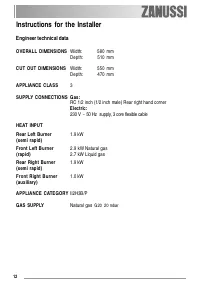
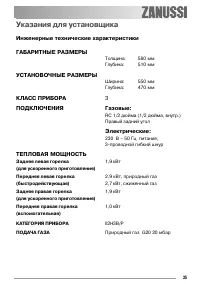
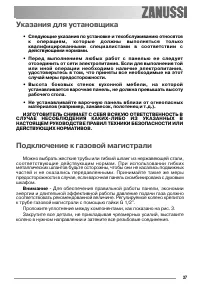
- 35 Указания для установщика
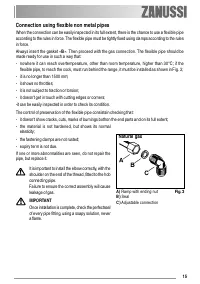
- 38 Подключение с помощью гибкого неметаллического шланга
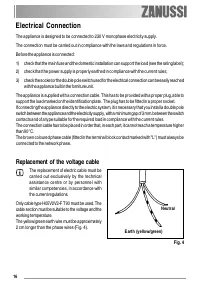
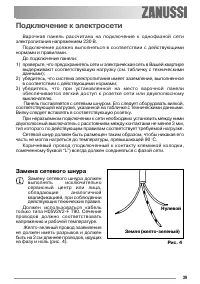
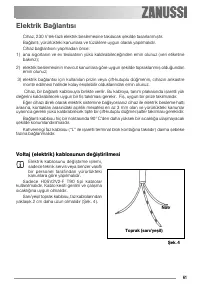
- 39 Замена сетевого шнура; Подключение к электросети
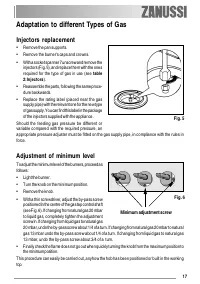
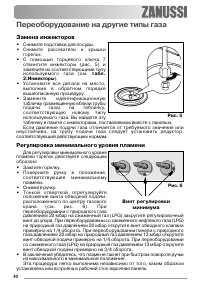
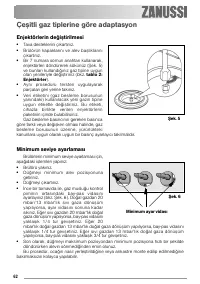
- 40 Переоборудование на другие типы газа; Винт регулировки
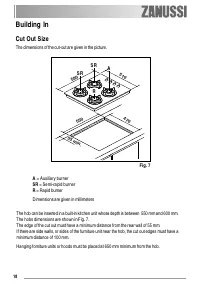
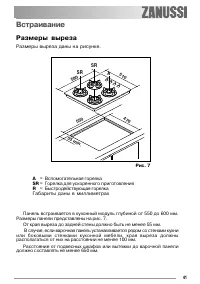
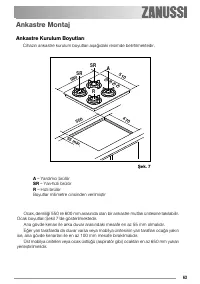
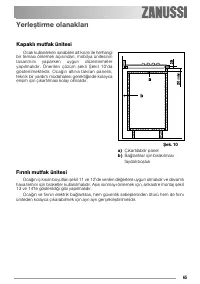
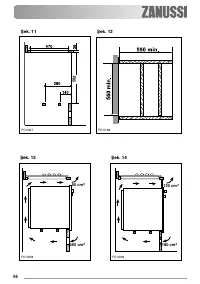
- 41 Встраивание; Размеры выреза
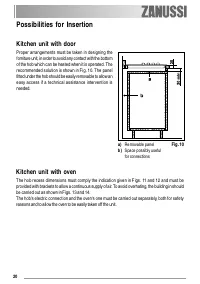
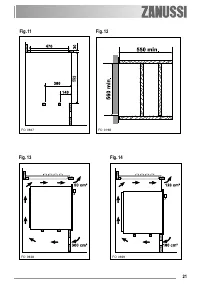
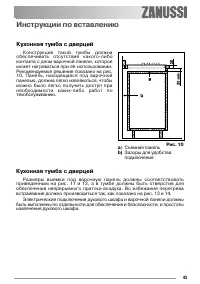
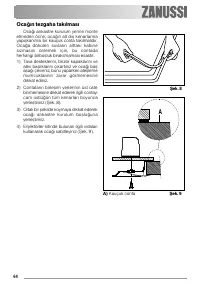
- 43 Инструкции по вставлению; Кухонная тумба с дверцей
- 45 Обслуживание и оригинальные запасные части
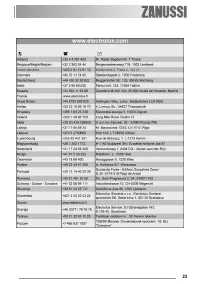
- 46 Гарантия/сервисная служба; ЕВРОПЕЙСКАЯ ГАРАНТИЯ


