Плита Gorenje IC2000SP - инструкция пользователя по применению, эксплуатации и установке на русском языке. Мы надеемся, она поможет вам решить возникшие у вас вопросы при эксплуатации техники.
Если остались вопросы, задайте их в комментариях после инструкции.
"Загружаем инструкцию", означает, что нужно подождать пока файл загрузится и можно будет его читать онлайн. Некоторые инструкции очень большие и время их появления зависит от вашей скорости интернета.


30
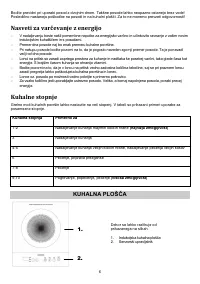
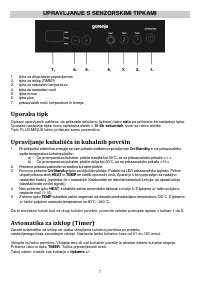
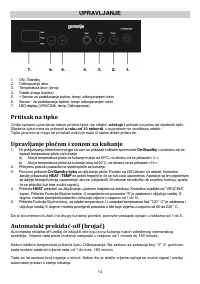
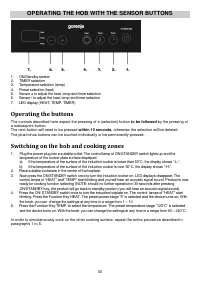
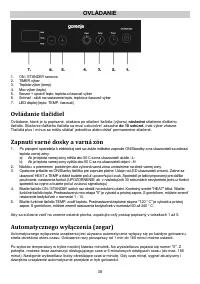
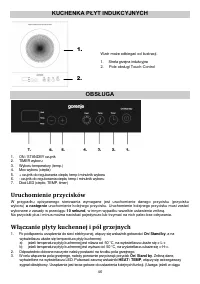
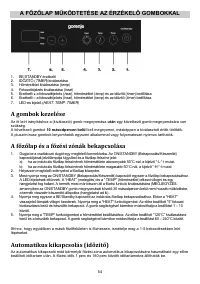
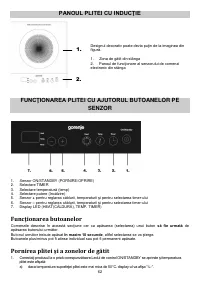
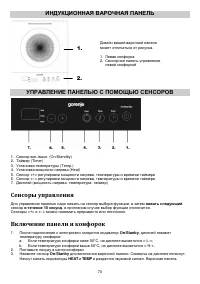
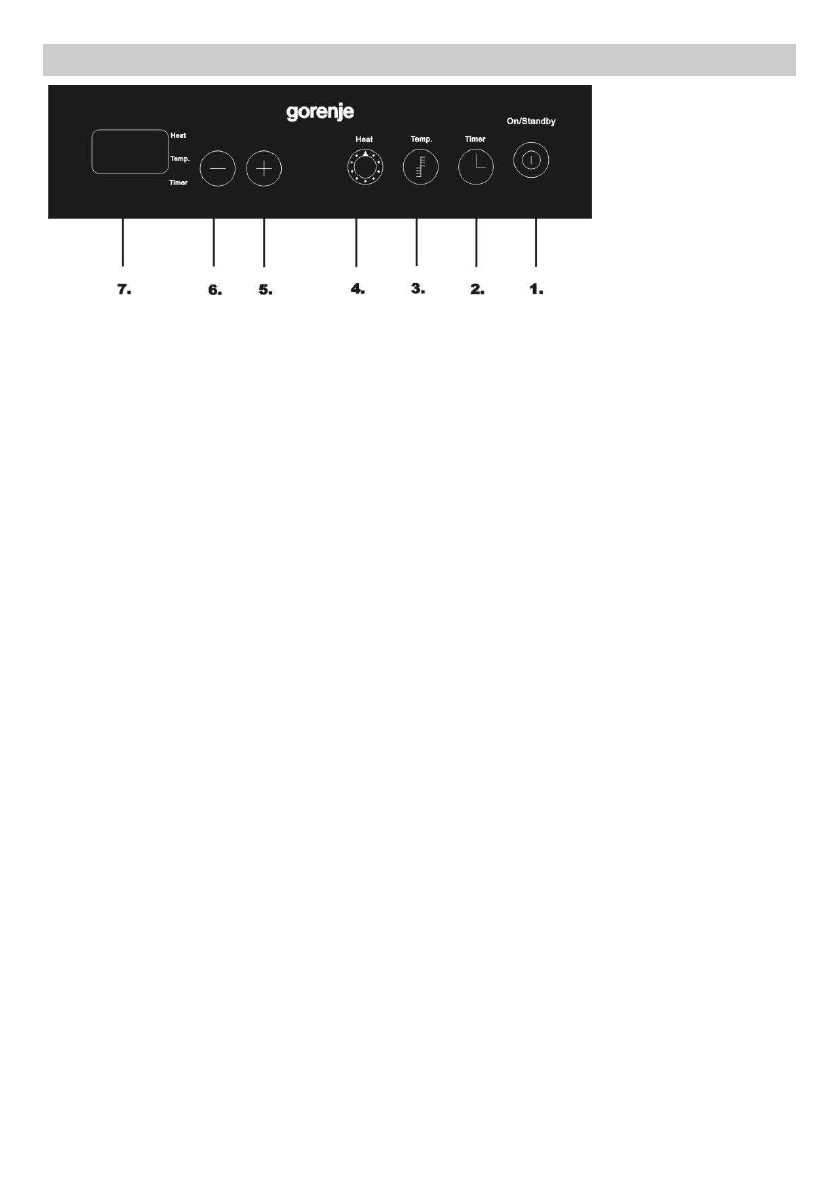
OPERATING THE HOB WITH THE SENSOR BUTTONS
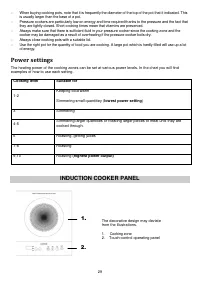
1.
ON/Standby sensor
2.
TIMER selection
3.
Temperature selection (temp)
4.
Power selection (heat)
5.
Sensor
+
to adjust the heat, temp and timer selection
6.
Sensor
-
to adjust the heat, temp and timer selection
7.
LED display (HEAT, TEMP, TIMER)
Operating the buttons
The controls described here expect the pressing of a (selection) button
to be followed
by the pressing of
a subsequent button.
The next button will need to be pressed
within 10 seconds
, otherwise the selection will be deleted.
The plus/minus buttons can be touched individually or be permanently pressed.
Switching on the hob and cooking zones
1.
Plug the power plug into a suitable outlet. The control lamp of ON/STANDBY switch lights up and the
temperature of the cooker plate surface displayed:
a)
if the temperature of the surface of the induction cooker is lower than 50
°C
, the display shows
“
-L-
“
.
b)
if the temperature of the surface of the induction cooker is over 50
°C
, the display shows
“
-H-
“
.
2.
Place suitable cookware in the centre of the hotplate.
3.
Now press the ON/STANDBY switch once to turn the induction cooker on. LED displays disappear. The
control lamps of
“
HEAT
”
and
”
TEMP
”ăstКrt
blinking and you will hear an acoustic signal sound. Product is now
ready for cooking function selecting
(NOTE: should no further operation in 30 seconds after pressing
ON/STANDBY key, the product will go back to standby position (you will hear an acoustic signal sound).
4.
Press the ON/
STANDBY
sаТtМСăoЧМОătoăturЧătСОăТЧНuМtТoЧăСotpХКtОăoЧ.ăTСОăМoЧtroХăăХКЦpsăoПă“HEAT”
start
blinking.
PrОssătСОăFuЧМtТoЧăKОвăHEAT.ăTСОăprОsОtăpoаОrăstКРОă“ő”ăТsăsОХОМtОНăКЧНătСОăНОvТМОăturЧsăoЧ.ăАТtСă
the knob, you can change the settings at any time in a range from 1
–
10.
5.
PrОssătСОăFuЧМtТoЧăKОвăTEMP.ătoăsОХОМtătСОătОЦpОrКturО.ăTСОăprОsОtătОЦpОrКturОăstКРОă“120°C”ăТsăsОХОМtОНă
and the device turns on. With the knob, you can change the settings at any time in a range from 60
–
2Ő0°C.
In order to simultaneously cook on the other cooking surface, repeat the entire procedure described in
paragraphs 1 to 5.


