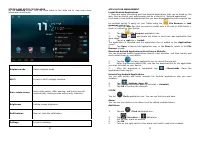
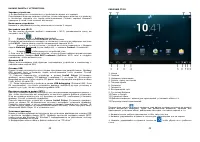
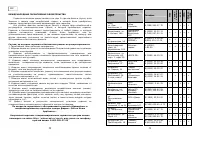
Планшеты Saturn ST-TPC0708 - инструкция пользователя по применению, эксплуатации и установке на русском языке. Мы надеемся, она поможет вам решить возникшие у вас вопросы при эксплуатации техники.
Если остались вопросы, задайте их в комментариях после инструкции.
"Загружаем инструкцию", означает, что нужно подождать пока файл загрузится и можно будет его читать онлайн. Некоторые инструкции очень большие и время их появления зависит от вашей скорости интернета.


16
Sort by title or date added
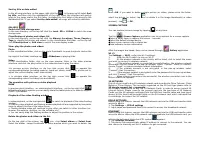
In the all song interface, on the upper right click the
, in the pop-up list select
Sort
by title
, and then click the alphabetical of the right hand, the interface will quickly
jump to the songs match the first letter (including the first letter of the pinyin)in the
alphabetical list. If you select
Sort by date added
, all songs will sorted by add date.
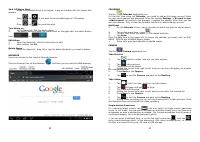
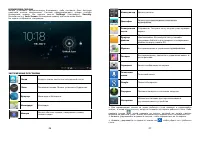
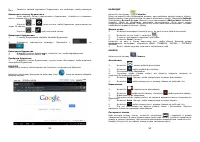
GALLERY
Switch the view storage area
In the root directory, on the top left click the
Local, SD
or
U-Disk
to switch the view
storage area.
Classification of photos and videos list
In the root directory, on the top left click the
Albums, Locations, Times, People
or
Tags
to classify the photos and videos. In the classification file folder, on the top left
click
Filmstrip view
or
Grid view
to switch the view display mode.
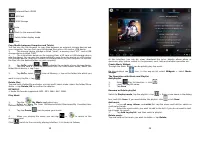
View, play the photos and videos
Photo
In the classification folder, click on the photo thumbnails to open the photo, and on the
top right of the folder interface tap
→
Slideshow
to playing slide.
Video
In the classification folder, click on the view preview. Enter to the video preview
interface, and click the play button in the video preview to play the video.
☆
In preview picture interface on the top right screen click
to operate the
corresponding photos (including zoom in/ zoom out, share, rotate, trim, photos set to,
adjust the current display scale, show details)
☆
In preview video interface, on the top right screen click
to operate the
corresponding videos (including trim and details).
The operation with picture or video playback
DLNA
In preview photo interface
(
or video playback interface
)
on the top right click
follow the prompt to operate you can easily share the tablet picture (or video)to support
DLNA TV broadcast.
Playback of the video floating window
In video playback, on the top right click
to switch to playback of the video floating
window.
☆
Ordinary video playback and floating window playback all are supported by two points
zoom to adjust the size of the video screen.
☆
Floating window video will continue to play after you switch to other interface (ex
:
browser the website, desktop, run the software etc.
)
.
☆
You can easily drag the floating window to adjust the position in the screen.
Delete the photos and videos in the list
On the top right of the screen, tap
icon
→
tap
Select album
or
Select item
.
Select the album, image thumbnails or video preview which you want to delete, tap
17
→
OK
. If you want to delete a single picture (or video), please enter the folder,
select the picture (or video), tap
, or delete it in the image thumbnails (or video
preview) , tap
→
OK
.
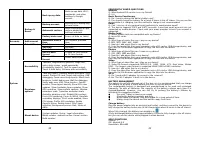
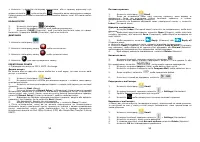
SCREEN CAPTURE
You can capture a screen image by tapping
at any time.
Tap the
Screen Capture
application icon to set options for a screen capture.
●Select a delay timer to capture the screen
(
seconds
)
.
●Select the default storage device.
●Show screen capture icon in status bar.
●View software version information.
After the images are saved, they can be viewed through
Gallery
application.
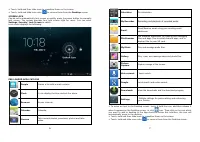
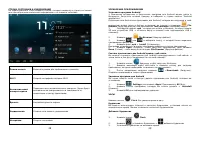
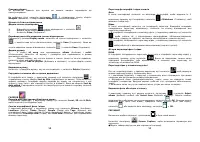
WI-FI
Tap
Settings
→
Wi-Fi
, enter into Wi-Fi settings.
1.
Slide the Wi-Fi switch to turn on Wi-Fi.
2.
All the wireless network in the vicinity will be listed, click to select the name
you want to connect to wireless network;
3.
If the wireless network is connected successful before, the wireless network
information will be saved in the pop-up window, select "Connect" starts to connect,
choose "forget" to remove wireless network information;
4.
If the wireless network is not encrypted, in the pop-up window, select
"Connect" Start Connection;
5.
If the wireless network is encrypted, enter the password in the pop-up window,
and click "Connect" Start Connection;
6.
When internet connections are successful, the wireless connection icon in the
bottom status bar appears.
3G NETWORK
First of all you need to buy 3G wireless network card according to China Telecom, China
Mobile or China Unicom. The currently supported on the 3G card type please refer to
3G dongle support list
or
appendix
.
We strongly recommend on buy the 3G Network Cards, in order to ensure normal 3G
Internet access. Please come to the prepaid card into the purchase of 3G Network
Cards, put the 3G network card insert into the USB host transfer cable and then insert
device. At this time it will be bright lights on the 3G network card, which indicated that
it could begin to connect the 3G network.
PPPoE SETTINGS
Before using this feature, connect the USB network card via the USB host transfer cable
access to device.
1. Tap
Settings
→
PPPoE settings
.
2. Input name and password then click connect to access the broadband network.
ETHERNET
Before using this feature, connect the USB network card via the USB host transfer cable
access to device. When the USB network cable plugged into the USB network card, you
will see the bottom of status bar ETH symbol
appears.
1. Tap
Settings
,
Ethernet
.
2. The device can automatically obtain IP address to connect to the network. You can
also choose to manually set the IP address to get connected.

