
Парогенераторы Taurus Sliding Care NonStop 2500 - инструкция пользователя по применению, эксплуатации и установке на русском языке. Мы надеемся, она поможет вам решить возникшие у вас вопросы при эксплуатации техники.
Если остались вопросы, задайте их в комментариях после инструкции.
"Загружаем инструкцию", означает, что нужно подождать пока файл загрузится и можно будет его читать онлайн. Некоторые инструкции очень большие и время их появления зависит от вашей скорости интернета.


English
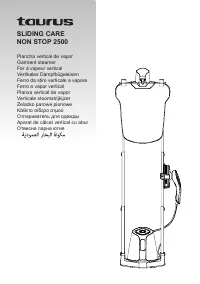
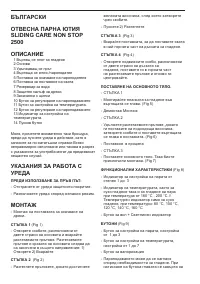
GARMENT STEAMER
SLIDING CARE NON STOP
2500
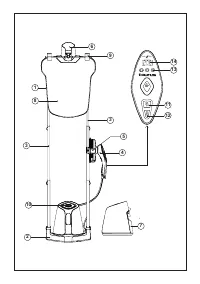
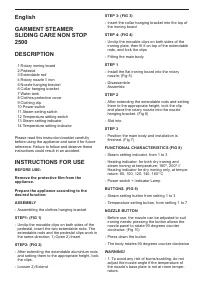
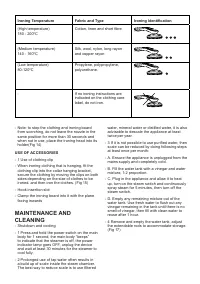
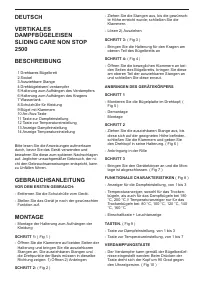
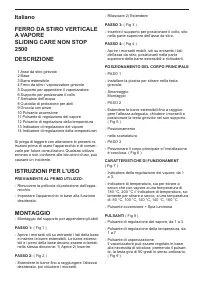
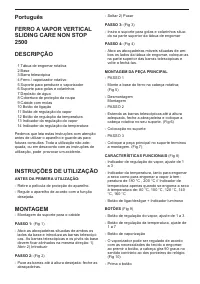
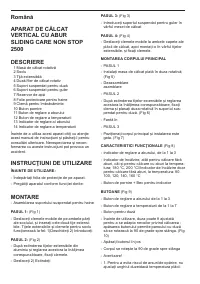
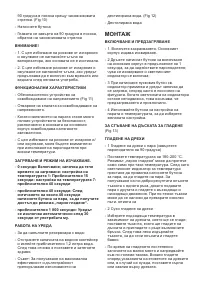
DESCRIPTION
1 Rotary ironing board
2 Pedestal
3 Extendable rod
4 Rotary nozzle // iron
5 Nozzle hanging bracket
6 Collar hanging bracket
7 Water tank
8 Clothes protective cover
9 Clothing clip
10 Power switch
11 Steam setting switch
12 Temperature setting switch
13 Steam setting indicator
14 Temperature setting indicator
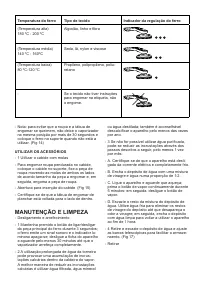
Please read this instruction booklet carefully
before using the appliance and save it for future
reference. Failure to follow and observe these
instructions could result in an accident.
INSTRUCTIONS FOR USE
BEFORE USE:
Remove the protective film from the
appliance.
Prepare the appliance according to the
desired function:
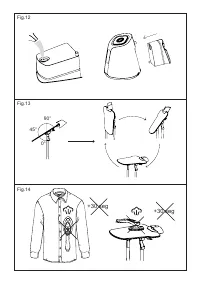
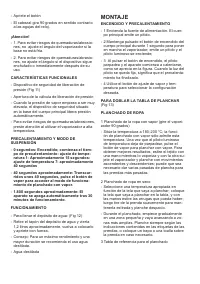
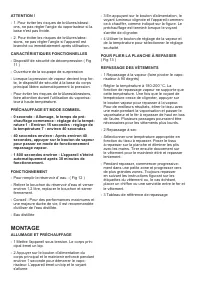
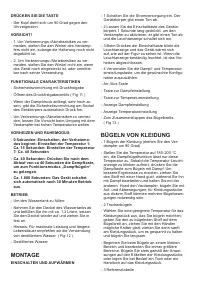
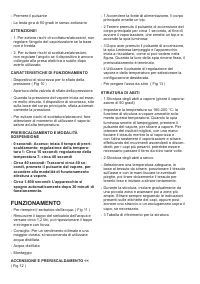
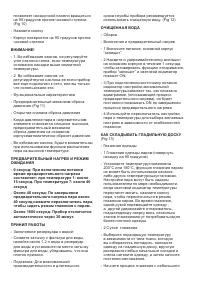
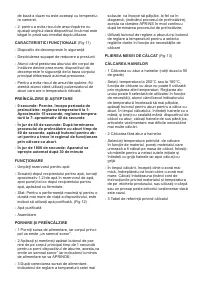
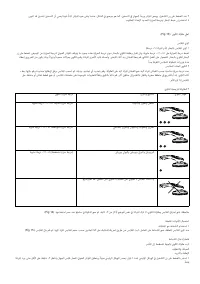
ASSEMBLY
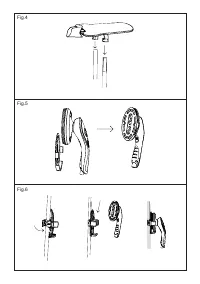
- Assembling the clothes hanging bracket
STEP1: (FIG 1)
- Unclip the movable clips on both sides of the
pedestal, insert the two extendable rods. The
extendable rods and the pedestal clips work in
the same direction: 1) Open 2) Insert
STEP2: (FIG 2)
- After extending the extendable aluminium rods
and setting them to the appropriate height, lock
the clips.
- Loosen 2) Extend
STEP 3: (FIG 3)
- Insert the collar hanging bracket into the top of
the ironing board
STEP 4: (FIG 4)
- Unclip the movable clips on both sides of the
ironing plate, then fit it on top of the extendable
rods, and lock the clips
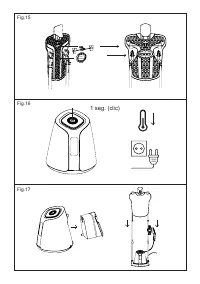
- Fitting the main body
STEP 1
-
Install the flat ironing board into the rotary
nozzle; (Fig 5)
- Disassemble
Assemble
STEP 2
- After extending the extendable rods and setting
them to the appropriate height, lock the clip
and place the rotary nozzle into the nozzle
hanging bracket. (Fig 6)
- Slot into
STEP 3
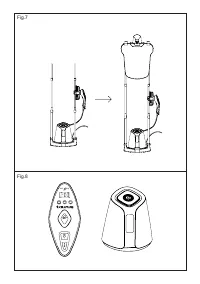
- Position the main body and installation is
finished. (Fig 7)
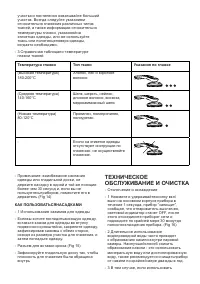
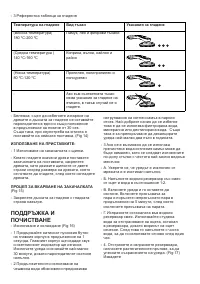
FUNCTIONAL CHARACTERISTICS (FIG 8)
- Steam setting indicator, from 1 to 3
- Heating indicator, for both dry ironing and
steam ironing at temperature; 180º, 200º //
Heating indicator for dry ironing only, at tempe-
rature: 80, 100, 120, 140, 160º C
- Power switch + Indicator Lamp
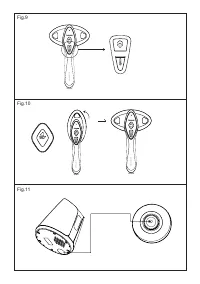
BUTTONS. (FIG 9)
- Steam setting button from setting 1 to 3
- Temperature setting button, from setting 1 to 7
NOZZLE BUTTON
- Before use, the nozzle can be adjusted to suit
ironing needs: pressing the button allows the
nozzle panel to rotate 90 degrees counter
clockwise. (Fig 10)
- Press down the button
- The body rotates 90 degrees counter clockwise
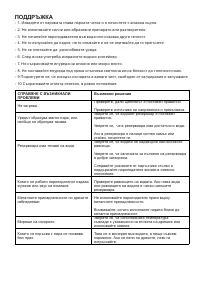
WARNING!
- 1. To avoid any risk of burns/scalding, do not
adjust the nozzle angle if the temperature of
the nozzle’s base plate is not at room tempe-
rature.
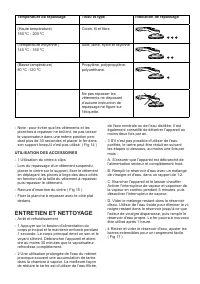
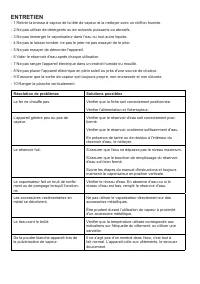
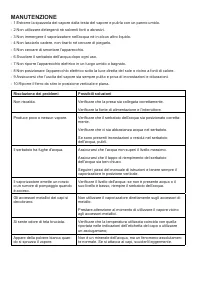
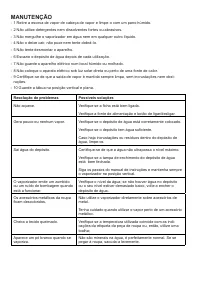
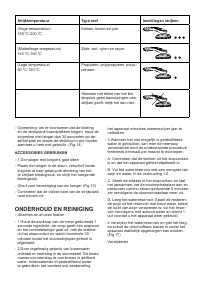
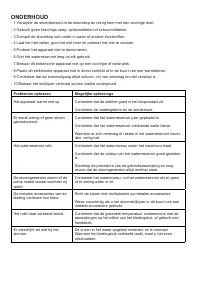
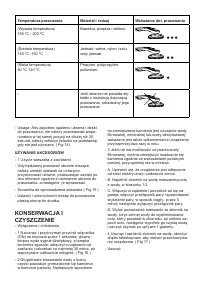
Характеристики

Остались вопросы?Не нашли свой ответ в руководстве или возникли другие проблемы? Задайте свой вопрос в форме ниже с подробным описанием вашей ситуации, чтобы другие люди и специалисты смогли дать на него ответ. Если вы знаете как решить проблему другого человека, пожалуйста, подскажите ему :)


