
Мойки высокого давления Karcher K 4 Full Control 1.324-000 - инструкция пользователя по применению, эксплуатации и установке на русском языке. Мы надеемся, она поможет вам решить возникшие у вас вопросы при эксплуатации техники.
Если остались вопросы, задайте их в комментариях после инструкции.
"Загружаем инструкцию", означает, что нужно подождать пока файл загрузится и можно будет его читать онлайн. Некоторые инструкции очень большие и время их появления зависит от вашей скорости интернета.


– 6
These operating instructions describe the maximum
equipment. Depending on the model, there are differ-
ences in the scopes of delivery (see packaging).
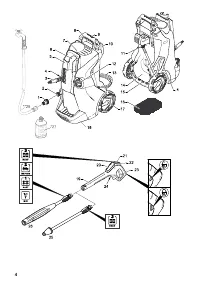
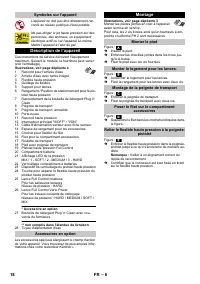
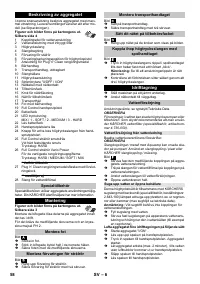
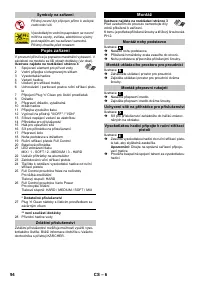
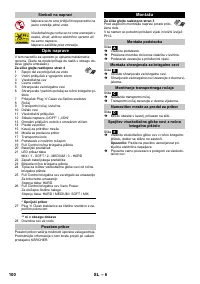
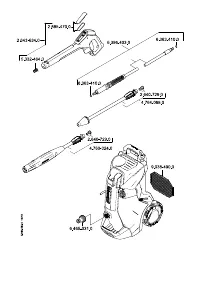
See fold-out page 4 for illustrations
1
Coupling element for water connection
2
Water connection with integrated sieve
3
High pressure hose
4
Hose guide
5
Storage for spray lances
6
Storage / parking position for trigger gun
7
Connection for Plug 'n' Clean detergent
8
Carrying handle
9
Transport handle, detachable
10 Hose switch
11 High pressure connection
12 Appliance switch "0/OFF“/ „I/ON“
13 Mains cable with mains plug
14 Accessory compartment
15 Hooks for fastening the net
16 Net for accessory compartment
17 Bearing wheel
18 Base with carrying handle
19 Full Control trigger gun
20 Battery compartment
21 LED pressure indicator
MIX / 1 - SOFT / 2 - MEDIUM / 3 - HARD
22 Battery compartment lock
23 Lock trigger gun
24 Button for detaching the high-pressure hose from
the trigger gun
25 Full Control spray lance dirt grinder
For strong contaminations
Pressure level: HARD
26 Full Control spray lance Vario Power
Carrying out the most common cleaning tasks
Pressure levels: HARD / MEDIUM / SOFT / MIX
* Optional accessories
27 Plug 'n' Clean detergent bottle with locking lid
** not included in the scope of delivery
28 Water supply hose
Special accessories expand the possibilities of using
your appliance. Please contact your KÄRCHER dealer
for further information.
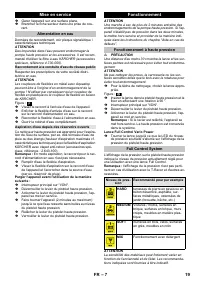
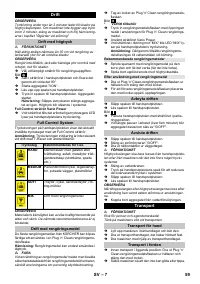
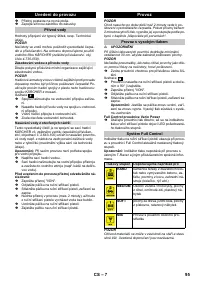
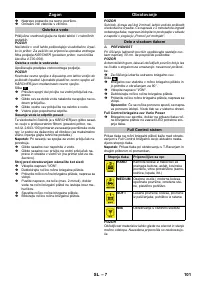
See fold-out page 3 for illustrations
Mount loose parts delivered with appliance pri-
or to start-up.
You will need the 2 included screws as well as a Philips
screwdriver PH 2.
Illustration
Insert base.
Insert the included dowels all the way into the
holes.
Secure the base with the enclosed screws.
Illustration
Hook in storage for spray lances.
Secure the storage for the spray lances by means
of two screws.
Illustration
Attach the transport handle.
Secure the transport handle by means of two
screws.
Illustration
Hook the net into the hooks shown in the illustra-
tion.
Illustration
Push the high pressure hose into the trigger gun
until it locks audibly.
Note:
Make sure the connection nipple is aligned
correctly.
Check the secure connection by pulling on the high
pressure hose.
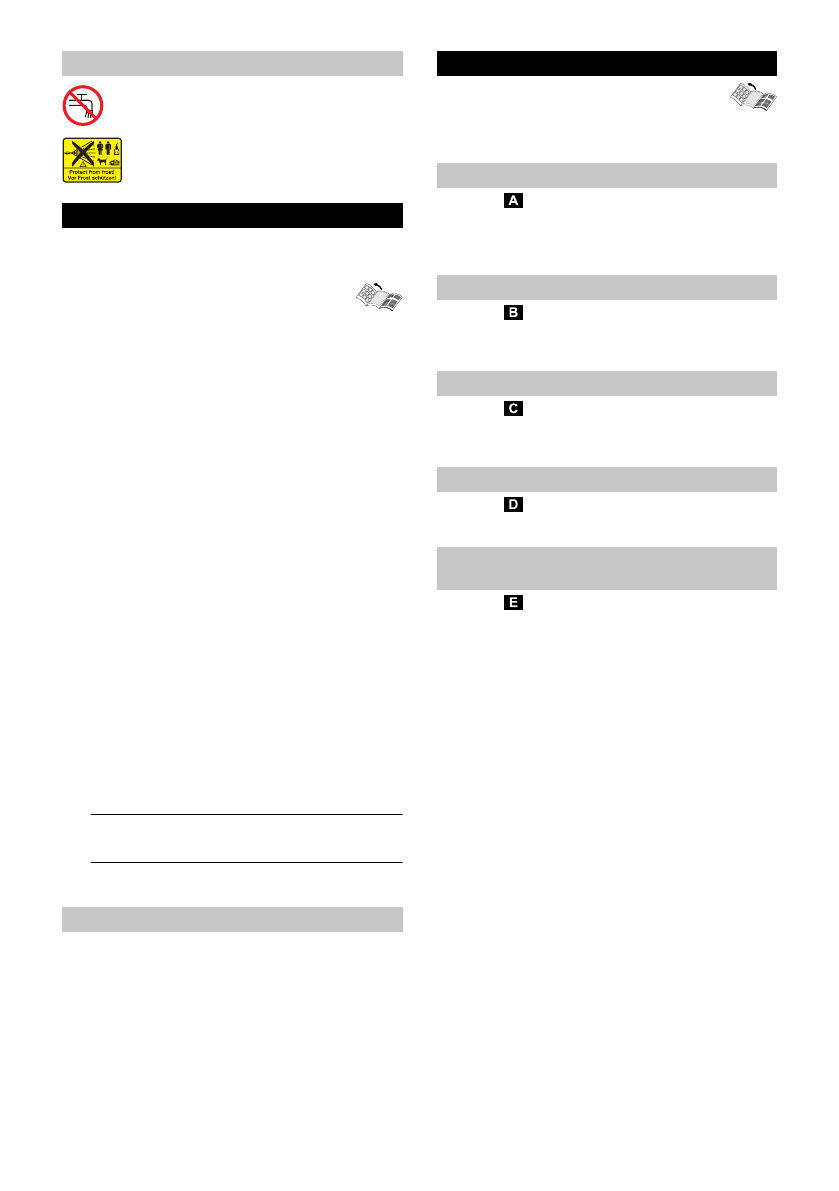
Symbols on the machine
The appliance must not be directly connect-
ed to the public drinking water network.
The high pressure jet must not be directed at
persons, animals, live electrical equipment
or at the appliance itself.
Protect the appliance against frost.
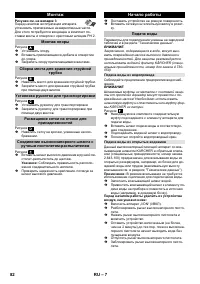
Description of the Appliance
Special accessories
Assembly
Installing the base
Install storage for spray lances
Install the transport handle
Attach the net to the accessory compartment
Connect the high pressure hose to the
trigger gun
12
EN


