Материнские платы GIGABYTE GA P55A UD4P rev 2 0 - инструкция пользователя по применению, эксплуатации и установке на русском языке. Мы надеемся, она поможет вам решить возникшие у вас вопросы при эксплуатации техники.
Если остались вопросы, задайте их в комментариях после инструкции.
"Загружаем инструкцию", означает, что нужно подождать пока файл загрузится и можно будет его читать онлайн. Некоторые инструкции очень большие и время их появления зависит от вашей скорости интернета.


Appendix
- 88 -
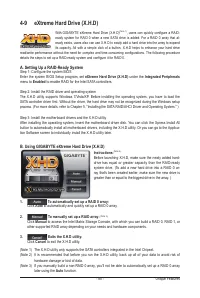
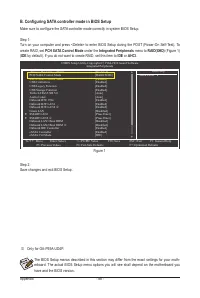
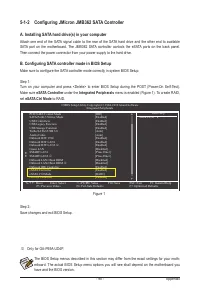
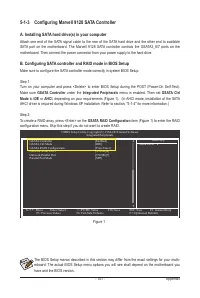
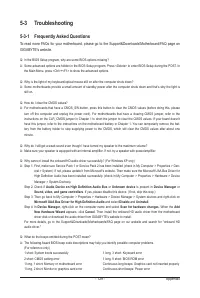
B. Configuring SATA controller mode in BIOS Setup
Make sure to configure the SATA controller mode correctly in system BIOS Setup.
Step 1:
Turn on your computer and press <Delete> to enter BIOS Setup during the POST (Power-On Self-Test). To
create RAID, set
PCH SATA Control Mode
under the
Integrated Peripherals
menu to
RAID(XHD)
(Figure 1)
(
IDE
by default). If you do not want to create RAID, set this item to
IDE
or
AHCI
.
Step 2:
Save changes and exit BIOS Setup.
The BIOS Setup menus described in this section may differ from the exact settings for your moth-
erboard. The actual BIOS Setup menu options you will see shall depend on the motherboard you
have and the BIOS version.
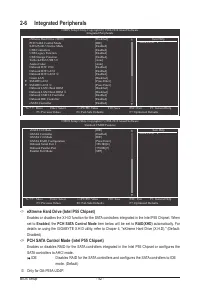
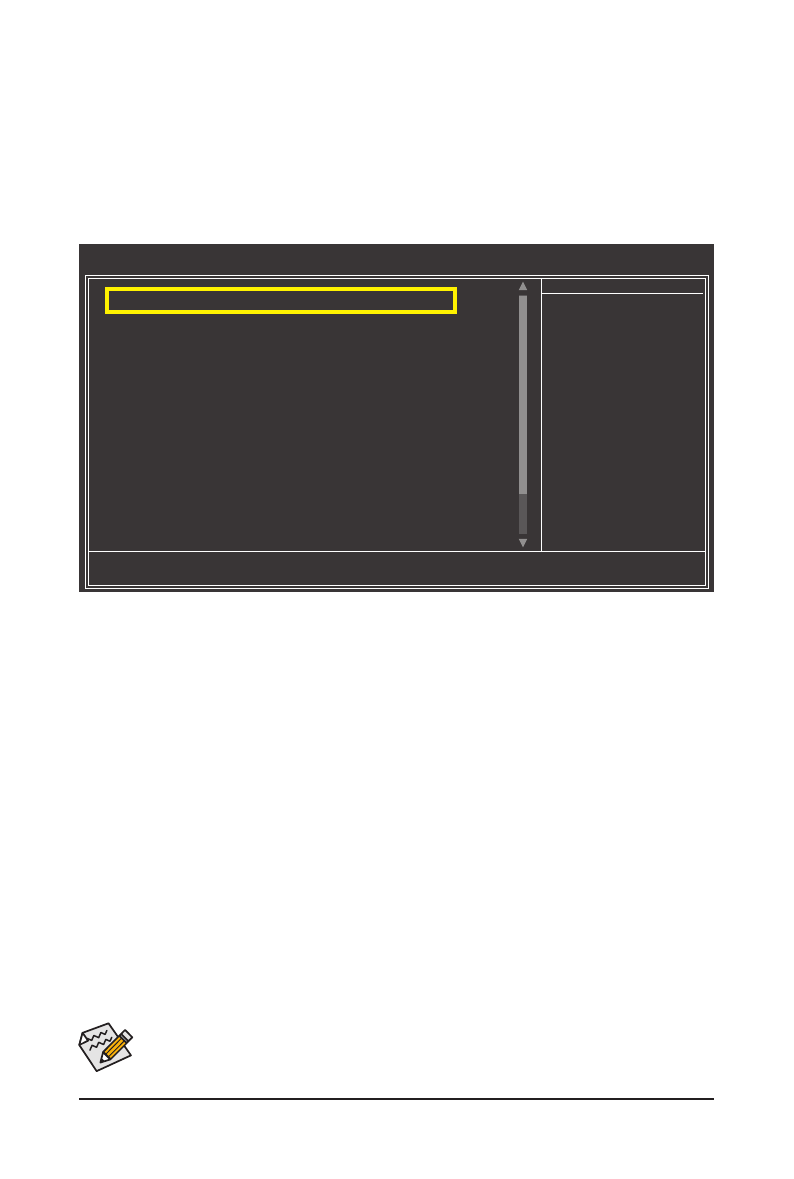
Figure 1
CMOS Setup Utility-Copyright (C) 1984-2010 Award Software
Integrated Peripherals
eXtreme Hard Drive (XHD)
[Disabled]
PCH SATA Control Mode
[RAID(XHD)]
SATA Port0-3 Native Mode
[Enabled]
USB Controllers
[Enabled]
USB Legacy Function
[Enabled]
USB Storage Function
[Enabled]
Turbo SATA3/USB 3.0
[Auto]
Azalia Codec
[Auto]
Onboard H/W 1394
[Enabled]
Onboard H/W LAN1
[Enabled]
Onboard H/W LAN2
j
[Enabled]
Green LAN
[Disabled]
SMART LAN1
[Press Enter]
SMART LAN2
j
[Press Enter]
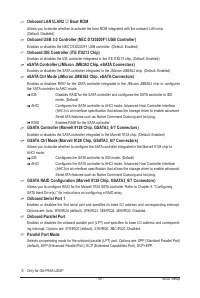
Onboard LAN1 Boot ROM
[Disabled]
Onboard LAN2 Boot ROM
j
[Disabled]
Onboard IDE Controller
[Enabled]
eSATA Controller
[Enabled]
eSATA Ctrl Mode
[IDE]
higf
: Move
Enter: Select
+/-/PU/PD: Value
F10: Save
ESC: Exit
F1: General Help
F5: Previous Values
F6: Fail-Safe Defaults
F7: Optimized Defaults
Item Help
Menu Level
j
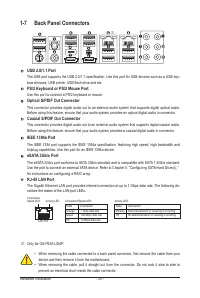
Only for GA-P55A-UD4P.


