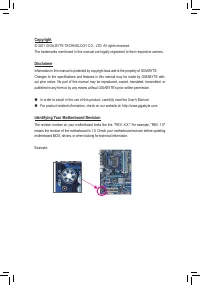
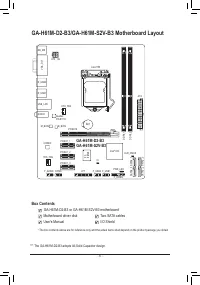
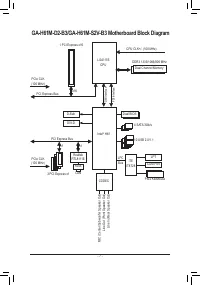
Материнские платы GIGABYTE GA H61M S2V B3 rev 1 1 - инструкция пользователя по применению, эксплуатации и установке на русском языке. Мы надеемся, она поможет вам решить возникшие у вас вопросы при эксплуатации техники.
Если остались вопросы, задайте их в комментариях после инструкции.
"Загружаем инструкцию", означает, что нужно подождать пока файл загрузится и можно будет его читать онлайн. Некоторые инструкции очень большие и время их появления зависит от вашей скорости интернета.


- 39 -
BIOS Setup
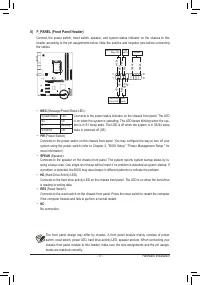
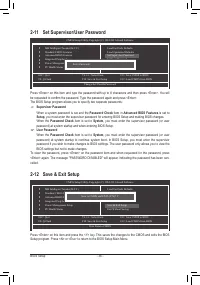
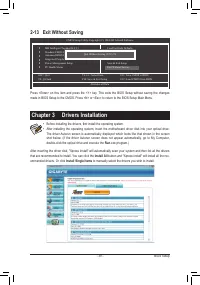
Press <Enter> on this item and press the <Y> key. This exits the BIOS Setup without saving the changes
made in BIOS Setup to the CMOS. Press <N> or <Esc> to return to the BIOS Setup Main Menu.
2-13 Exit Without Saving
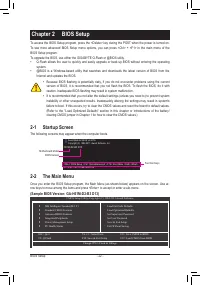
CMOS Setup Utility-Copyright (C) 1984-2011 Award Software
Abandon all Data
MB Intelligent Tweaker(M.I.T.)
Standard CMOS Features
Advanced BIOS Features
Integrated Peripherals
Power Management Setup
PC Health Status
ESC: Quit
: Select Item
F11: Save CMOS to BIOS
F8: Q-Flash
F10: Save & Exit Setup
F12: Load CMOS from BIOS
Load Fail-Safe Defaults
Load Optimized Defaults
Set Supervisor Password
Set User Password
Save & Exit Setup
Exit Without Saving
Quit Without Saving (Y/N)? N
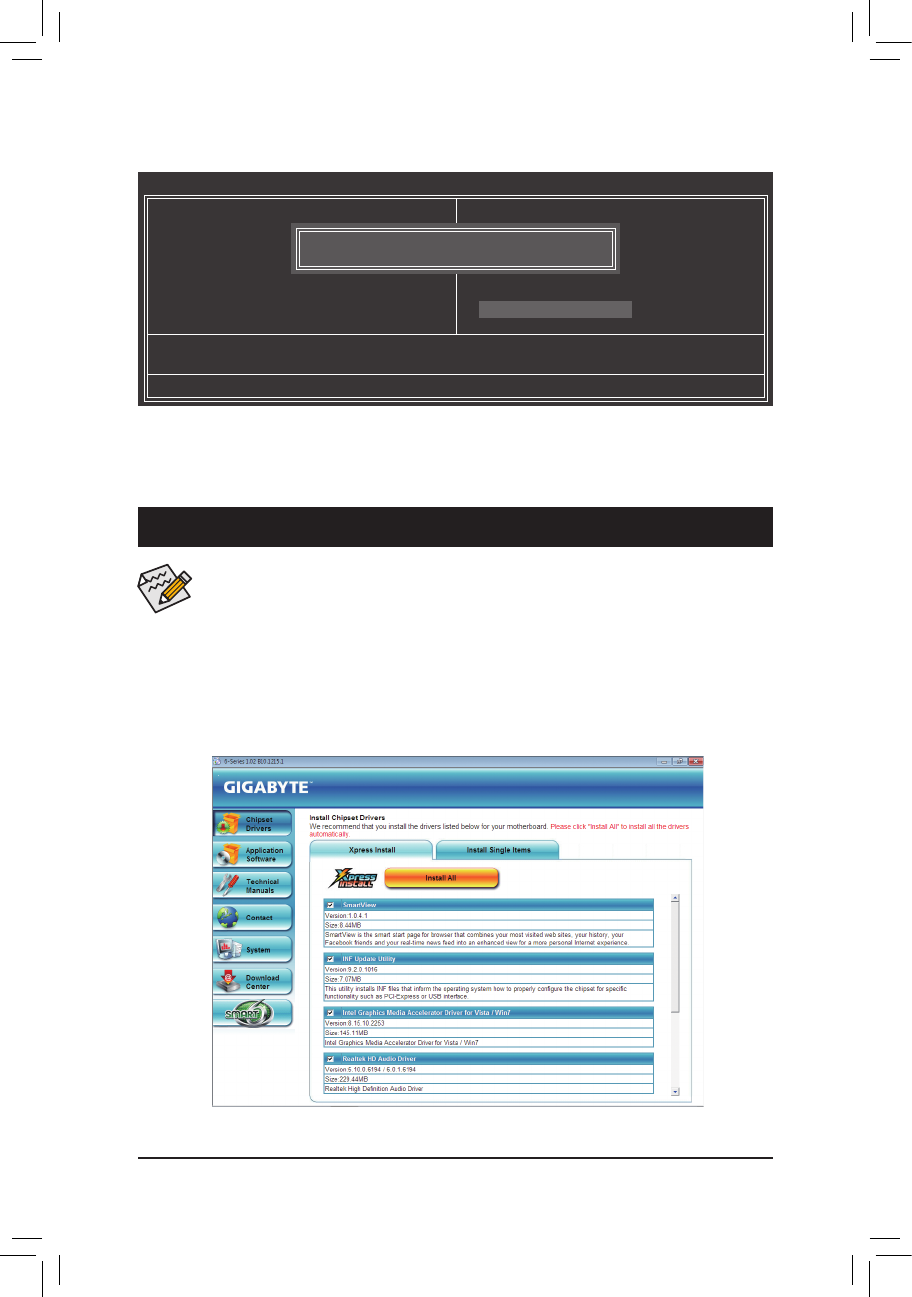
Chapter 3 Drivers Installation
•
Before installing the drivers, first install the operating system.
•
After installing the operating system, insert the motherboard driver disk into your optical drive.
The driver Autorun screen is automatically displayed which looks like that shown in the screen
shot below. (If the driver Autorun screen does not appear automatically, go to My Computer,
double-click the optical drive and execute the
Run
.exe program.)
After inserting the driver disk, "Xpress Install" will automatically scan your system and then list all the drivers
that are recommended to install. You can click the
Install All
button and "Xpress Install" will install all the rec-
ommended drivers. Or click
Install Single Items
to manually select the drivers you wish to install.


