Материнские платы GIGABYTE GA 8I915P Pro rev 1 x - инструкция пользователя по применению, эксплуатации и установке на русском языке. Мы надеемся, она поможет вам решить возникшие у вас вопросы при эксплуатации техники.
Если остались вопросы, задайте их в комментариях после инструкции.
"Загружаем инструкцию", означает, что нужно подождать пока файл загрузится и можно будет его читать онлайн. Некоторые инструкции очень большие и время их появления зависит от вашей скорости интернета.


Hard ware In stalla tion
- 13 -
English
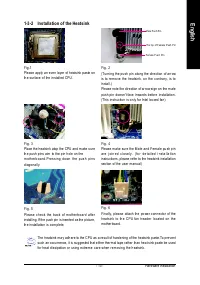
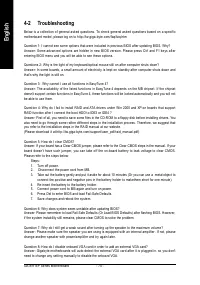
1-3-2 Installation o f the Heatsink
Fig .1
Ple ase apply an e ven layer of heats ink p aste on
th e s ur fac e o f the in stalled CPU.
The heats ink m a y adh ere to the CPU as a res ult of harde ning of the heats ink p aste.To prev ent
such an occu rrence, it is su ggested that either ther m al tape rather than hea t sink p aste be used
fo r h eat dissipation or us ing ex tre m e car e when re m ov ing th e h eatsin k.
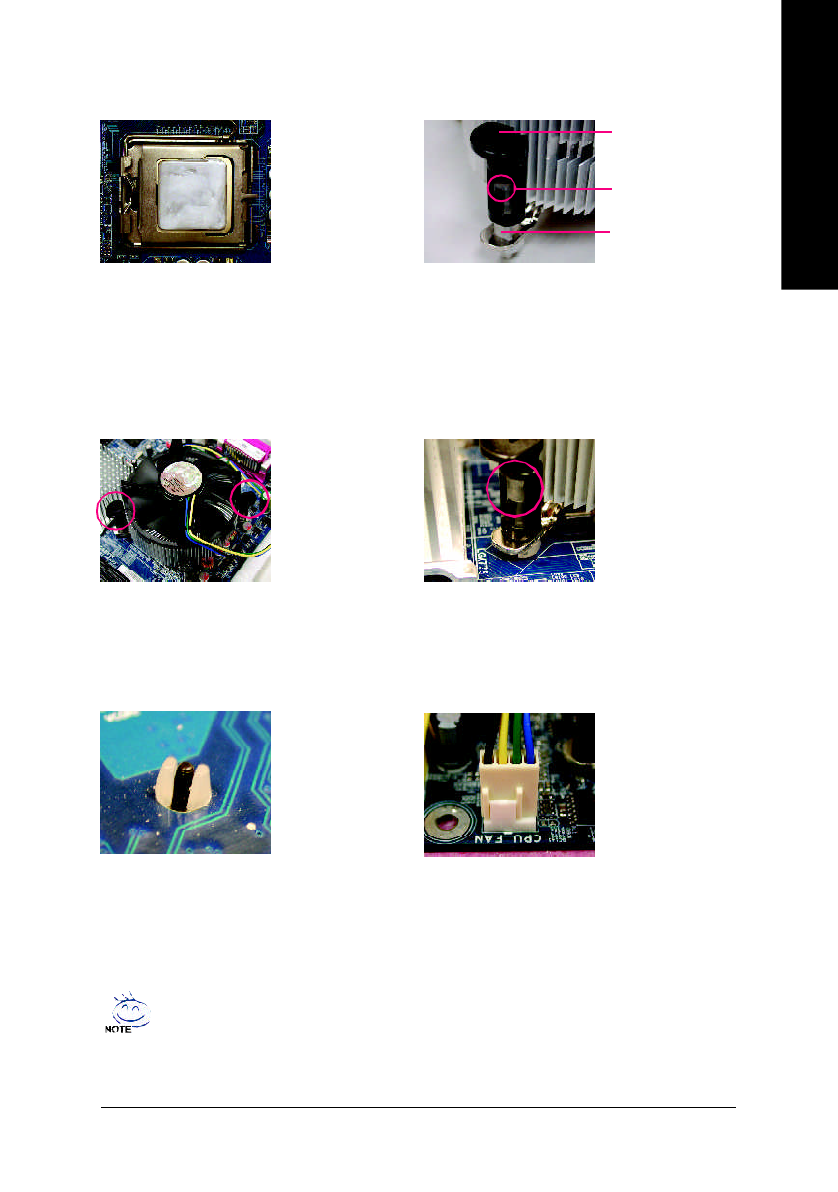
F ig . 6
Fina lly, plea se atta ch th e po we r c on ne cto r of the
h ea ts in k to th e CPU fan h ea d er loc a te d o n th e
m other board.
F ig . 3
Pla ce th e hea tsink atop the CPU and m ake s ure
th e pu sh p ins aim to the p in h ole on the
m o th e r b o a r d . Pr e s s in g d o wn th e p u s h p in s
diag ona lly.
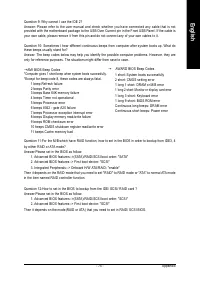
F ig . 2
(T urn ing the pu sh pin alo ng the dir ection of arr ow
is to r em o ve the he atsink , o n th e c on tr ar y , is to
in sta ll.)
Ple ase no te th e dire ction of ar row sign on the m ale
pu sh pin doe sn 't fa ce in wa rds b efo re installatio n.
(T his in struc tio n is o nly for Intel bo xed fa n)
F ig . 4
Ple ase m ake sur e th e M a le a nd F em ale pu sh p in
a r e jo in e d c l o s e ly . ( fo r d e ta il e d i n s ta lla t io n
instructio ns, please r efer to the heatsink ins tallation
sec tion of the u ser m anu al)
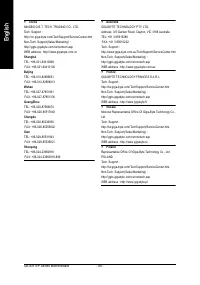
F ig . 5
Plea s e c h e ck the b ac k of m oth e rb o a rd a fte r
installing. If th e push pin is inserte d as the picture,
th e in sta llation is com plete.
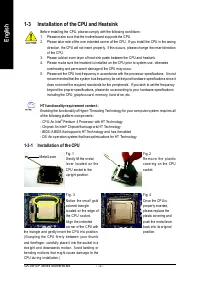
M ale Pus h P in
Female P us h Pi n
The top of F em ale P ush P in


