Материнские платы GIGABYTE 8VM533M RZ - инструкция пользователя по применению, эксплуатации и установке на русском языке. Мы надеемся, она поможет вам решить возникшие у вас вопросы при эксплуатации техники.
Если остались вопросы, задайте их в комментариях после инструкции.
"Загружаем инструкцию", означает, что нужно подождать пока файл загрузится и можно будет его читать онлайн. Некоторые инструкции очень большие и время их появления зависит от вашей скорости интернета.


- 19 -
BIOS Setup
English
CONT RO L KEYS
< > < >< >< >
Mov e to select item
<Enter>
Select Item
<Esc>
Main Menu - Q uit and n ot sav e c hanges i nto CMOS Status Pa ge Setup Menu
and O ption Pa ge Setup Menu - Ex it curre nt page a nd return to Main Menu
<+/P gUp>
Incre ase the numeric v alue or make ch anges
<-/P gDn>
Decre ase the numeric v alue or make ch anges
<F1>
Gener al help, only for Status Pa ge Setup Menu and Option P age Setup Menu
<F2>
Item Help
<F5>
Restore the prev ious CMOS v alue from CMOS, only for Option Page Setup Menu
<F6>
Load the file -safe default CMOS v alue from BIOS default table
<F7>
Load the Optim ized Defaults
<F8>
Q-Fl ash uti lity
<F9>
Sy ste m Inform ation
<F10>
Sav e all the C MOS chang es, only for Main Menu
BIOS Setup is a n ov erv ie w of the B IOS Setup Program. The progr am that al low s user s to modify the
basic sy stem configuration. This ty pe o f informati on is store d in batter y -backed CM OS RAM so that it
retai ns the Setup informa tion w hen the pow er is turned off.
ENT ERIN G SET UP
Pow ering ON the computer a nd pressing <Del> immediately w ill allow y ou to en ter Setup. If y ou require
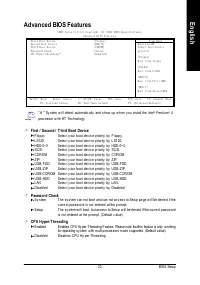
m o re a dv a n ce d BIO S s e tti n g s , p l ea s e g o to " Ad v a nc e d B IO S " s e tti n g m e nu . To e nte r
Adv an ced BIOS s etting me nu, press "Ctrl+F1" key on the BIOS sc reen.
Chapter 2 BIOS Setup
Main Menu
The o n-line de scription of the h ighlighte d setup function is displa y ed at th e bottom of the sc reen.
Status Page Setup Menu / Opti on Page Setu p Menu
Press F1 to po p up a sm all help w indow that descr ibes the appropria te key s to use an d the pos sible
selec tions for the high lighted i tem. To e x it the Help Windo w press < Esc>.
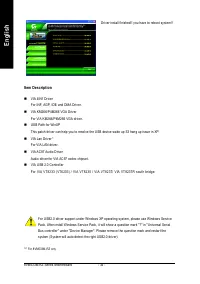
The Main Menu (For example: BIOS Ver. : F4a)
Once y ou enter A w ard BIOS C MOS Setup Utility , th e Main Menu (as figur e below ) w i ll appear on the
scr een. T he Ma in Men u all ow s y o u to select from eight setup func tions and tw o ex i t cho ices. Use
arrow key s to s elect amo ng the ite ms and pre ss <Enter > to accep t or ente r the sub- menu.
CMOS Setup Ut ility-Co pyright (C) 1984 -2003 Aw ard Soft ware
}
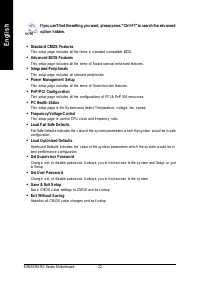
Stan dard CM OS Feat ures
}
Adva nced BI OS Feat ures
}
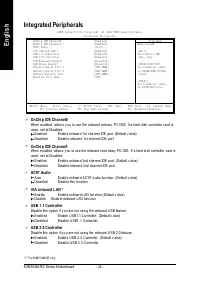
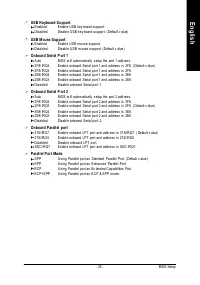
Inte grated Periphe rals
}
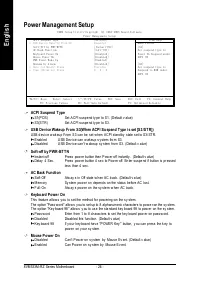
Powe r Manag ement S etup
}
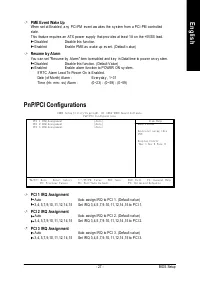
PnP/ PCI Con figurat ions
}
PC H ealth St atus
}
Frequ ency/Vol tage Con trol
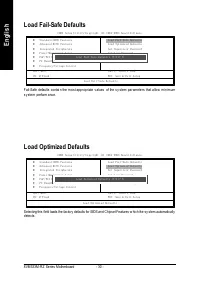
Load Fail-Sa fe Defa ults
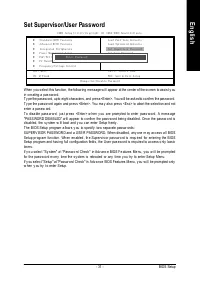
Load Optimiz ed Defa ults
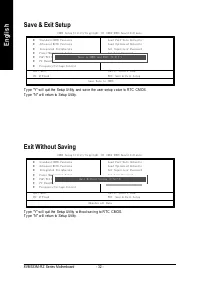
Set Supervis or Pass word
Set U ser Pass word
Save & Exit S etup
Exit Without S aving
ESC: Quit
higf
: Selec t Item
F8: Q- Flash
F10: Save & Exit S etup
Time, Date, Har d Disk Ty pe...


