
Машинки для стрижки Vitek VT-2549 - инструкция пользователя по применению, эксплуатации и установке на русском языке. Мы надеемся, она поможет вам решить возникшие у вас вопросы при эксплуатации техники.
Если остались вопросы, задайте их в комментариях после инструкции.
"Загружаем инструкцию", означает, что нужно подождать пока файл загрузится и можно будет его читать онлайн. Некоторые инструкции очень большие и время их появления зависит от вашей скорости интернета.


7
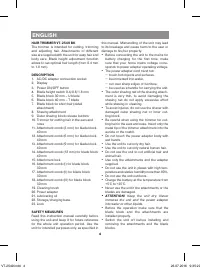
ENGLISH
–
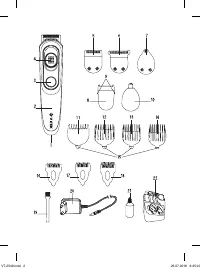
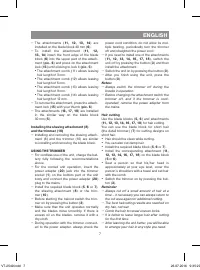
The attachments (
11, 12, 13, 14
) are
installed on the blade block 40 mm (
6
).
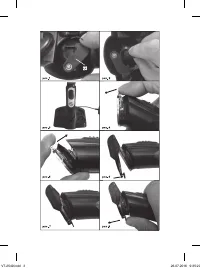
–
To install the attachment (
11, 12,
13, 14
) insert the front edge of the blade
block (
6
) into the upper part of the attach-
ment (
pic. 6
) and press on the attachment
lock (
15
) until clicking to lock it (
pic. 5
).
•
The attachment comb (11) allows leaving
hair length of 3 mm.
•
The attachment comb (12) allows leaving
hair length of 6 mm.
•
The attachment comb (13) allows leaving
hair length of 9 mm.
•
The attachment comb (14) allows leaving
hair length of 12 mm.
–
To remove the attachment, press the attach-
ment lock (
15
) with your thumb (
pic. 6
).
–
The attachments (
16, 17, 18
) are installed
in the similar way on the blade block
30 mm (
5
).
Installing the shaving attachment (8)
and the trimmer (10)
–
Installing and removing the shaving attach-
ment (8) and the trimmer (10) are similar
to installing and removing the blade block.
USING THE TRIMMER
–
For cordless use of the unit, charge the bat-
tery fully following the recommendations
above.
–
For the corded unit operation, insert the
power adapter (
20
) jack into the trimmer
socket (
1
) on the bottom part of the unit
body and connect the power adapter (
20
)
plug to the mains.
–
Install the required blade block (
5
,
6
or
7
),
the shaving attachment (
8
) or the trim-
mer (
10
).
–
Before starting the haircut switch the trim-
mer on by pressing the button (
3
).
–
Make sure that the unit operates normally
and the blades move smoothly. If there is
excess oil on the blades, remove it with a
dry cloth.
–
During operation with the trimmer connect-
ed to the power adapter, always check the
power cord condition, do not allow its mul-
tiple twisting, periodically turn the trimmer
off and straighten the power cord.
–
If you need to install one of the attachments
(
11, 12, 13, 14, 16, 17, 18
), switch the
unit off by pressing the button (
3
) and then
install the attachment.
–
Switch the unit on by pressing the button (
3
).
–
After you finish using the unit, press the
button (
3
).
Notes:
–
Always switch the trimmer off during the
breaks in operation.
–
Before changing the attachment switch the
trimmer off, and if the trimmer is cord-
operated, remove the power adapter from
the mains.
Hair cutting
Use the blade blocks (
5, 6
) and attachments
(
11, 12, 13, 14, 16, 17, 18
) for hair cutting.
You can use the blade block for short hair
(the detail trimmer) (
7
) for cutting designs on
short hair.
•
Hair should be clean while cutting.
•
You can also cut damp hair.
•
Install the required blade block (
5
,
6
or
7
).
•
Install the corresponding attachment (
11,
12, 13,
14, 16, 17, 18
) on the blade block
(
5
or
6
).
•
Seat a person so that his/her head is
approximately at your eye level, cover the
person’s shoulders with a towel and set hair
with the comb.
•
Switch the trimmer on by pressing the but-
ton (
3
).
Reminder
–
Always cut off a small amount of hair at a
time – if necessary you can always return to
the cut area again for additional cutting.
–
The best haircutting results are reached on
dry hair, not wet.
–
Comb the hair to reveal uneven locks.
–
It is better to leave longer hair after cutting
for the first time.
–
After learning the unit better, you will be able
to arrange your hair in any style you need.
IM VT-2549.indd 7
26.07.2016 9:35:20
Содержание
- 12 Содержите
- 13 ПЕРЕД ПЕРВЫМ ИСПОЛЬЗОВАНИЕМ:; минут непрерывной работы.
- 14 Использование сетевого адаптера; Используйте только масло
- 15 ИСПОЛЬЗОВАНИЕ ТРИММЕРА
- 16 Напоминание; Шаг первый; жайте стричь волосы ближе к макушке.
- 17 Шаг пятый – заключительная часть; Установите бритвенную насадку (
- 18 ЧИСТК А И УХОД
- 19 Срок службы прибора – 3 года; Информация для связи –
- 36 RUS
Характеристики

Остались вопросы?Не нашли свой ответ в руководстве или возникли другие проблемы? Задайте свой вопрос в форме ниже с подробным описанием вашей ситуации, чтобы другие люди и специалисты смогли дать на него ответ. Если вы знаете как решить проблему другого человека, пожалуйста, подскажите ему :)


