Магнитолы Kenwood DDX155 - инструкция пользователя по применению, эксплуатации и установке на русском языке. Мы надеемся, она поможет вам решить возникшие у вас вопросы при эксплуатации техники.
Если остались вопросы, задайте их в комментариях после инструкции.
"Загружаем инструкцию", означает, что нужно подождать пока файл загрузится и можно будет его читать онлайн. Некоторые инструкции очень большие и время их появления зависит от вашей скорости интернета.


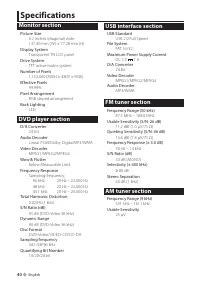
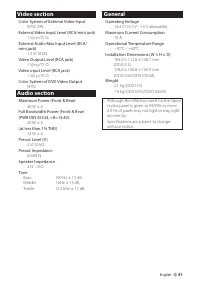


34
English
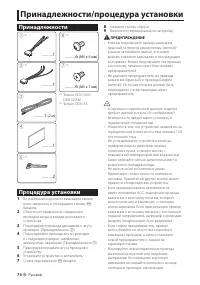
Accessories/Installation Procedure
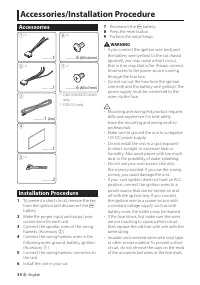
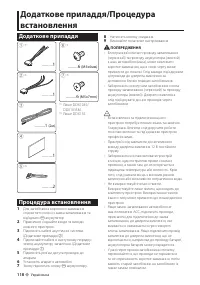
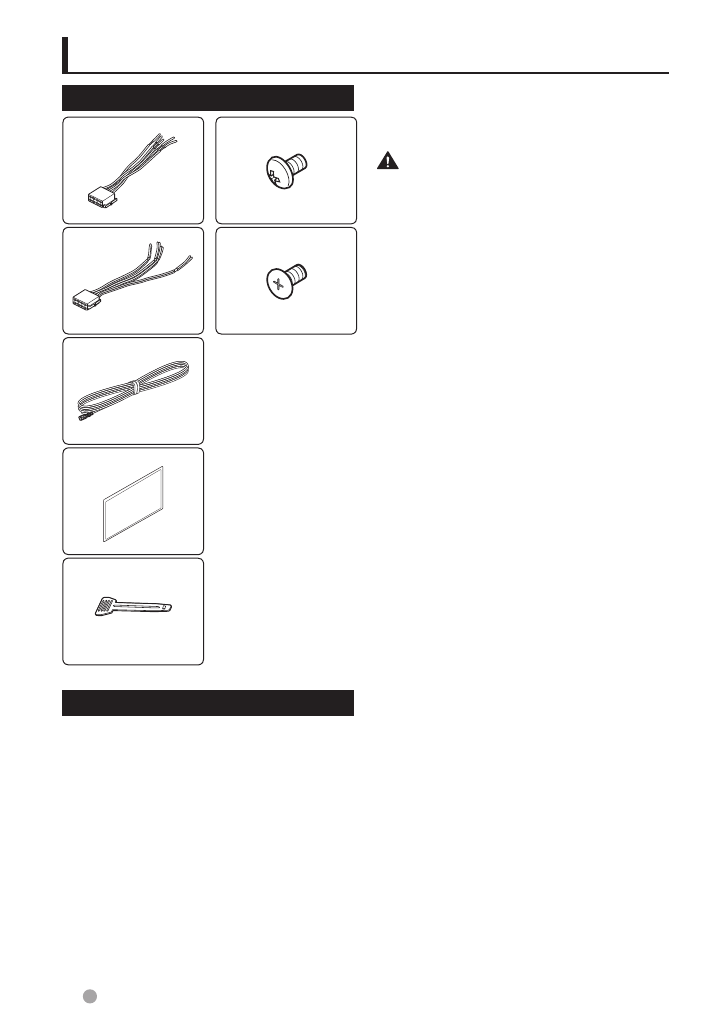
Accessories
1
*
1
..........1
2
*
1
..........1
3
..........1
(2m)
4
..........1
5
*
2
..........2
6
*
1
..........6
(M5x6mm)
7
*
1
..........6
(M5x7mm)
*
1
DDX1035/DDX1035M
only.
*
2
DDX155 only.
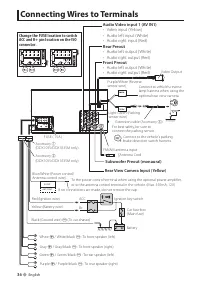
Installation Procedure
1
To prevent a short circuit, remove the key
from the ignition and disconnect the
·
battery.
2
Make the proper input and output wire
connections for each unit.
3
Connect the speaker wires of the wiring
harness. (Accessory
2
)
4
Connect the wiring harness wires in the
following order: ground, battery, ignition.
(Accessory
1
)
5
Connect the wiring harness connector to
the unit.
6
Install the unit in your car.
7
Reconnect the
·
battery.
8
Press the reset button.
9
Perform the Initial Setup.
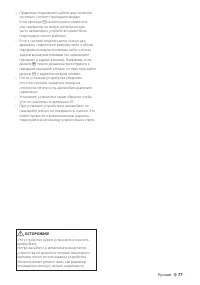
WARNING
• If you connect the ignition wire (red) and
the battery wire (yellow) to the car chassis
(ground), you may cause a short circuit,
that in turn may start a fire. Always connect
those wires to the power source running
through the fuse box.
• Do not cut out the fuse from the ignition
wire (red) and the battery wire (yellow). The
power supply must be connected to the
wires via the fuse.
¤
• Mounting and wiring this product requires
skills and experience. For best safety,
leave the mounting and wiring work to
professionals.
• Make sure to ground the unit to a negative
12V DC power supply.
• Do not install the unit in a spot exposed
to direct sunlight or excessive heat or
humidity. Also avoid places with too much
dust or the possibility of water splashing.
• Do not use your own screws. Use only
the screws provided. If you use the wrong
screws, you could damage the unit.
• If your car’s ignition does not have an ACC
position, connect the ignition wires to a
power source that can be turned on and
off with the ignition key. If you connect
the ignition wire to a power source with
a constant voltage supply, such as with
battery wires, the battery may be drained.
• If the fuse blows, first make sure the wires
are not touching to cause a short circuit,
then replace the old fuse with one with the
same rating.
• Insulate unconnected wires with vinyl tape
or other similar material. To prevent a short
circuit, do not remove the caps on the ends
of the unconnected wires or the terminals.
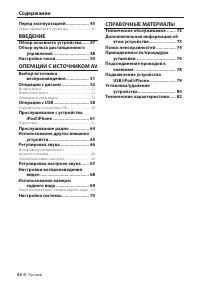
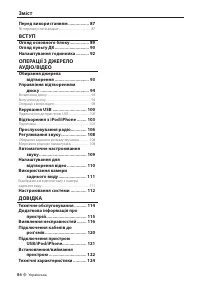
Содержание
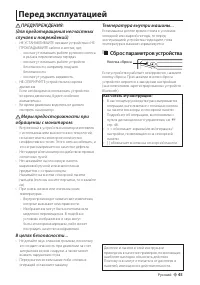
- 45 (для предотвращения несчастных; Сброс параметров устройства; Перед эксплуатацией
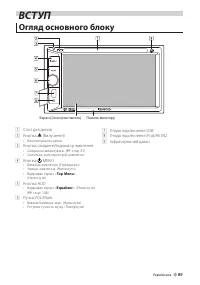
- 47 Обзор основного устройства; ВВЕДЕНИЕ
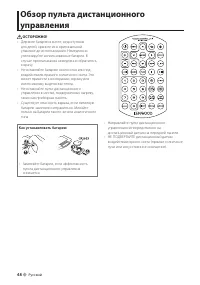
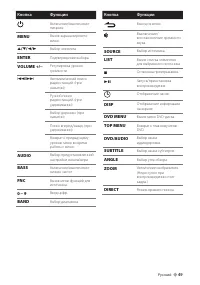
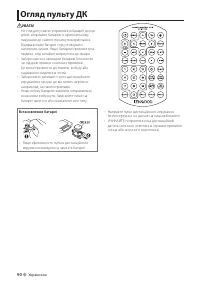
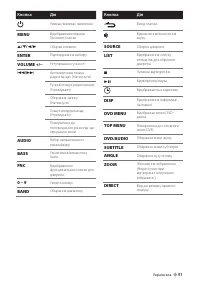
- 48 Обзор пульта дистанционного
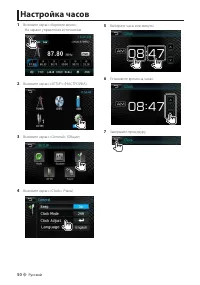
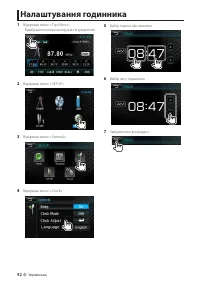
- 50 Настройка часов
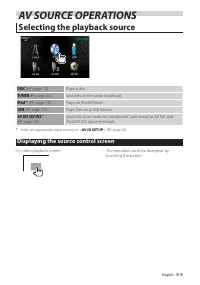
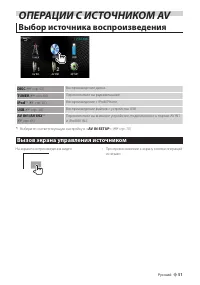
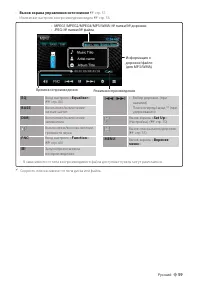
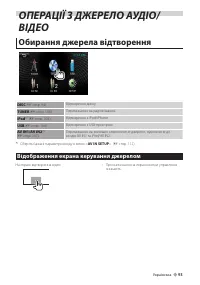
- 51 Вызов экрана управления источником; ОПЕРАЦИИ С ИСТОЧНИКОМ AV; Выбор источника воспроизведения
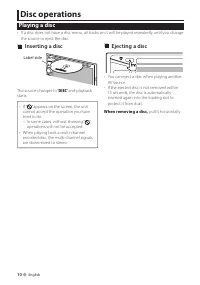
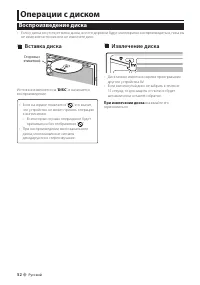
- 52 Извлечение диска; Операции с диском; Воспроизведение диска; Вставка диска
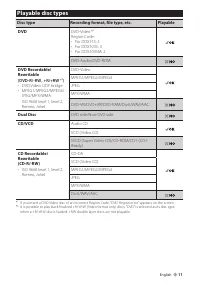
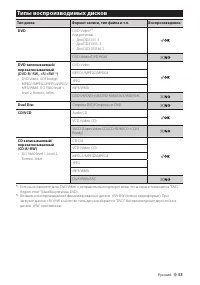
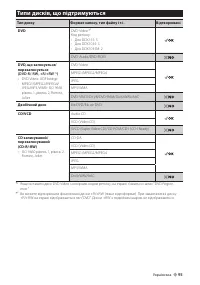
- 53 Типы воспроизводимых дисков
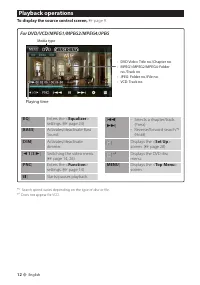
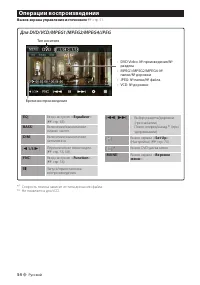
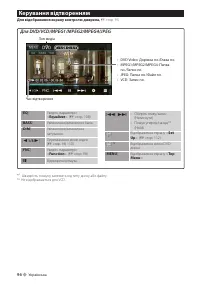
- 54 Операции воспроизведения
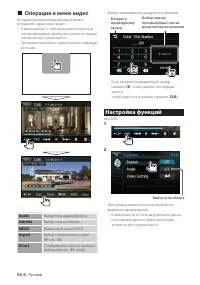
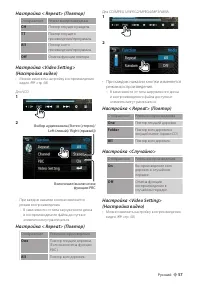
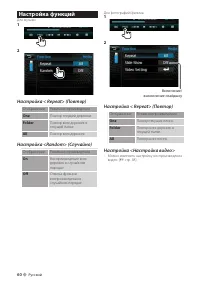
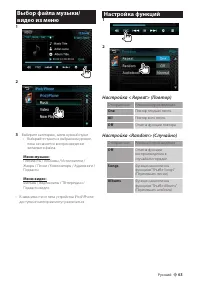
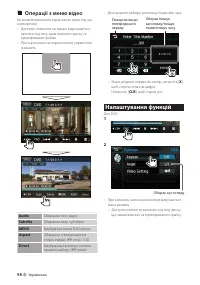
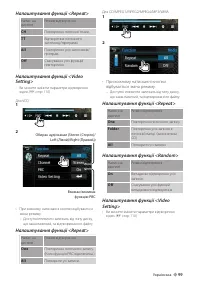
- 56 Операции в меню видео; Настройка функций
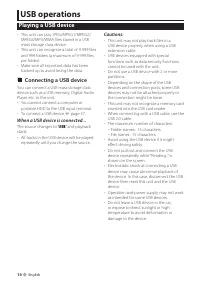
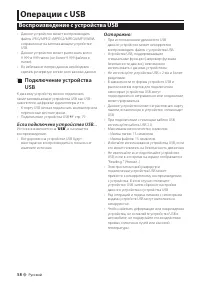
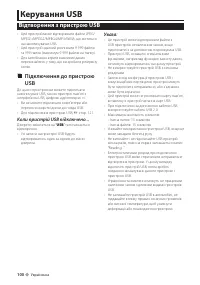
- 58 Воспроизведение с устройства USB; Операции с USB
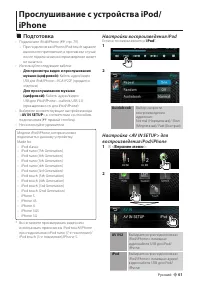
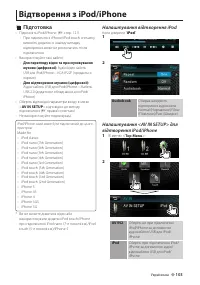
- 61 Подготовка; Прослушивание с устройства iPod/; Настройки воспроизведения iPod; воспроизведения iPod/iPhone
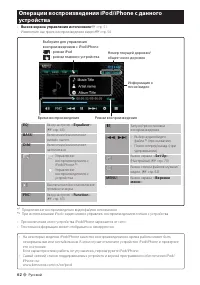
- 62 Операции воспроизведения iPod/iPhone с данного
- 63 видео из меню
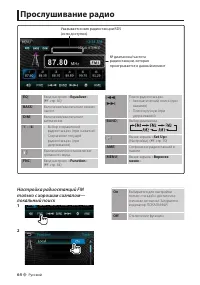
- 64 Прослушивание радио; Настройка радиостанций FM
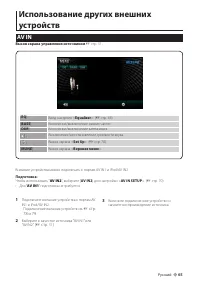
- 65 Использование других внешних
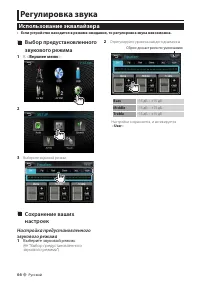
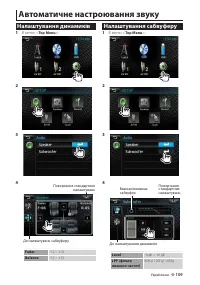
- 66 Регулировка звука; Настройка предустановленного; Использование эквалайзера
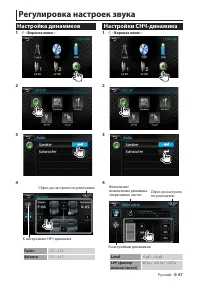
- 67 Регулировка настроек звука; Настройка динамиков; Настройки СНЧ-динамика
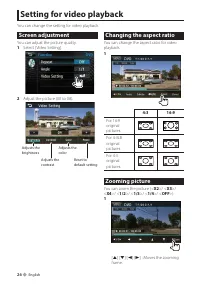
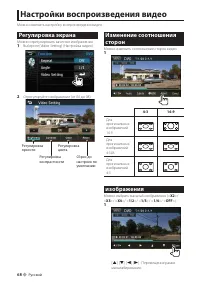
- 68 Настройки воспроизведения видео; Регулировка экрана; Изменение соотношения; Масштабирование
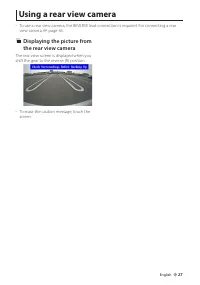
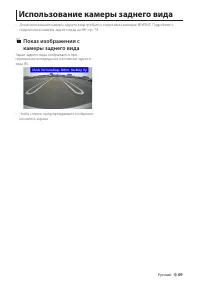
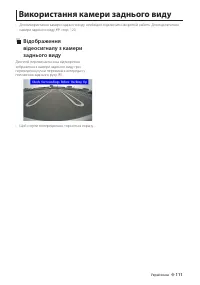
- 69 Использование камеры заднего вида
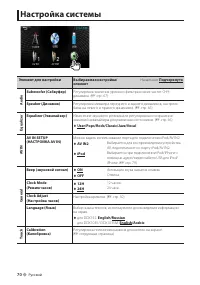
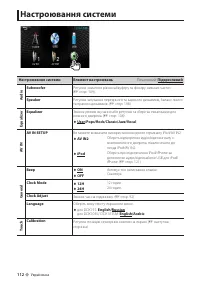
- 70 Настройка системы
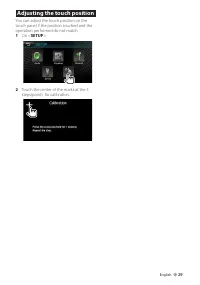
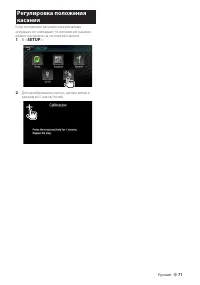
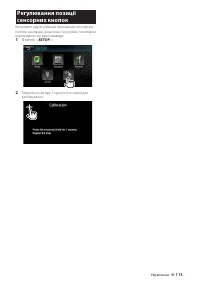
- 71 Регулировка положения
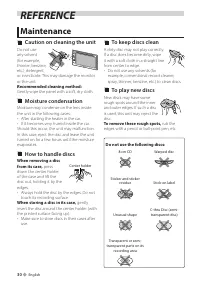
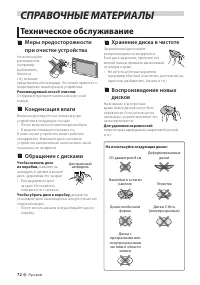
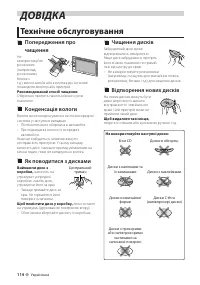
- 72 Конденсация влаги; Хранение диска в чистоте; СПРАВОЧНЫЕ МАТЕРИАЛЫ; Техническое обслуживание
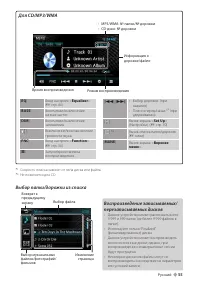
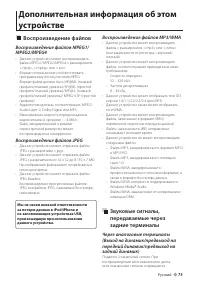
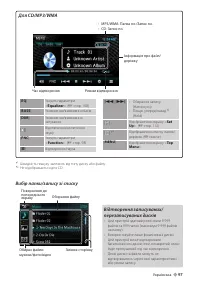
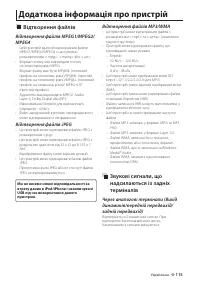
- 73 Воспроизведение файлов MP3/WMA; Через аналоговые терминалы; Воспроизведение файлов; Воспроизведение файлов MPEG1/; Воспроизведение файлов JPEG; Дополнительная информация об этом
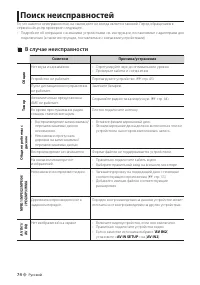
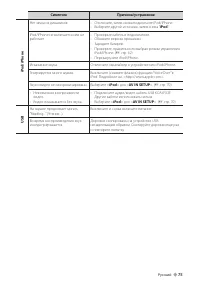
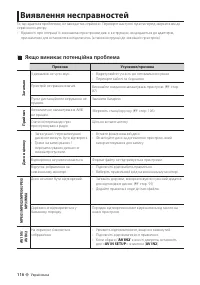
- 74 Поиск неисправностей; В случае неисправности
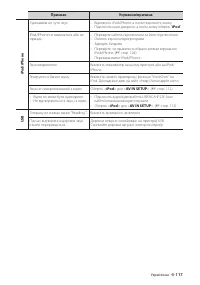
- 76 Принадлежности/процедура установки; Принадлежности
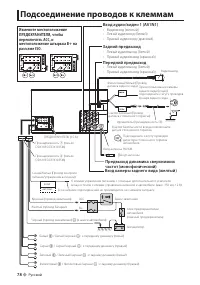
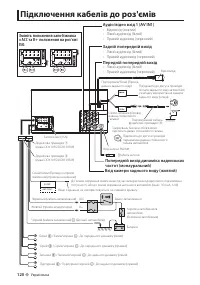
- 78 Подсоединение проводов к клеммам
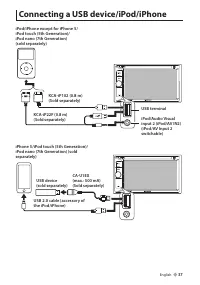
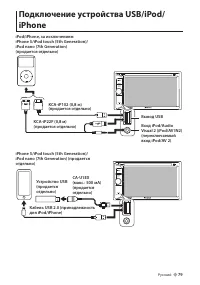
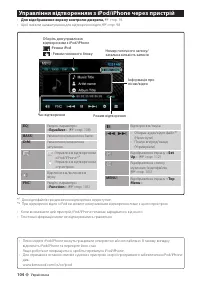
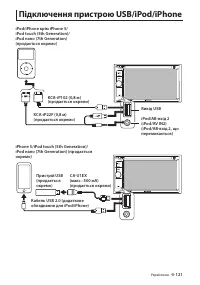
- 79 iPhone
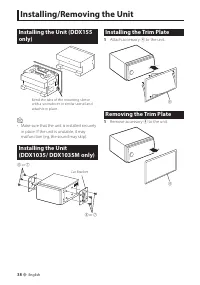
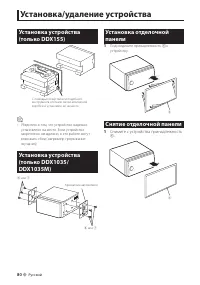
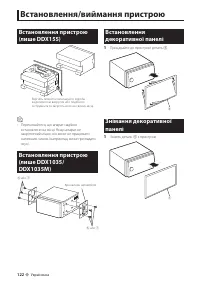
- 80 Установка устройства; Установка/удаление устройства; Установка отделочной; Снятие отделочной панели
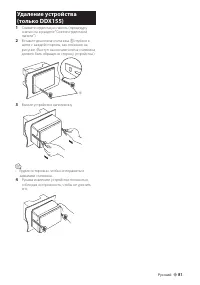
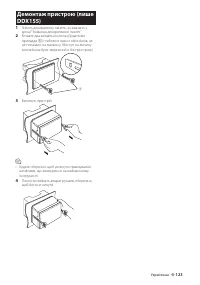
- 81 Удаление устройства
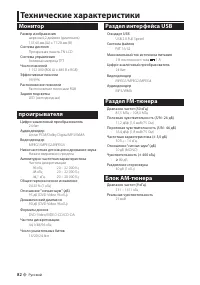
- 82 Технические характеристики; Монитор


