Магнитолы Elenberg MX-339 - инструкция пользователя по применению, эксплуатации и установке на русском языке. Мы надеемся, она поможет вам решить возникшие у вас вопросы при эксплуатации техники.
Если остались вопросы, задайте их в комментариях после инструкции.
"Загружаем инструкцию", означает, что нужно подождать пока файл загрузится и можно будет его читать онлайн. Некоторые инструкции очень большие и время их появления зависит от вашей скорости интернета.


16
Balance variable range is 10L ~ 10R (21 STEPS) which can be ad-
justed in steps.
5) FADER CONTROL
Press SEL button to select “FAD” on the display and turning the VOL
button to adjust front or rear channel volume.
Fader variable range is 10F ~10R (21 STEPS) which can be adjusted
in steps.
NOTE:
• Choose the mounting location where the unit will not interfere with the
normal driving function of the driver.
• Before finally installing the unit, connect the wiring temporarily and
make sure it is all connected up properly and the unit and the system
work properly.
• Use only the parts included with the unit to ensure proper installation.
The use of unauthorized parts can cause malfunctions.
• Consult with your nearest dealer if installation requires the drilling of
holes or other modifications of the vehicle.
• Install the unit where it does not get in the drive’s way and cannot in-
jure the passenger if there is a sudden stop. Like an emergency stop.
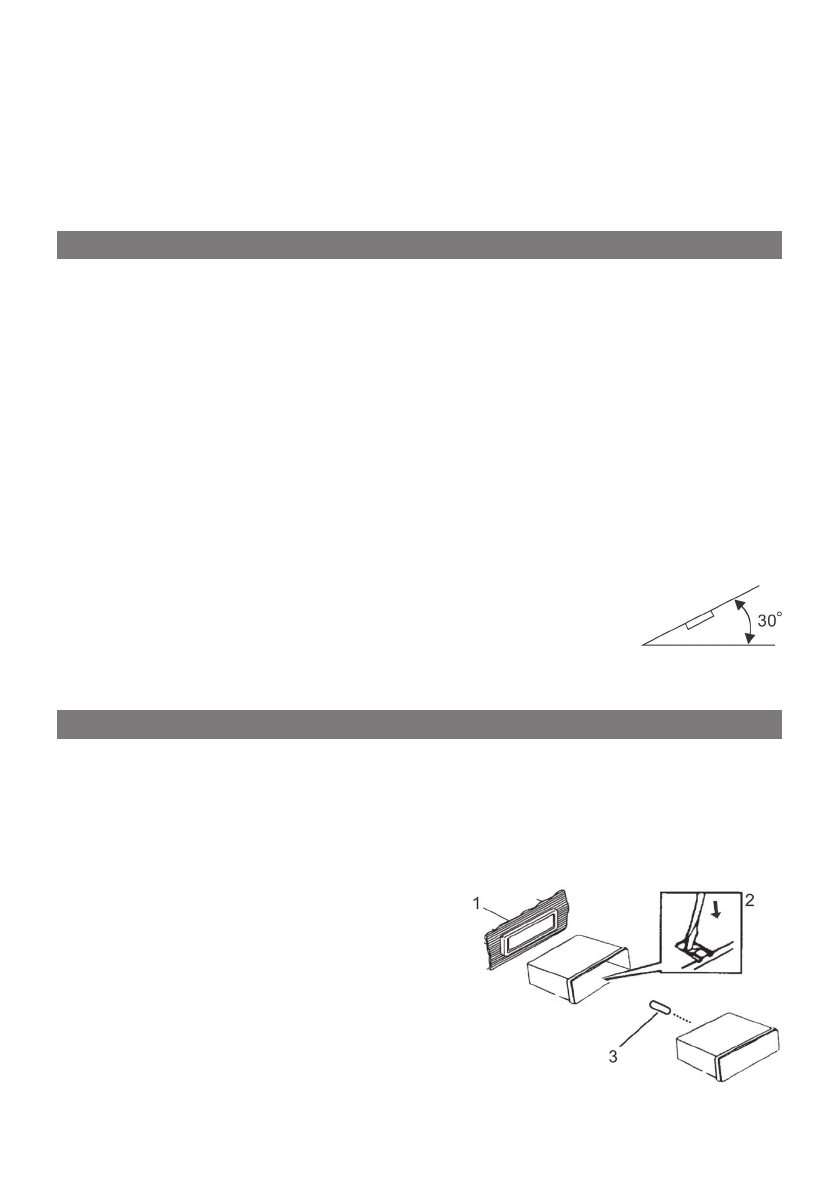
• If installation angle exceeds 30 from horizontal. The unit might not
give its optimum performance.
• Avoid installing the unit where it would be subject to
high temperature, such as from direct sunlight. Or from
hot air. From the heater. Or where it would be subject to dust . Dirt or
excessive vibration.
This unit can be properly installed either from “Front” (conventional DIN
Front-mount) or “Rear” (DIN Rear-mount installation, utilizing threaded
screw holes at the sides of the unit chassis). For detail, refer to the fol-
lowing illustrated installation methods.
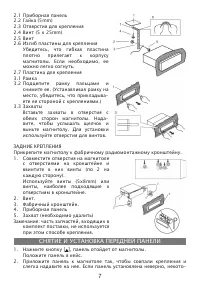
DIN FRONT-MOUNT
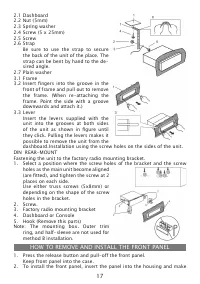
1.1 Dashboard
1.2 Holder
After inserting the holder into the
dashboard, select the appropri-
ate tab according to the thickness
of the dashboard material and bend
them inwards to secure the holder in
place.
1.3 Screw
INSTALLATION
DIN FRONT/REAR-MOUNT

