Лобзики Bosch GST 12V-70 (0615990M40) - инструкция пользователя по применению, эксплуатации и установке на русском языке. Мы надеемся, она поможет вам решить возникшие у вас вопросы при эксплуатации техники.
Если остались вопросы, задайте их в комментариях после инструкции.
"Загружаем инструкцию", означает, что нужно подождать пока файл загрузится и можно будет его читать онлайн. Некоторые инструкции очень большие и время их появления зависит от вашей скорости интернета.


18
| English
Pendulum action settings
The pendulum action can be adjusted using three different
settings, allowing the cutting speed, cutting capacity and the
cut itself to be optimally adapted to the material that you
want to cut.
You can also adjust the pendulum action during operation
using the adjusting lever
(8)
.
Level 0
No pendulum action
Level
Ⅰ
Low pendulum action
Level
Ⅱ
High pendulum action
The optimum pendulum level for each application can be de-
termined by a practical test. Note the following recommend-
ations:
– Select a lower pendulum level or switch off the pendulum
action completely if you wish to produce a finer or cleaner
cutting edge.
– Switch off the pendulum action when machining thin ma-
terials (e.g. sheets).
– Work on hard materials (e.g. steel) with low pendulum ac-
tion.
– You can work on soft materials and saw wood in the direc-
tion of the grain using maximum pendulum action.
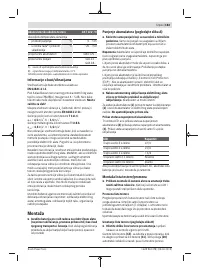
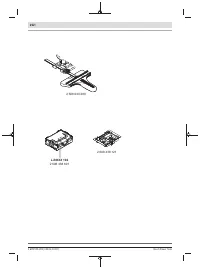
Adjusting the mitre/bevel angle (see figure H)
The base plate
(9)
can be swivelled to the right or left to
make mitre cuts up to 45°.
The extraction outlet
(16)
and anti-splinter guard
(18)
can-
not be used while mitre/bevel cuts are being made.
– Remove the extraction outlet
(16)
and the anti-splinter
guard
(18)
.
– For mitre/bevel angle 0°, there is a pin in a corresponding
recess.
– Loosen the screw
(23)
with the hex key
(24)
until you can
slide the base plate
(9)
in towards the battery
(1)
. Let the
pin slide into the guide groove.
– To adjust mitre/bevel angles, swivel the base plate
(9)
to
the required position according to the scale
(25)
. Every
angle can be adjusted to 45° using a protractor.
– Retighten the screw
(23)
.
Starting Operation
Inserting the battery
Note:
The use of batteries unsuitable for your power tool can
lead to malfunctions or damage to the power tool.
Insert the charged battery
(1)
into the battery receptacle un-
til you feel it engage and it is securely locked in place.
Switching on the LED worklight
To switch the worklight
(14)
on or off, press the worklight
button
(3)
.
u
Do not look directly into the worklight; it can blind
you.
Switching on/off
u
Make sure that you are able to press the On/Off switch
without releasing the handle.
To
switch on
the power tool, slide the on/off switch
(7)
for-
wards so that
"I"
appears on the switch.
To
switch off
the power tool, slide the on/off switch
(7)
backwards so that
"0"
appears on the switch.
Restart protection
The restart protection feature prevents the power tool from
uncontrolled starting after the power supply to it has been
interrupted. Once the restart protection is active, the tem-
perature monitoring/overload protection indicator
(6)
flashes continuously.
To restart the tool, set the on/off switch
(7)
to the off posi-
tion and then switch the power tool on again.
Note:
Rapidly switching the power tool off and on again may
trigger the restart protection, meaning the power tool may
not start up even if the on/off switch
(7)
is pressed. Set the
on/off switch
(7)
to the off position and then switch the
power tool on again.
Preselect the stroke rate
You can also preselect the stroke rate and change it during
operation using the stroke rate preselection thumbwheel
(5)
.
The required stroke rate is dependent on the material and
the work conditions and can be determined using practical
tests.
It is recommended that you reduce the stroke rate when
placing the saw blade on the workpiece and when sawing
plastic and aluminium.
During prolonged periods of use at a low stroke rate, the
power tool may heat up significantly. Remove the saw blade
and let the power tool run at the maximum stroke rate for
around three minutes to cool down.
Temperature-dependent overload protection
In normal conditions of use, the power tool cannot be over-
loaded. If the power tool is overloaded or not kept within the
permitted battery temperature range, the speed is reduced
or the power tool switches off. At reduced speed, the power
tool will run again at full speed once the permitted battery
temperature is reached or the load is reduced. If it automat-
ically shuts down, switch the power tool off, allow the bat-
tery to cool down, then switch the power tool back on.
Temperature monitoring/overload protection indicator
The red temperature monitoring/overload protection indic-
ator
(6)
helps you to protect the battery against overheating
and the motor against overload.
If the temperature monitoring/overload protection indic-
ator
(6)
is lit up
permanently in red
, the temperature of the
battery is too high and the power tool switches off automat-
ically.
Switch the power tool off and allow the battery to cool down
before you carry on working.
If the temperature monitoring/overload protection indic-
ator
(6)
is
flashing
red
, then the power tool is blocked and
will switch off automatically.
1 609 92A 4TB | (28.03.2019)
Bosch Power Tools
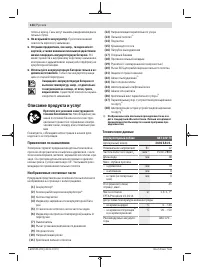
Содержание
- 134 Описание продукта и услуг; Применение по назначению
- 135 Данные по шуму и вибрации; Сборка; Установка/смена пильного полотна
- 136 Удаление пыли и стружки; Работа с инструментом; Режимы работы
- 137 Включение электроинструмента
- 138 Указания по применению; Техобслуживание и сервис; Техобслуживание и очистка
- 139 Транспортировка
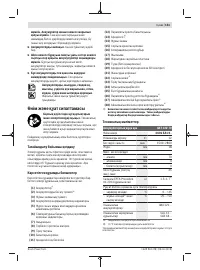
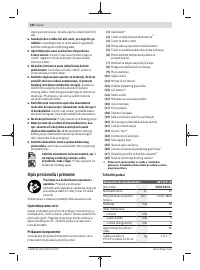
Характеристики

Остались вопросы?Не нашли свой ответ в руководстве или возникли другие проблемы? Задайте свой вопрос в форме ниже с подробным описанием вашей ситуации, чтобы другие люди и специалисты смогли дать на него ответ. Если вы знаете как решить проблему другого человека, пожалуйста, подскажите ему :)


