Кондиционеры Neoclima NS-07 - инструкция пользователя по применению, эксплуатации и установке на русском языке. Мы надеемся, она поможет вам решить возникшие у вас вопросы при эксплуатации техники.
Если остались вопросы, задайте их в комментариях после инструкции.
"Загружаем инструкцию", означает, что нужно подождать пока файл загрузится и можно будет его читать онлайн. Некоторые инструкции очень большие и время их появления зависит от вашей скорости интернета.

Page 22
Indoor Unit
Installation
Step 4: Prepare refrigerant piping
The refrigerant piping is inside an insulating
sleeve attached to the back of the unit. You
must prepare the piping before passing it
through the hole in the wall.
1. Based on the position of the wall hole relative
to the mounting plate, choose the side from
which the piping will exit the unit.
2. If the wall hole is behind the unit, keep the
knock-out panel in place. If the wall hole is to
the side of the indoor unit, remove the plastic
knock-out panel from that side of the unit.
3.
If existing connective piping is already
embedded in the wall, proceed directly to
the
Connect Drain Hose
step. If there is no
embedded piping, connect the indoor unit’s
refrigerant piping to the connective piping
that will join the indoor and outdoor units.
Refer to the
Refrigerant Piping Connection
section of this manual for detailed instructions.
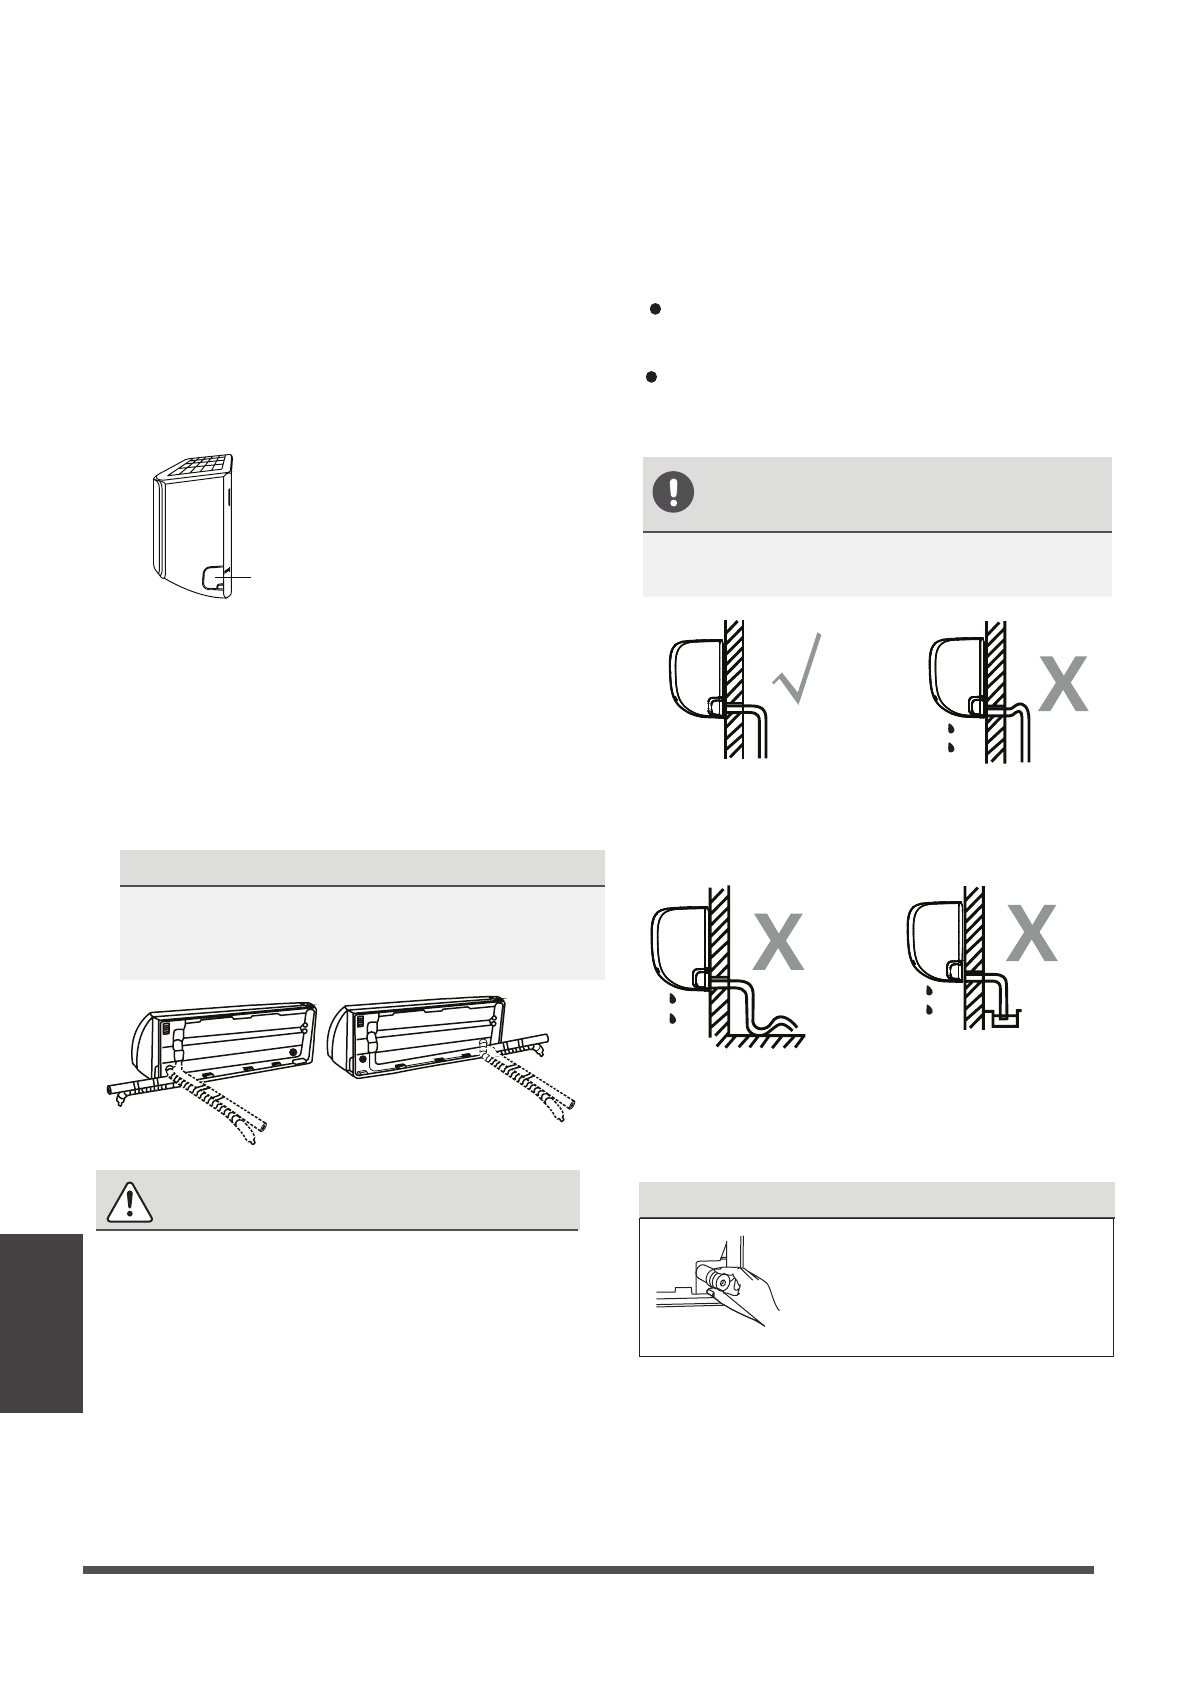
NOTE ON PIPING ANGLE
Refrigerant piping can exit the indoor unit from
four different angles:Left-hand side,Right-hand
side, Left rear, Right rear.
Knock-out Panel
CAUTION
Be extremely careful not to dent or damage
the piping while bending them away from
the unit. Any dents in the piping will affect
the unit’s performance.
Step 5:
Connect drain hose
By default, the drain hose is attached to the left-
hand side of unit (when you’re facing the back
of the unit). However, it can also be attached to
the right-hand side. To ensure proper drainage,
attach the drain hose on the same side that your
refrigerant piping exits the unit.
Wrap the connection point firmly with Teflon
tape to ensure a good seal and to prevent leaks.
Remove the air filter and pour a small amount
of water into the drain pan to make sure that
water flows from the unit smoothly.
NOTE ON DRAIN HOSE
PLACEMENT
Make sure to arrange the drain hose
according to the following figures.
.
PLUG THE UNUSED DRAIN HOLE
To prevent unwanted leaks
you must plug the unused
drain hole with the rubber
plug provided.
CORRECT
Make sure there are no kinks
or dent in drain hose to ensure
proper drainage.
NOT CORRECT
Kinks in the drain hose
will create water traps.
NOT CORRECT
Do not place the end of the
drain hose in water or in
containers that collect water.
This will prevent proper
drainage.
NOT CORRECT
Kinks in the drain hose
will create water traps.
Характеристики
Остались вопросы?Не нашли свой ответ в руководстве или возникли другие проблемы? Задайте свой вопрос в форме ниже с подробным описанием вашей ситуации, чтобы другие люди и специалисты смогли дать на него ответ. Если вы знаете как решить проблему другого человека, пожалуйста, подскажите ему :)


