Кондиционеры Elenberg SPT-7070 - инструкция пользователя по применению, эксплуатации и установке на русском языке. Мы надеемся, она поможет вам решить возникшие у вас вопросы при эксплуатации техники.
Если остались вопросы, задайте их в комментариях после инструкции.
"Загружаем инструкцию", означает, что нужно подождать пока файл загрузится и можно будет его читать онлайн. Некоторые инструкции очень большие и время их появления зависит от вашей скорости интернета.

27
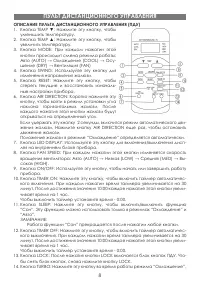
of the LOCK. Press again to cancel the LOCK mode.
14. TURBO Button: Push this button on COOL mode, the air conditioner goes into
powerful cooling operation. Push again to cancel the TURBO function (Not avail-
able for the air conditioner without TURBO function).
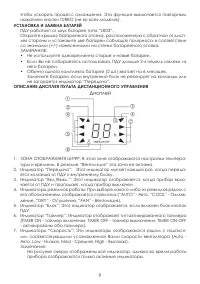
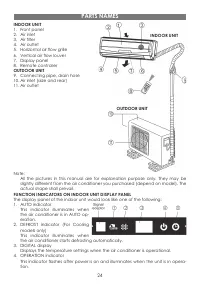
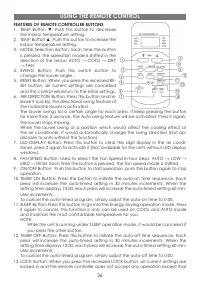
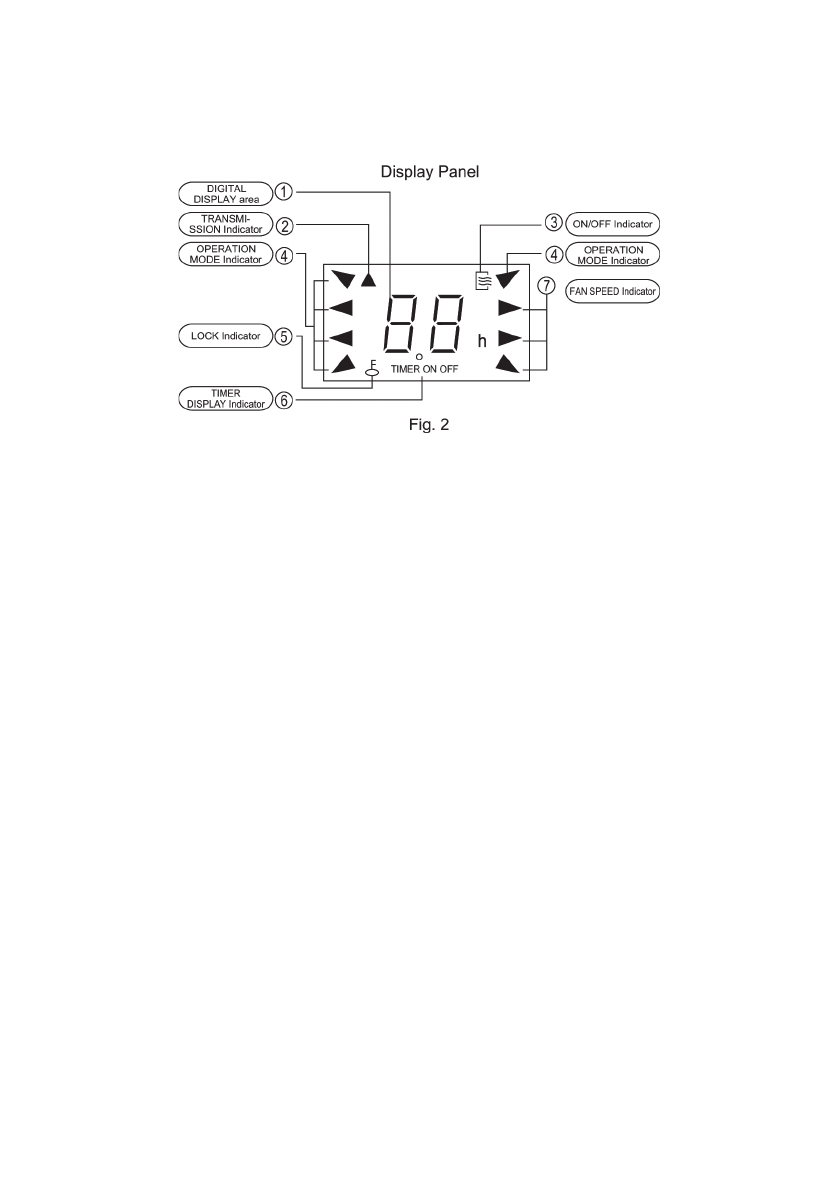
indiCAtoRs on displAy pAnel
1. DIGITAL DISPLAY area: This area will show the set temperature and, if in the TIMER
mode, will show the ON and OFF settings of the TIMER. If in the FAN mode, nothing
is appeared.
2. TRANSMISSION Indicator: This indicator lashes one time when remote controller
transmits signals to the indoor unit.
3. ON/OFF Indicator: This symbol appears when the unit is turned on by the remote
controller, and disappear when the unit is turned off.
4. OPERATION MODE Indicator: When press the MODE button, it shows the current
operating mode: “AUTO”, “COOL”, “DRY” or “FAN” mode.
5. LOCK Indicator: LOCK display is displayed by pushing the LOCK button. Push the
LOCK button to clear display.
6. TIMER DISPLAY Indicator: This display area shows the settings of the TIMER. That is,
if only the starting time of operation is set, it will display the TIMER ON. If only the
turning off time of operation is set, it will display the TIMER OFF. If both operations
are set, it will show TIMER ON-OFF which indicates you have chosen to set both
the starting time and off time.
7. FAN SPEED Indicator: Press the FAN SPEED button to select the desired fan speed
setting (Auto-Low-Med-High). You selection will be displayed in the LCD window
except the Auto fan speed.
NOTE:
All signs shown in the Fig.2 is for the purpose of clear presentation. But during
the actual operation only the relative functional signs are shown on the dis-
play panel.
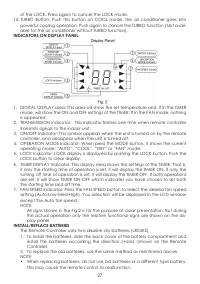
instAll/ReplACe bAtteRies
The Remote Controller uses two alkaline dry batteries (LR03X2).
1. To install the batteries, slide the back cover of the battery compartment and
install the batteries according the direction (+and -)shown on the Remote
Controller.
2. To replace the old batteries, use the same method as mentioned above.
NOTE
• When replacing batteries, do not use old batteries or a different type battery.
This may cause the remote control to malfunction.
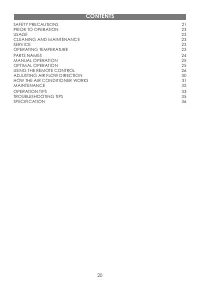
Содержание
- 3 Меры предосторожности
- 6 описание приБора
- 7 ручное управление
- 8 пульт дистанционноГо управления
- 10 управление приБороМ
- 11 ЭффеКтивность раБоты приБора
- 12 выБор направления воздуШноГо потоКа
- 13 основные принципы раБоты приБора
- 14 ЭКсплуатация
- 15 дополнительная инфорМация по раБоте приБора
- 17 устранение неполадоК
- 18 специфиКация

