
Холодильник Liebherr K 3120 Comfort - инструкция пользователя по применению, эксплуатации и установке на русском языке. Мы надеемся, она поможет вам решить возникшие у вас вопросы при эксплуатации техники.
Если остались вопросы, задайте их в комментариях после инструкции.
"Загружаем инструкцию", означает, что нужно подождать пока файл загрузится и можно будет его читать онлайн. Некоторые инструкции очень большие и время их появления зависит от вашей скорости интернета.

DANGER
identifies a situation involving direct
danger which, if not obviated, may
result in death or severe bodily
injury.
WARNING
identifies a dangerous situation
which, if not obviated, may result in
death or severe bodily injury.
CAUTION
identifies a dangerous situation
which, if not obviated, may result in
minor or medium bodily injury.
NOTICE
identifies a dangerous situation
which, if not obviated, may result in
damage to property.
Note
identifies useful information and tips.
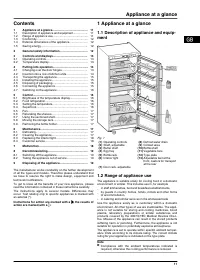
3 Controls and displays
3.1 Operating controls
Fig. 3
(1) On/Off button
(6) SuperCool symbol
(2) SuperCool button
(7) Brightness symbol
(3) Temperature indicator
(8) Ventilation symbol
(4) Adjustment button
(9) Menu symbol
(5) Ventilation button
3.2 Temperature display
The following are displayed in normal operation:
-
the set cooling temperature
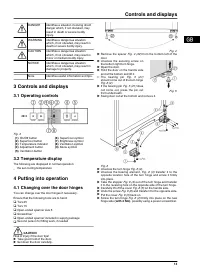
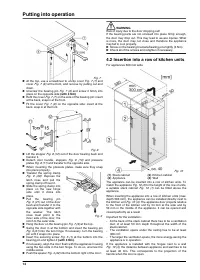
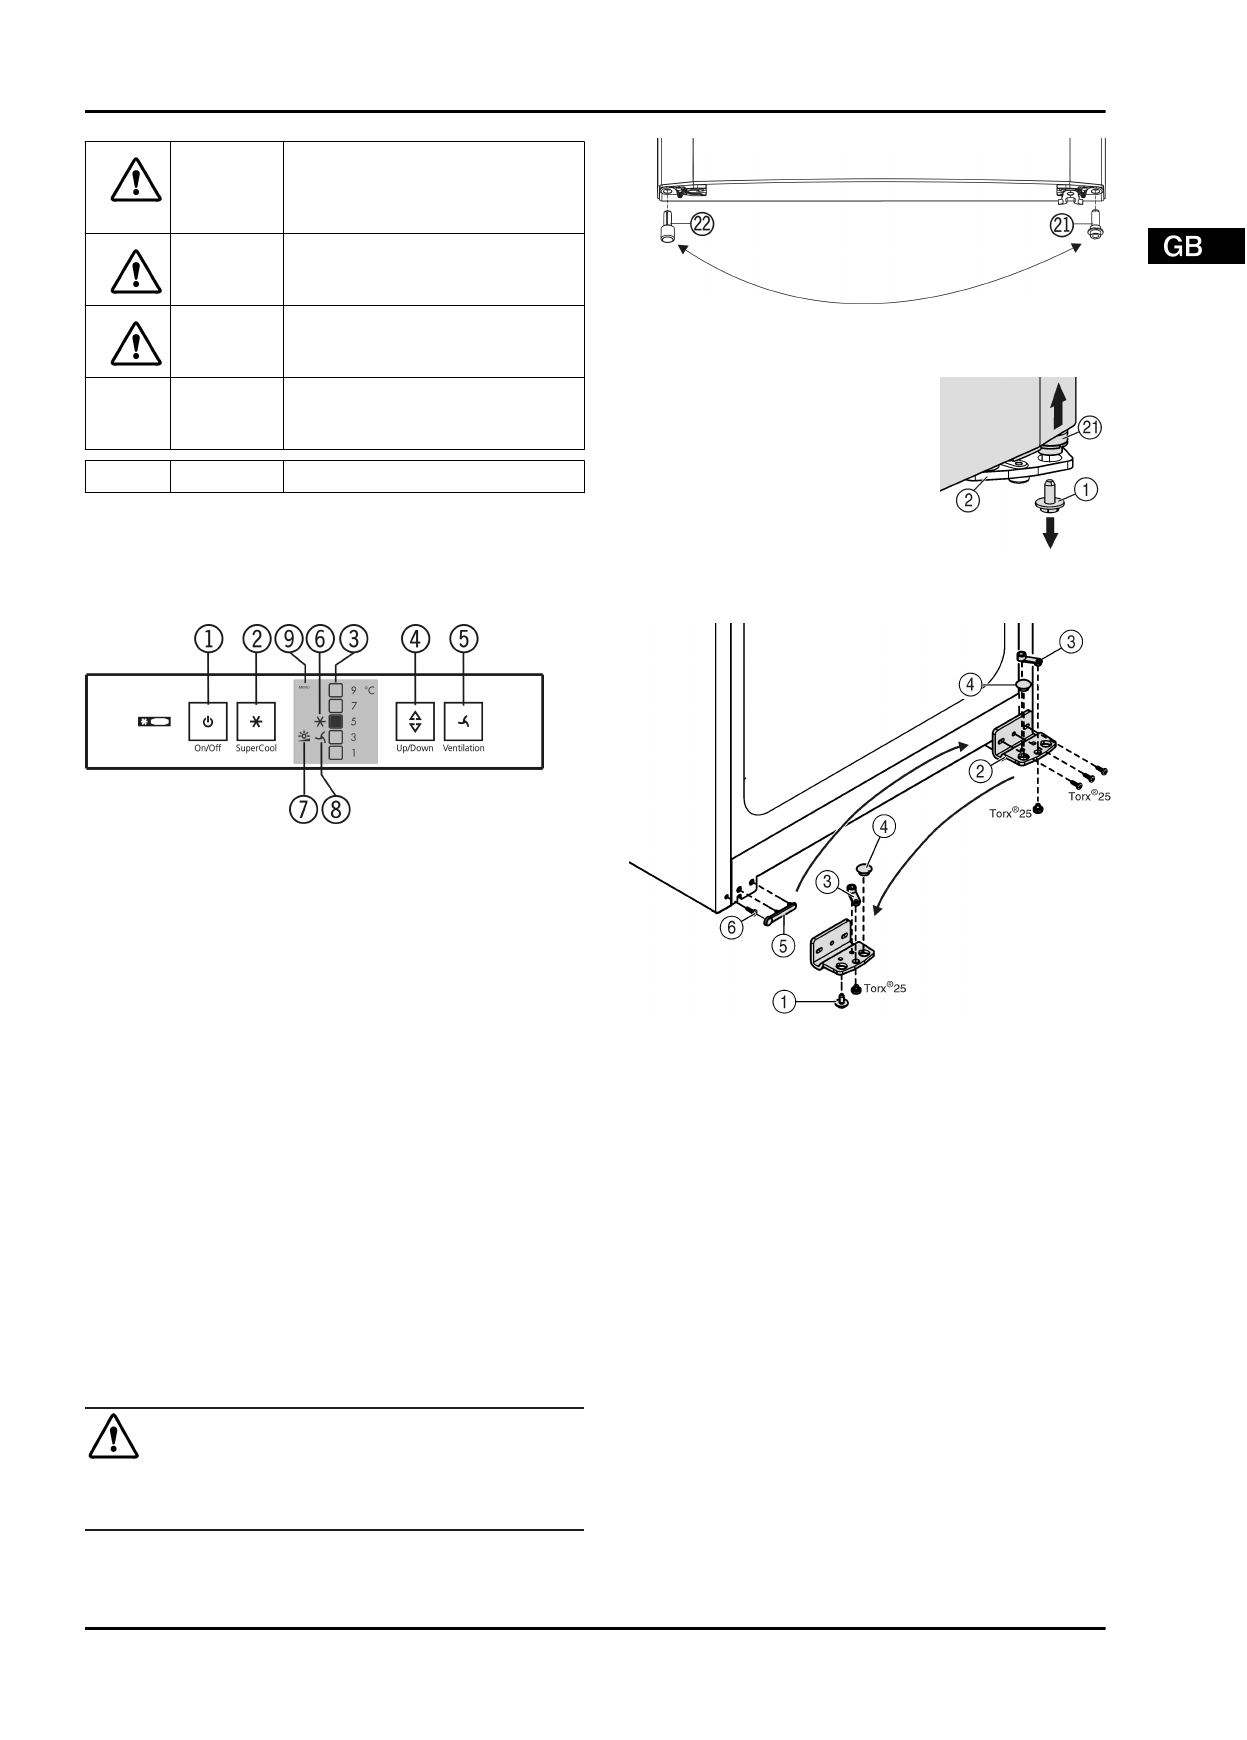
4 Putting into operation
4.1 Changing over the door hinges
You can change over the door hinges if necessary.
Ensure that the following tools are to hand:
q
Torx 25
q
Torx 15
q
Open-ended spanner size 6
q
Screwdriver
q
Open-ended spanner included in supply package
q
Second person for fitting work, if needed
CAUTION
Risk of injury if the door tips!
u
Take good hold of the door.
u
Set down the door carefully.
Fig. 4
u
Remove the spacer
Fig. 4 (22) from the bottom left of the
door.
u
Unscrew the securing screw on
the bottom right turn hinge.
u
Open the door.
u
Hold the door on the handle side
and at the bottom and lift it.
w
The bearing pin
Fig. 5 (21)
should come out of the turn hinge
Fig. 6 (2).
u
If the bearing pin
Fig. 5 (21) does
not come out, press the pin out
from underneath.
Fig. 5
u
Swing door out at the bottom and remove it.
Fig. 6
u
Unscrew the turn hinge
Fig. 6 (2).
u
Unscrew the bearing element,
Fig. 6 (3) transfer it to the
opposite location hole of the turn hinge and screw it firmly
into place.
u
Take the stopper
Fig. 6 (4) out of the turn hinge and transfer
it to the receiving hole on the opposite side of the turn hinge.
u
Carefully lift off the cover
Fig. 6 (5) on the handle side.
u
Undo the screw
Fig. 6 (6) and transfer it to the opposite side.
u
Put the cover
Fig. 6 (5) back on.
u
Screw the turn hinge
Fig. 6 (2) firmly into place on the new
hinge side (with 4 Nm), possibly using a power screwdriver.
Controls and displays
13
Характеристики

Остались вопросы?Не нашли свой ответ в руководстве или возникли другие проблемы? Задайте свой вопрос в форме ниже с подробным описанием вашей ситуации, чтобы другие люди и специалисты смогли дать на него ответ. Если вы знаете как решить проблему другого человека, пожалуйста, подскажите ему :)


