
Холодильник Liebherr IGS 1101 - инструкция пользователя по применению, эксплуатации и установке на русском языке. Мы надеемся, она поможет вам решить возникшие у вас вопросы при эксплуатации техники.
Если остались вопросы, задайте их в комментариях после инструкции.
"Загружаем инструкцию", означает, что нужно подождать пока файл загрузится и можно будет его читать онлайн. Некоторые инструкции очень большие и время их появления зависит от вашей скорости интернета.
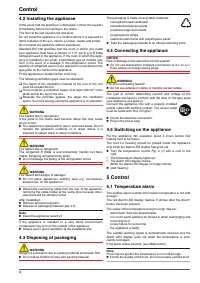
4.2 Installing the appliance
In the event that the appliance is damaged, contact the supplier
immediately before connecting to the mains.
The floor at the site must be flat and level.
Do not install the appliance in a location where it is exposed to
direct radiation of the sun, next to a cooker, heater and similar.
Do not install the appliance without assistance.
Standard EN 378 specifies that the room in which you install
your appliance must have a volume of 1 m
2
per 8 g of R 600a
refrigerant used in the appliance. If the room in which the appli-
ance is installed is too small, a flammable gas-air mixture may
form in the event of a leakage in the refrigeration circuit. The
quantity of refrigerant used in your appliance is indicated on the
type plate on the inside of the appliance.
Fit the appliance in stable kitchen units only.
The following ventilation gaps must be observed:
q
The depth of the ventilation channel at the rear of the unit
must be at least 38 mm.
q
There must be a ventilation space of at least 200 cm
2
in the
plinth and at the top of the unit.
q
Basically the principle applies: the larger the ventilation
space, the more energy-saving the appliance is in operation.
WARNING
Fire hazard due to dampness!
If live parts or the mains lead become damp this may cause
short circuits.
u
The appliance is designed for use in enclosed areas. Do not
operate the appliance outdoors or in areas where it is
exposed to splash water or damp conditions.
WARNING
Fire hazard due to refrigerant!
The refrigerant R 600a is environmentally friendly but flam-
mable. Escaping refrigerant may ignite.
u
Do not damage the piping of the refrigeration circuit.
WARNING
Fire hazard and danger of damage!
u
Do not place appliances emitting heat e.g. microwaves,
toasters etc. on the appliance!
u
Detach the connecting cable from the rear of the appliance,
removing the cable holder at the same time because other-
wise there will be vibratory noise!
After installation:
u
Remove all transit supports.
u
Dispose of packaging material (see 4.3) .
Note
u
Clean the appliance (see 6.2) .
If the appliance is installed in a very damp environment,
condensate may form on the outside of the appliance.
u
Always see to good ventilation at the installation site.
4.3 Disposing of packaging
WARNING
Danger of suffocation due to packing material and plastic film!
u
Do not allow children to play with packing material.
The packaging is made of recyclable materials:
-
corrugated board/cardboard
-
expanded polystyrene parts
-
polythene bags and sheets
-
polypropylene straps
-
nailed wooden frame with polyethylene panel*
u
Take the packaging material to an official collecting point.
4.4 Connecting the appliance
NOTICE
Risk of damage to the electronic control system!
u
Do not use stand-alone inverters (conversion of d.c. to a.c./
three-phase) or energy saving plugs.
WARNING
Fire and overheating hazard!
u
Do not use extension cables or multiple socket outlets.
The type of current (alternating current) and voltage at the
installation site have to conform with the data on the type plate
(see Appliance at a glance).
Connect the appliance only with a properly installed
socket outlet with earthing contact. The socket outlet
must be fused with 10 A or higher.
u
Check the electrical connection.
u
Plug in the power plug.
4.5 Switching on the appliance
Put the appliance into operation about 4 hours before first
loading food to be frozen.
The food for freezing should be placed inside the appliance
only when the Alarm LED display has gone out.
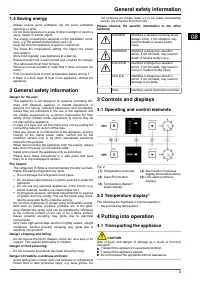
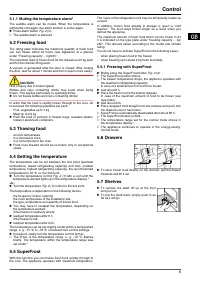
u
Turn the temperature control
Fig. 2 (1) with a coin to the
right.
w
The temperature display lights up.*
w
The Alarm LED display shines.
When the Alarm LED display no longer shines:
u
start freezing .
5 Control
5.1 Temperature alarm
The audible alarm sounds if the freezer temperature is not cold
enough.*
The red Alarm LED display flashes. It shines after the Alarm*
button has been pressed.
The cause of the temperature being too high may be:
-
warm fresh food was placed inside
-
too much warm ambient air flowed in when rearranging and
removing food
-
power failure for some time
-
the appliance is faulty
The audible warning signal is automatically silenced and the
Alarm LED display goes out when the temperature is suffi-
ciently cold again.
If the alarm status persists: (see Malfunction).
Note
Food may be spoilt if the temperature is not cold enough.
u
Check the quality of the food. Do not consume spoiled food.
Control
4
Характеристики

Остались вопросы?Не нашли свой ответ в руководстве или возникли другие проблемы? Задайте свой вопрос в форме ниже с подробным описанием вашей ситуации, чтобы другие люди и специалисты смогли дать на него ответ. Если вы знаете как решить проблему другого человека, пожалуйста, подскажите ему :)


