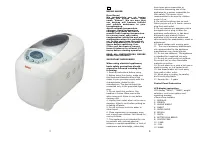
Хлебопечки Saturn ST-EC0129 - инструкция пользователя по применению, эксплуатации и установке на русском языке. Мы надеемся, она поможет вам решить возникшие у вас вопросы при эксплуатации техники.
Если остались вопросы, задайте их в комментариях после инструкции.
"Загружаем инструкцию", означает, что нужно подождать пока файл загрузится и можно будет его читать онлайн. Некоторые инструкции очень большие и время их появления зависит от вашей скорости интернета.


5
·
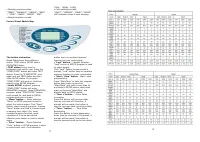
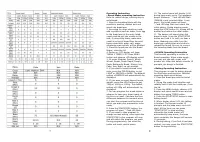
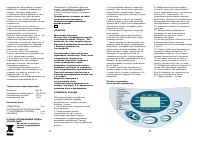
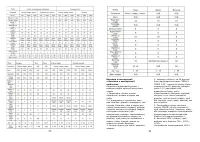
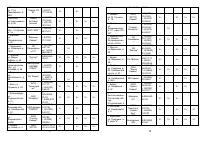
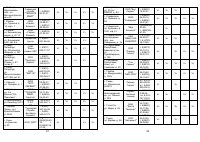
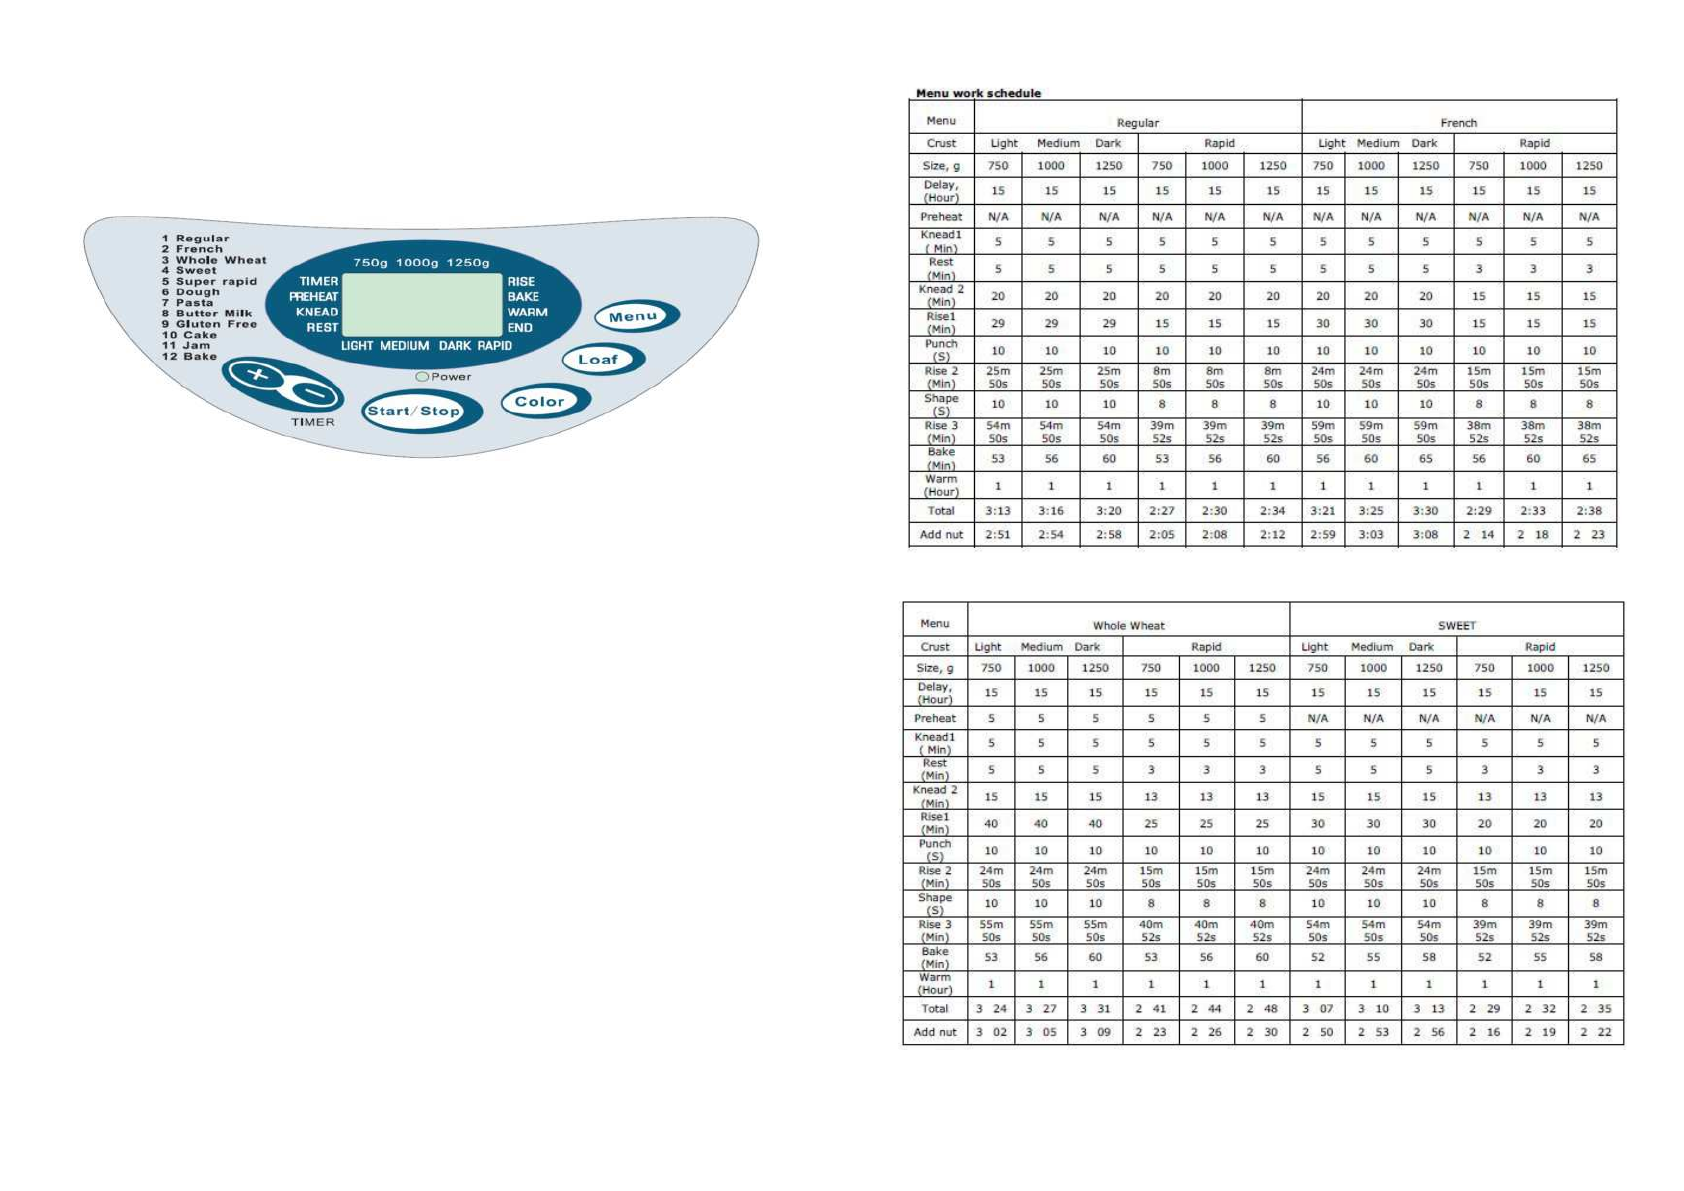
Working process contain:
“TIMER”
;
“PREHEAT”
;
“KNEAD”
;
“REST
”
;
“RISE”
;
“BAKE”
;
“WARM”
;
“END”
·
Weight selection contain
:
750g ; 1000g; 1250g
·
Color settings contain:
“LIGHT”; “MEDIUM”; “DARK”; “RAPID”
LED indicator shows if start working.
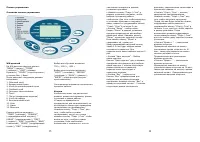
Control Panel Sketch Map
The button instruction
Bread Maker have three different
status
:
TEST status, SETUP status,
OPERATING status.
·
TEST status
is only used in
production test not for user. Press the
"START/STOP" button and enter TEST
status. Press the “START/STOP” once
again and exit TEST status and then
enter SETUP status. If not press
“START/STOP” but plug on, and then
directly enter SETUP program.
·
Under SETUP
program, pressing
“START/STOP” button will enter
OPERATING program. Under OPERATING
program, press “START/STOP” button
until exceed 2s, and back to SETUP
program and current menu.
·
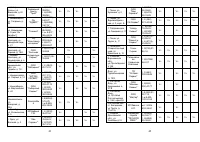
“
Menu” button
----Menu selection
“Menu” in SETUP program is used to
select the various menu. Click “Menu”
button, buzzer sound a prompt. If press
“Menu” button and hold it, buzzer sound
a warning tone, after 0.5s, enter
constant pressure function, quick
repetition of 5 times per second
effective press button is used to switch
menu.
·
"
Color" button
----Crust Selection
"Color" button in SETUP program is used
to select crust color. Crust selection
button have no constant pressure
function but only cycle switch.
·
"Loaf" button
----Weight Selection
“Loaf” button in SETUP program is used
to select weight.
Click “Loaf” button, buzzer sound a
prompt, “Loaf” button have no constant
pressure function but only cycle switch.
·
"
Start / Stop" button
- start / stop
programming
Press “Start/Stop” to start the program,
before keep warm cycle press
“Start/Stop” and hold it more than 2s
and back to SETUP status; after keep
warm cycle press “Start/Stop” and
directly back to SETUP status.
·
“Time +”button
----Time Delay
increasing
Press this button will increase delay
time by intervals of 10minutes. A
prompt will be heard; this button is
used to increase quick cycle time delay.
·
"Time-" button
---- Time Delay
descending
Press this button to have descending
delay time by intervals of 10minutes. A
prompt will be heard; this button is
used to descend quick cycle time delay.
6

