
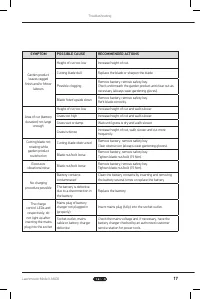
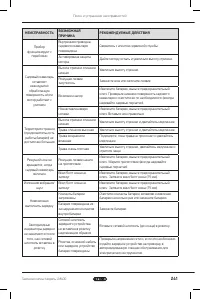
Газонокосилки OREGON LM400 609479 - инструкция пользователя по применению, эксплуатации и установке на русском языке. Мы надеемся, она поможет вам решить возникшие у вас вопросы при эксплуатации техники.
Если остались вопросы, задайте их в комментариях после инструкции.
"Загружаем инструкцию", означает, что нужно подождать пока файл загрузится и можно будет его читать онлайн. Некоторые инструкции очень большие и время их появления зависит от вашей скорости интернета.


13
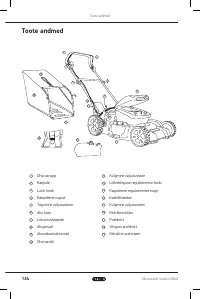
Lawnmower Model LM400
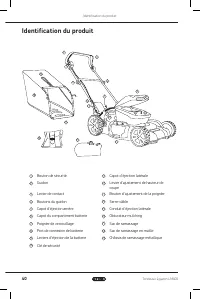
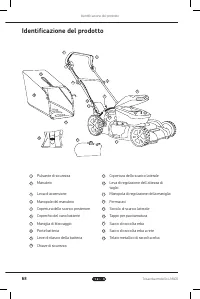
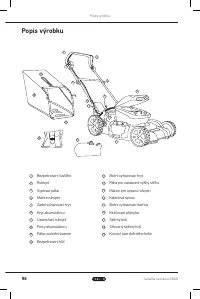
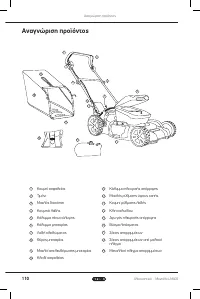
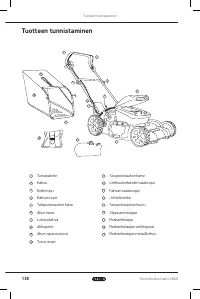
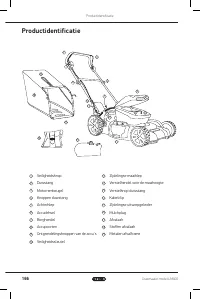
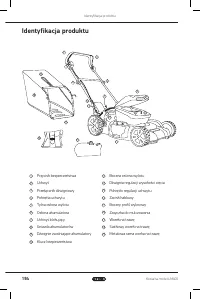
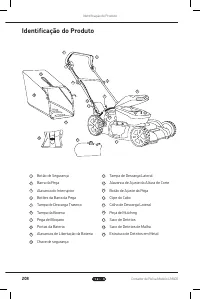
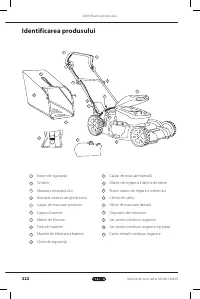
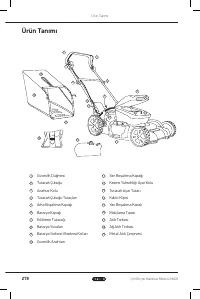
Product Identification
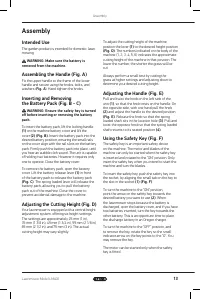
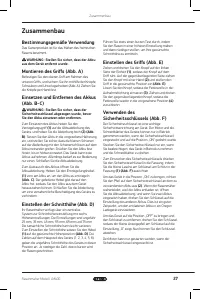
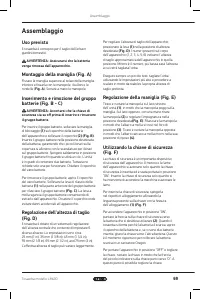
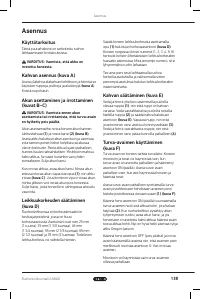
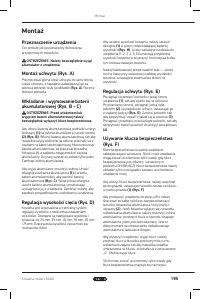
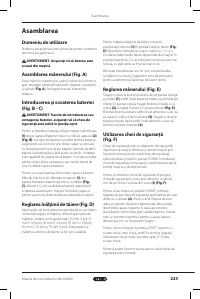
Assembly
Assembly
Intended Use
The garden product is intended for domestic lawn
mowing
WARNING: Make sure the battery is
removed from the machine.
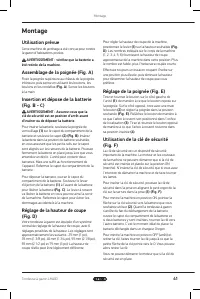
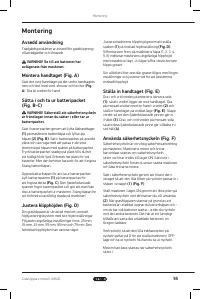
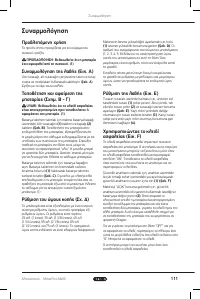
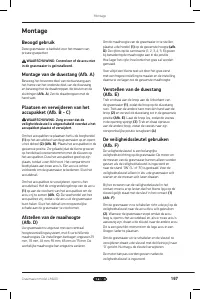
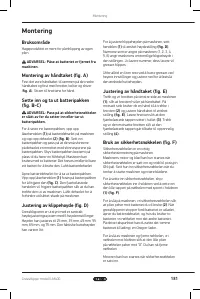
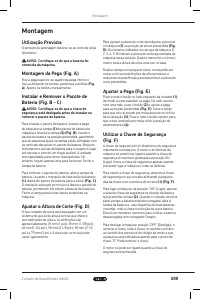
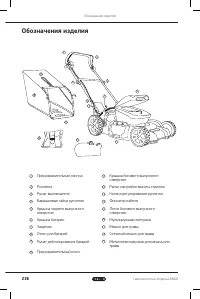
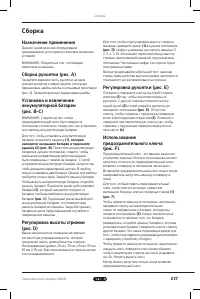
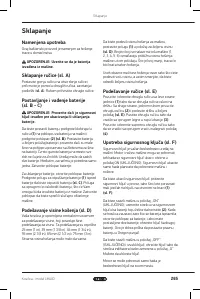
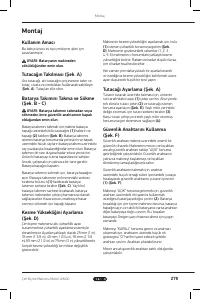
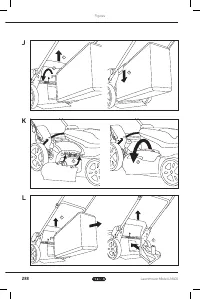
Assembling the Handle (Fig. A)
Fix the upper handle to the frame of the lower
handle and secure using the knobs, bolts, and
washers (
Fig. A
) Hand tighten the knobs
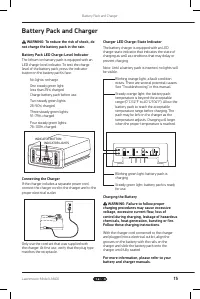
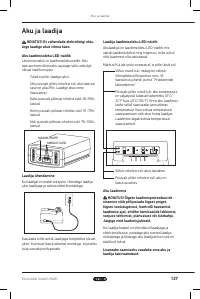
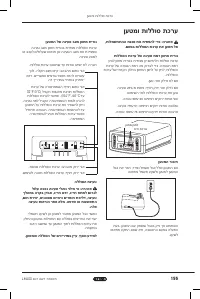
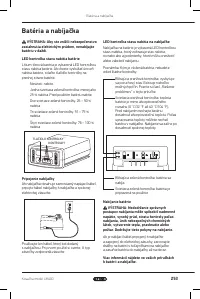
Inserting and Removing
the Battery Pack (Fig. B - C)
WARNING: Ensure the safety key is turned
off before inserting or removing the battery
pack.
To insert the battery pack, lift the locking handle
(1)
on the machine battery cover and lift the
cover
(2)
(Fig. B)
Insert the battery pack into the
desired battery position, ensuring the small rails
on the cover align with the rail slots on the battery
pack Firmly push the battery pack into place, until
you hear an audible click sound The unit is capable
of holding two batteries However it requires only
one to operate Close the battery cover
To remove the battery pack, open the battery
cover Lift the battery release lever
(1)
in front
of the battery pack to release the battery pack
(Fig. C)
The spring loaded lever will release the
battery pack, allowing you to pull the battery
pack out of the machine Close the cover to
prevent accidental damage to the machine
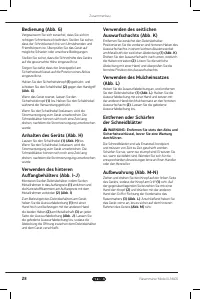
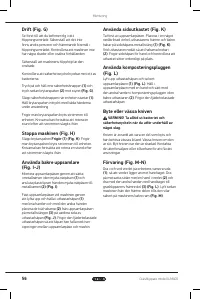
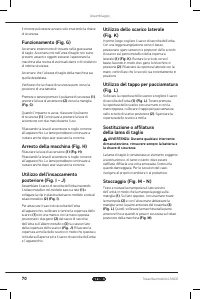
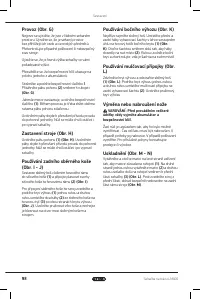
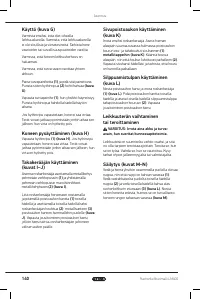
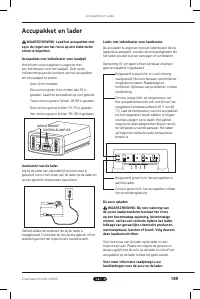
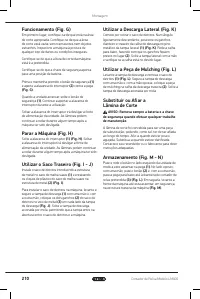
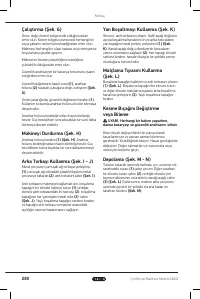
Adjusting the Cutting Height (Fig. D)
Your lawnmower is equipped with a central height
adjustment system, offering six height settings
The settings are approximately 25 mm (1 in),
35 mm (1 3/8 in), 45 mm (1 3/4 in), 55 mm (2 1/8 in),
65 mm (2 1/2 in), and 75 mm (3 in) The actual
cutting height may vary slightly
To adjust the cutting height of the machine,
position the lever
(1)
to the desired height position
(Fig. D)
The numbers indicated on the body of the
machine (1, 2, 3, 4, 5, 6) indicates the approximate
cutting height of the machine in that position The
lower the number, the shorter the grass will be
cut
Always perform a small test by cutting the
grass at higher settings and adjusting down to
determine your desired cutting height
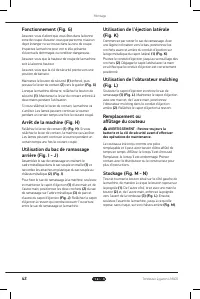
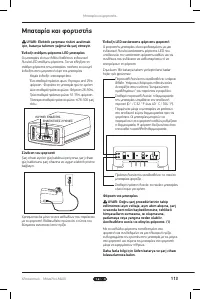
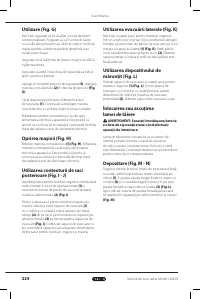
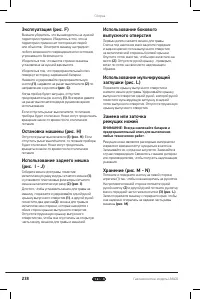
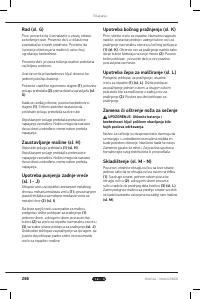
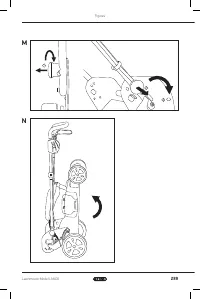
Adjusting the Handle (Fig. E)
Pull and twist the knob on the left side of the
unit
(1)
, so that the knob rests on the handle On
the opposite side, with one hand pull the knob
(2)
and adjust the handle to the desired position
(Fig. E)
Release the knob so that the spring
loaded shaft sits in the location hole
(3)
Pull and
twist the opposite knob so that the spring loaded
shaft returns to its seated position
(4)
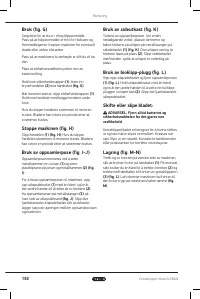
Using the Safety Key (Fig. F)
The safety key is an important safety device
on the machine The motor and blades of the
machine can only be started when the safety key
is inserted and rotated to the "ON" position Only
insert the safety key when you intend to start the
machine and turn the blades
To insert the safety key, push the safety key into
the socket, by aligning the small tab on the key to
the slot in the socket
(1) (Fig. F)
To turn the machine to the "ON" position,
point the arrow on the safety key towards the
desired battery you want to use
(2)
When
the lawnmower stops because the battery is
discharged, open the battery cover, and if you have
two batteries inserted, turn the key towards the
other battery This is an opportune time to place
the discharge battery in an Oregon charger
To turn the machine to the "OFF" position, and
to remove the key, rotate the key so the small
indicator arrow on the key points to the "O" You
may remove the key
The motor can be started only when the safety
key is fitted
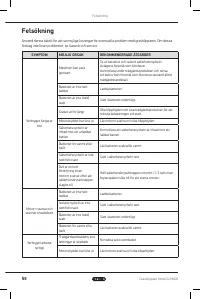
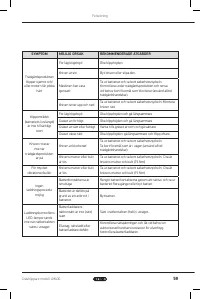
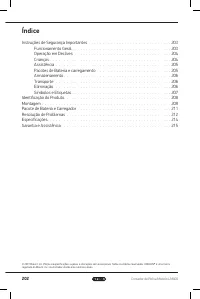
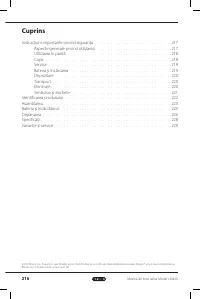
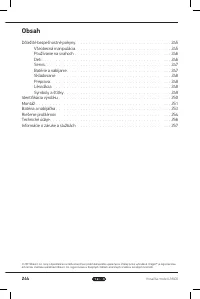
Содержание
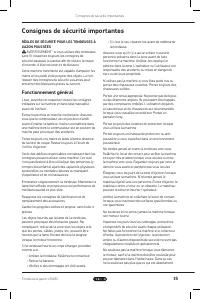
- 230 Содержание; Важные указания по технике безопасности 231
- 231 Важные указания по технике безопасности; Общая эксплуатация
- 232 Работа на склоне
- 233 Обслуживание
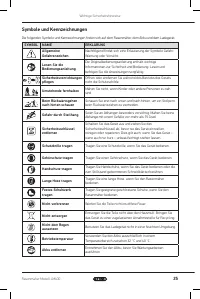
- 234 Хранение
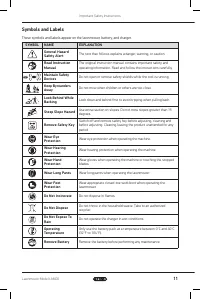
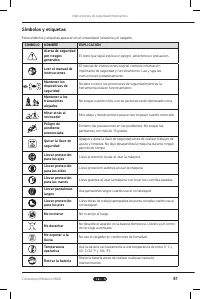
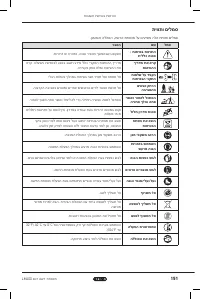
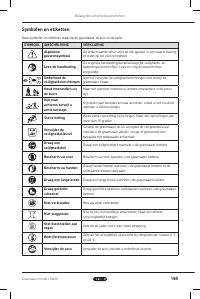
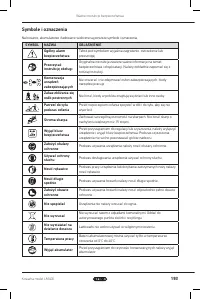
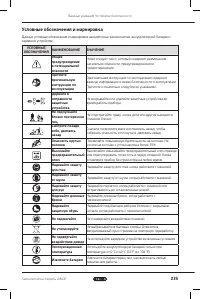
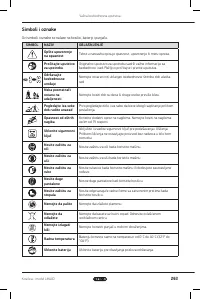
- 235 Условные обозначения и маркировка
- 236 Обозначения изделия
- 237 Сборка
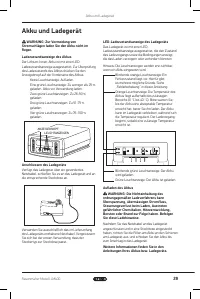
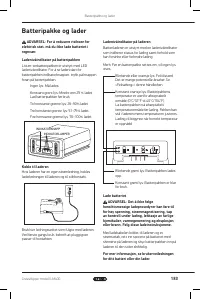
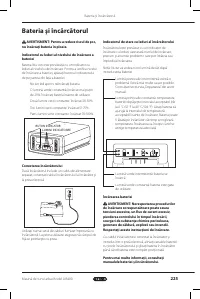
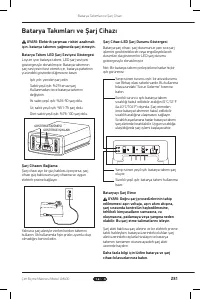
- 239 Аккумуляторная батарея и зарядное устройство
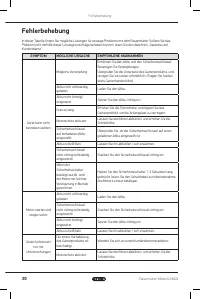
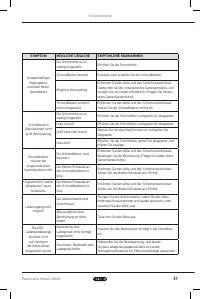
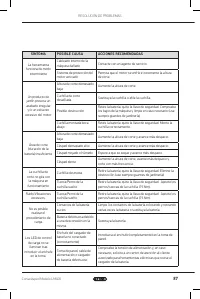
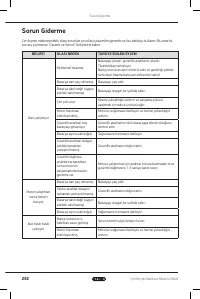
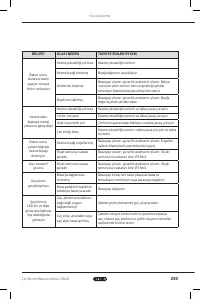
- 240 Поиск и устранение неисправностей
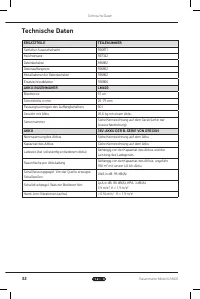
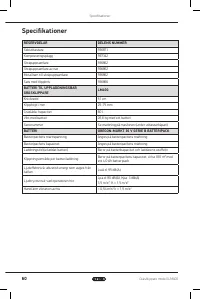
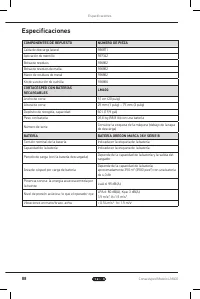
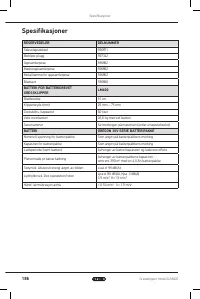
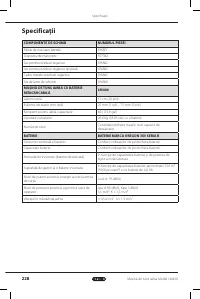
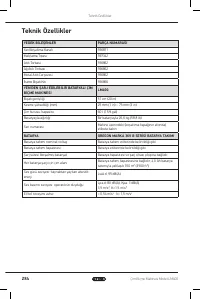
- 242 Спецификации
- 243 Гарантия и обслуживание; Гарантия


