
Газонокосилки Husqvarna LC140 9676367-01 - инструкция пользователя по применению, эксплуатации и установке на русском языке. Мы надеемся, она поможет вам решить возникшие у вас вопросы при эксплуатации техники.
Если остались вопросы, задайте их в комментариях после инструкции.
"Загружаем инструкцию", означает, что нужно подождать пока файл загрузится и можно будет его читать онлайн. Некоторые инструкции очень большие и время их появления зависит от вашей скорости интернета.


• Before you refuel, open the fuel tank cap slowly and
release the pressure carefully.
• Do not add fuel to the engine in an indoor area. Not
sufficient airflow can cause injury or death because
of asphyxiation or carbon monoxide.
• Tighten the fuel tank cap fully. If the fuel tank cap is
not tightened, there is a risk of fire.
• Move the product a minimum of 3 m (10 ft) from the
position where you filled the tank before a start.
• Do not put too much fuel in the fuel tank.
Safety instructions for maintenance
WARNING:
Read the warning instructions
that follow before you use the product.
• The exhaust fumes from the engine contain carbon
monoxide, an odourless, poisonous and very
dangerous gas. Do not start the engine indoors or in
closed spaces.
• Before you do the maintenance on the product, stop
the engine and remove the ignition cable from the
spark plug.
• Use protective gloves when you do maintenance on
the cutting equipment. The blade is very sharp and
cuts can easily occur.
• Accessories and changes to the product that are not
approved by the manufacturer, can cause serious
injury or death. Do not change the product. Always
use accessories that are approved by the
manufacturer.
• If the maintenance is not done correctly and
regularly, the risk of injury and damage to the
product increases.
• Only do the maintenance as given in this owner's
manual. All other servicing must be done by an
approved Husqvarna service agent.
• Let an approved Husqvarna service agent do
servicing on the product regularly.
• Replace damaged, worn or broken parts.
Assembly
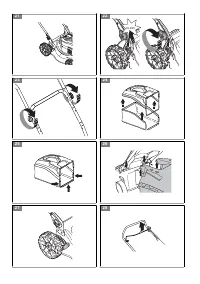
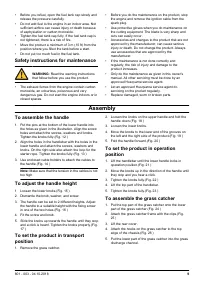
To assemble the handle
1. Put the pins at the bottom of the lower handle into
the holes as given in the illustration. Align the screw
holes and attach the screws, washers and knobs.
Tighten the knobs fully.(Fig. 12 )
2. Align the holes in the handlebar with the holes in the
lower handle and attach the screws, washers and
knobs. On the right side also attach the loop for the
starter rope. Tighten the knobs fully.(Fig. 13 )
3. Use enclosed cable holders to attach the cables to
the handle.(Fig. 14 )
Note:
Make sure that the tension in the cables is not
too high.
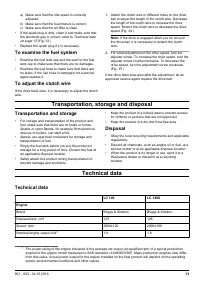
To adjust the handle height
1. Loosen the lower knobs.(Fig. 15 )
2. Dismantle the knob, washer, and screw.
3. The handle can be set to 2 different heights. Adjust
the handle to a suitable height with the fixing screw
in one of the two holes.(Fig. 16 )
4. Fit the screw and knob.
5. Slide the knobs up towards the handle until they stop
and a click is heard. Tighten the knobs properly.(Fig.
17 )
To set the product in transport
position
1. Remove the grass catcher.
2. Loosen the knobs on the upper handle and fold the
handle down.(Fig. 18 )
3. Loosen the lower knobs.
4. Move the knobs to the lower end of the grooves on
the left and the right side of the product.(Fig. 19 )
5. Fold the handle forward.(Fig. 20 )
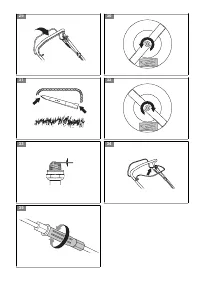
To set the product in operation
position
1. Lift the handlebar until the lower handle locks in
operation position.(Fig. 21 )
2. Move the knobs up in the direction of the handle until
they stop and you hear a click.
3. Tighten the knobs fully.(Fig. 22 )
4. Lift the top part of the handlebar.
5. Tighten the knobs fully.(Fig. 23 )
To assemble the grass catcher
1. Put the top part of the grass catcher onto the lower
part of the grass catcher.(Fig. 24 )
2. Attach the grass catcher frame with the clips.(Fig.
25 )
3. Lift the rear cover.
4. Attach the hooks on the grass catcher to the top
edge of the chassis.(Fig. 26 )
5. Put the lower part of the grass catcher into the grass
discharge channel.
801 - 003 - 04.10.2018
9
Содержание
- 244 Безопасность; Инструкции по технике; Техника безопасности на рабочем месте
- 245 Техника безопасности; Инструкции по безопасности во; Средства индивидуальной защиты
- 246 Защитные устройства на изделии; Правила безопасного обращения с
- 247 Сборка
- 248 Эксплуатация
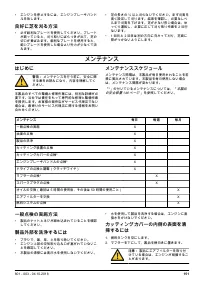
- 249 Техническое обслуживание
- 251 Воздушный фильтр; Очистка пенопластового фильтра; Проверка свечи зажигания; Транспортировка, хранение и утилизация; Транспортировка и хранение
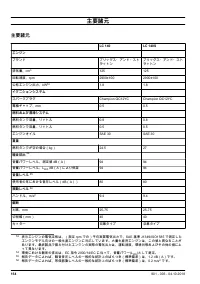
- 252 Утилизация; Технические данные
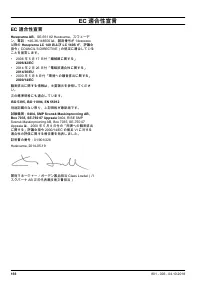
- 254 Декларация соответствия ЕС


