
Гайковерты Makita DTW180Z - инструкция пользователя по применению, эксплуатации и установке на русском языке. Мы надеемся, она поможет вам решить возникшие у вас вопросы при эксплуатации техники.
Если остались вопросы, задайте их в комментариях после инструкции.
"Загружаем инструкцию", означает, что нужно подождать пока файл загрузится и можно будет его читать онлайн. Некоторые инструкции очень большие и время их появления зависит от вашей скорости интернета.

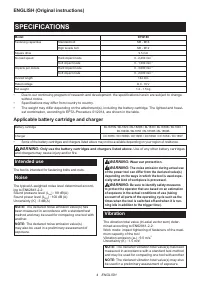


8 ENGLISH
ASSEMBLY
CAUTION:
Always be sure that the tool is
switched off and the battery cartridge is removed
before carrying out any work on the tool.
Selecting correct impact socket
Always use the correct size impact socket for bolts and
nuts. An incorrect size impact socket will result in inac-
curate and inconsistent fastening torque and/or damage
to the bolt or nut.
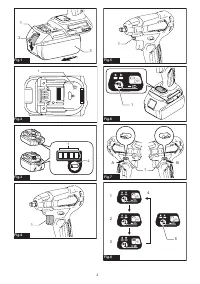
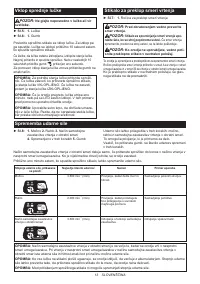
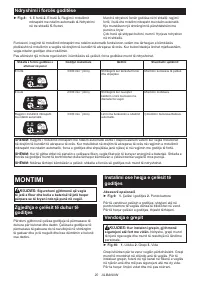
Installing or removing impact socket
Optional accessory
►
Fig.9:
1.
Impact socket
2.
Square drive
To install the impact socket, push it onto the square
drive of the tool until it locks into place.
To remove the impact socket, simply pull it off.
Installing hook
CAUTION:
When installing the hook, always
secure it with the screw firmly.
If not, the hook
may come off from the tool and result in the personal
injury.
►
Fig.10:
1.
Groove
2.
Hook
3.
Screw
The hook is convenient for temporarily hanging the tool.
This can be installed on either side of the tool. To install
the hook, insert it into a groove in the tool housing on
either side and then secure it with a screw. To remove,
loosen the screw and then take it out.
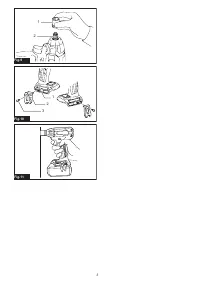
OPERATION
CAUTION:
Always insert the battery cartridge
all the way until it locks in place.
If you can see the
red indicator on the upper side of the button, it is not
locked completely. Insert it fully until the red indicator
cannot be seen. If not, it may accidentally fall out of
the tool, causing injury to you or someone around
you.
►
Fig.11
Hold the tool firmly and place the impact socket over
the bolt or nut. Turn the tool on and fasten for the proper
fastening time.
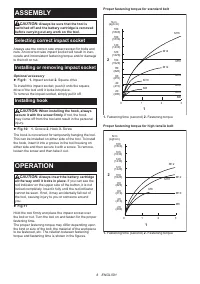
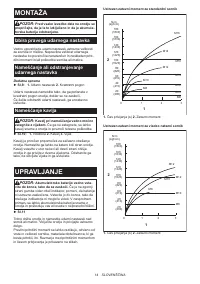
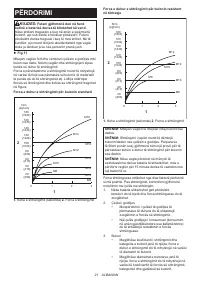
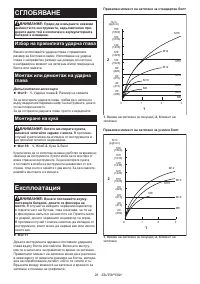
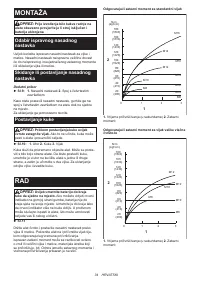
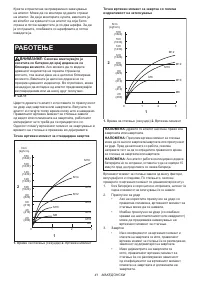
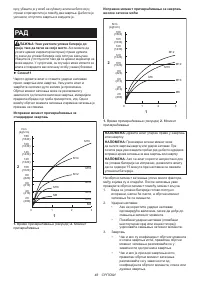
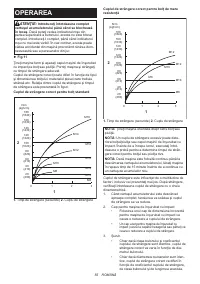
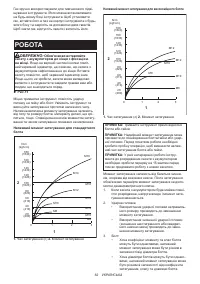
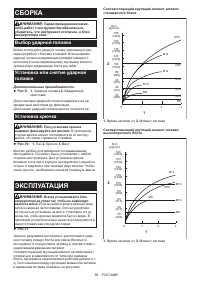
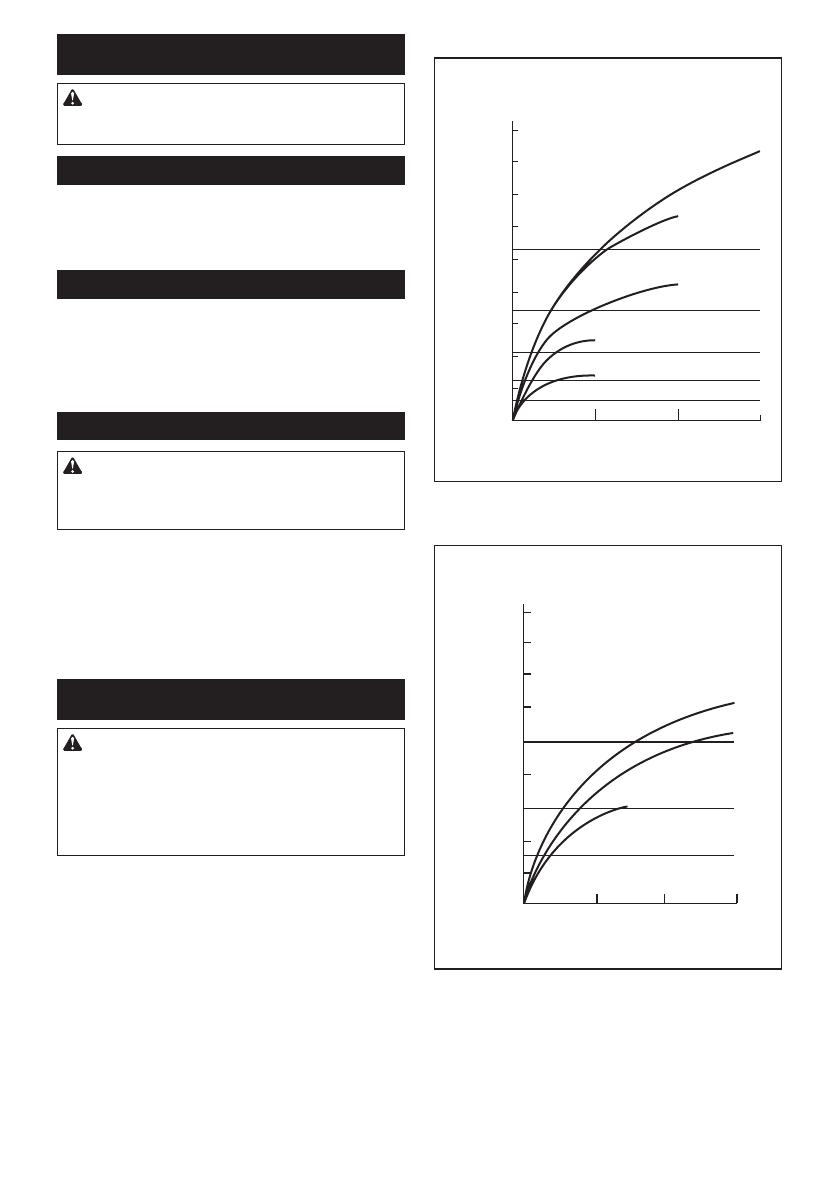
The proper fastening torque may differ depending upon
the kind or size of the bolt, the material of the workpiece
to be fastened, etc. The relation between fastening
torque and fastening time is shown in the figures.
Proper fastening torque for standard bolt
1
N
•
m
(kgf
•
cm)
2
20
(200)
40
(410)
60
(610)
80
(820)
100
(1020)
120
(1220)
140
(1430)
160
(1630)
180
(1840)
0
1
2
3
M16
M14
M12
M10
M8
M8
M10
M12
M14
M16
1.
Fastening time (second)
2.
Fastening torque
Proper fastening torque for high tensile bolt
0
1
2
3
2
N•m
(kgf•cm)
1
20
(200)
40
(410)
60
(610)
80
(820)
100
(1020)
120
(1220)
140
(1430)
160
(1630)
M12
M10
M8
M12
M10
M8
180
(1840)
1.
Fastening time (second)
2.
Fastening torque
Характеристики

Остались вопросы?Не нашли свой ответ в руководстве или возникли другие проблемы? Задайте свой вопрос в форме ниже с подробным описанием вашей ситуации, чтобы другие люди и специалисты смогли дать на него ответ. Если вы знаете как решить проблему другого человека, пожалуйста, подскажите ему :)


Нужна инструкция на русском языке для гайковерта Makita DTW1600