
Электропилы Makita LXT DUC356Z - инструкция пользователя по применению, эксплуатации и установке на русском языке. Мы надеемся, она поможет вам решить возникшие у вас вопросы при эксплуатации техники.
Если остались вопросы, задайте их в комментариях после инструкции.
"Загружаем инструкцию", означает, что нужно подождать пока файл загрузится и можно будет его читать онлайн. Некоторые инструкции очень большие и время их появления зависит от вашей скорости интернета.


12 ENGLISH
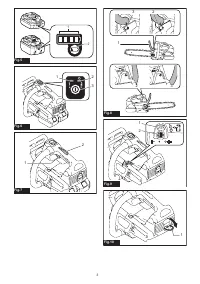
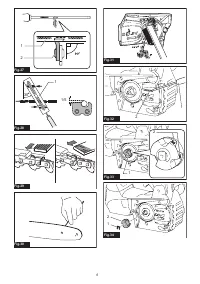
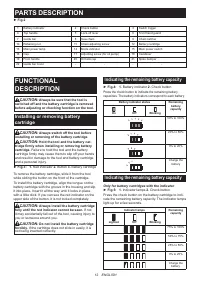
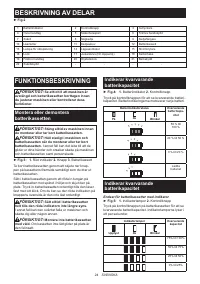
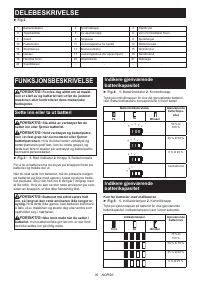
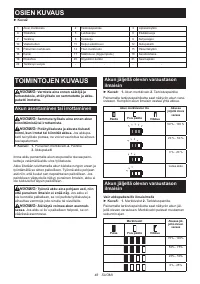
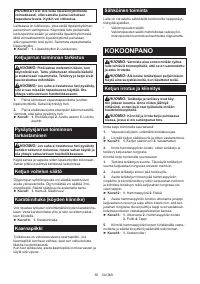
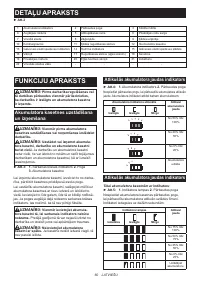
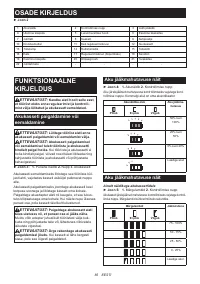
PARTS DESCRIPTION
►
Fig.2
1
Battery indicator
2
Check button
3
Switch trigger
4
Top handle
5
Lock-off lever
6
Front hand guard
7
Guide bar
8
Saw chain
9
Chain catcher
10
Retaining nut
11
Chain adjusting screw
12
Battery cartridge
13
Main power lamp
14
Mode indicator
15
Main power switch
16
Cap
17
Adjusting screw (for oil pump)
18
Carabiner
19
Front handle
20
Oil tank cap
21
Spike bumper
22
Guide bar cover
-
-
-
-
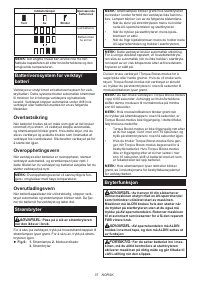
FUNCTIONAL
DESCRIPTION
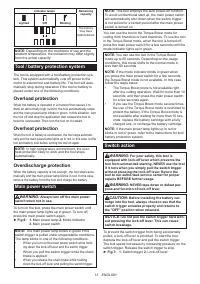
CAUTION:
Always be sure that the tool is
switched off and the battery cartridge is removed
before adjusting or checking function on the tool.
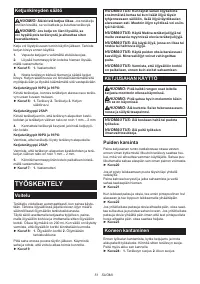
Installing or removing battery
cartridge
CAUTION:
Always switch off the tool before
installing or removing of the battery cartridge.
CAUTION:
Hold the tool and the battery car-
tridge firmly when installing or removing battery
cartridge.
Failure to hold the tool and the battery
cartridge firmly may cause them to slip off your hands
and result in damage to the tool and battery cartridge
and a personal injury.
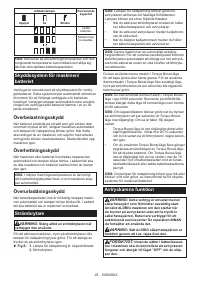
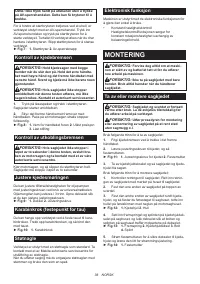
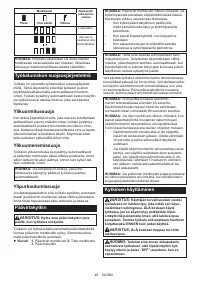
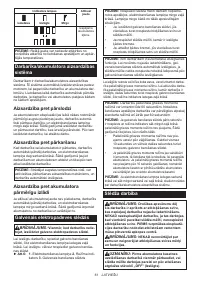
►
Fig.3:
1.
Red indicator
2.
Button
3.
Battery cartridge
To remove the battery cartridge, slide it from the tool
while sliding the button on the front of the cartridge.
To install the battery cartridge, align the tongue on the
battery cartridge with the groove in the housing and slip
it into place. Insert it all the way until it locks in place
with a little click. If you can see the red indicator on the
upper side of the button, it is not locked completely.
CAUTION:
Always install the battery cartridge
fully until the red indicator cannot be seen.
If not,
it may accidentally fall out of the tool, causing injury to
you or someone around you.
CAUTION:
Do not install the battery cartridge
forcibly.
If the cartridge does not slide in easily, it is
not being inserted correctly.
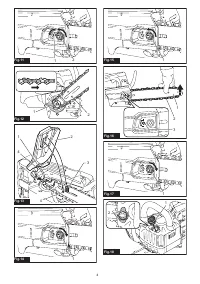
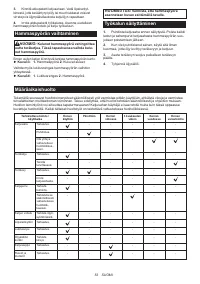
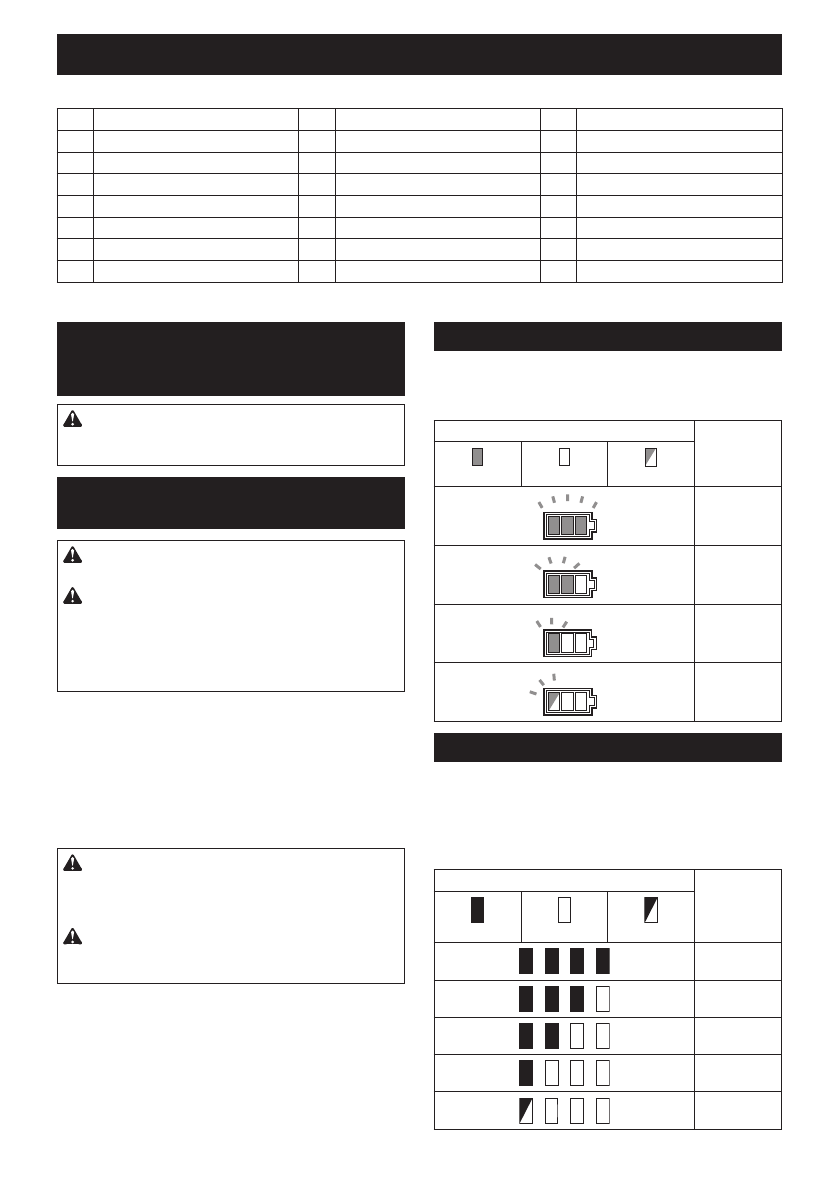
Indicating the remaining battery capacity
►
Fig.4:
1.
Battery indicator
2.
Check button
Press the check button to indicate the remaining battery
capacities. The battery indicators correspond to each battery.
Battery indicator status
Remaining
battery
capacity
On
Off
Blinking
50% to 100%
20% to 50%
0% to 20%
Charge the
battery
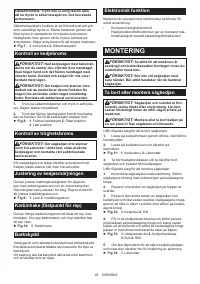
Indicating the remaining battery capacity
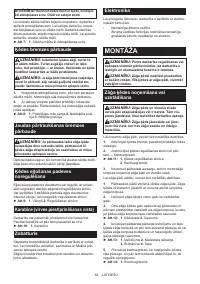
Only for battery cartridges with the indicator
►
Fig.5:
1.
Indicator lamps
2.
Check button
Press the check button on the battery cartridge to indi-
cate the remaining battery capacity. The indicator lamps
light up for a few seconds.
Indicator lamps
Remaining
capacity
Lighted
Off
Blinking
75% to 100%
50% to 75%
25% to 50%
0% to 25%
Charge the
battery.


