
Духовые шкафы Korting OKB491CRGW - инструкция пользователя по применению, эксплуатации и установке на русском языке. Мы надеемся, она поможет вам решить возникшие у вас вопросы при эксплуатации техники.
Если остались вопросы, задайте их в комментариях после инструкции.
"Загружаем инструкцию", означает, что нужно подождать пока файл загрузится и можно будет его читать онлайн. Некоторые инструкции очень большие и время их появления зависит от вашей скорости интернета.


9
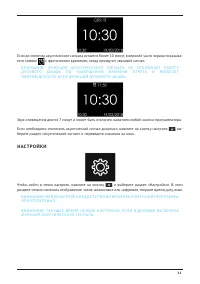
После установки отложенного старта, на дисплее будет отображаться символ паузы
, подсказы
-
вающий, что процесс приготовления запрограммирован, но находится в режиме ожидания.
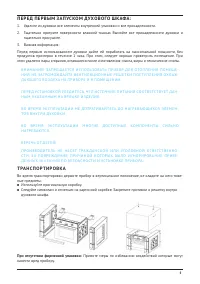
В Н И М А Н И Е! Н Е З А Б УД ЬТ Е ТА К Ж Е П О В Е Р Н У Т Ь Р Е Г УЛ Я ТО Р Ы Р Е Ж И М А И Т Е М П Е РАТ У
-
Р Ы В Н Е О Б ХОД И М О Е П О Л О Ж Е Н И Е.
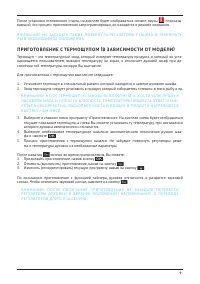
П Р И ГОТО В Л Е Н И Е С Т Е Р М О ЩУ П О М
(
В З А В И С И М О СТ И ОТ М ОД Е Л И
)
Термощуп – это температурный зонд, который измеряет температуру продукта, в который он уста
-
навливается пользователем, выводит температуру на экран, и отключает духовой шкаф при до
-
стижении той температуры, которую Вы выставите.
Для приготовления с термощупом выполните следующее:
1. Установите термощуп в специальный разъем, который находится в камере духового шкафа.
2. Зонд термощупа следует установить в продукт, который собираетесь готовить: в мясо, рыбу и пр.
В Н И М А Н И Е! Е С Л И Т Е Р М О ЩУ П УСТА Н О В И Т Ь В П Л ОТ Н У Ю К К О СТ И И Л И П Р О Й Т И
Н АС К В О З Ь М Я СА И П О П АСТ Ь В П О Л О СТ Ь, Т Е М П Е РАТ У РА П Р ОДУ К ТА Б УД Е Т И З М Е
-
Р Я Т Ь С Я Н Е К О Р Р Е К Т Н О, П О С К О Л Ь К У К О СТ Ь И В О З ДУХ В П О Л О СТ И Н А Г Р Е В А ЮТС Я
Б Ы СТ Р Е Е, Ч Е М М Я СО.
3. Выберите в главном меню программу «Приготовление». На дисплее слева будет отображаться
текущее показание термощупа, а слева Вы можете установить ту температуру, при достижении
которого духовка автоматически отключится.
4. Выберите необходимое температурное значение автоматического отключения духово шка
-
фа и нажмите
OK
.
5. Процесс приготовления с термощупом начался. Не забудьте повернуть регуляторы режи
-
ма и температуры духовки на необходимые параметры.
После нажатия
f9bfe9485f3c399a21d8cbb26971479bbbf7cfb281ce8cb24cfabbb2592e0d3d
OT4100-MP-00 USER MANUAL
Page
2
/
16
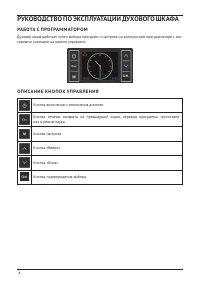
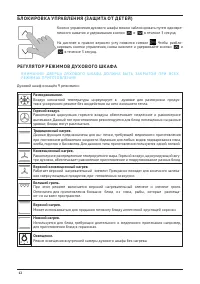
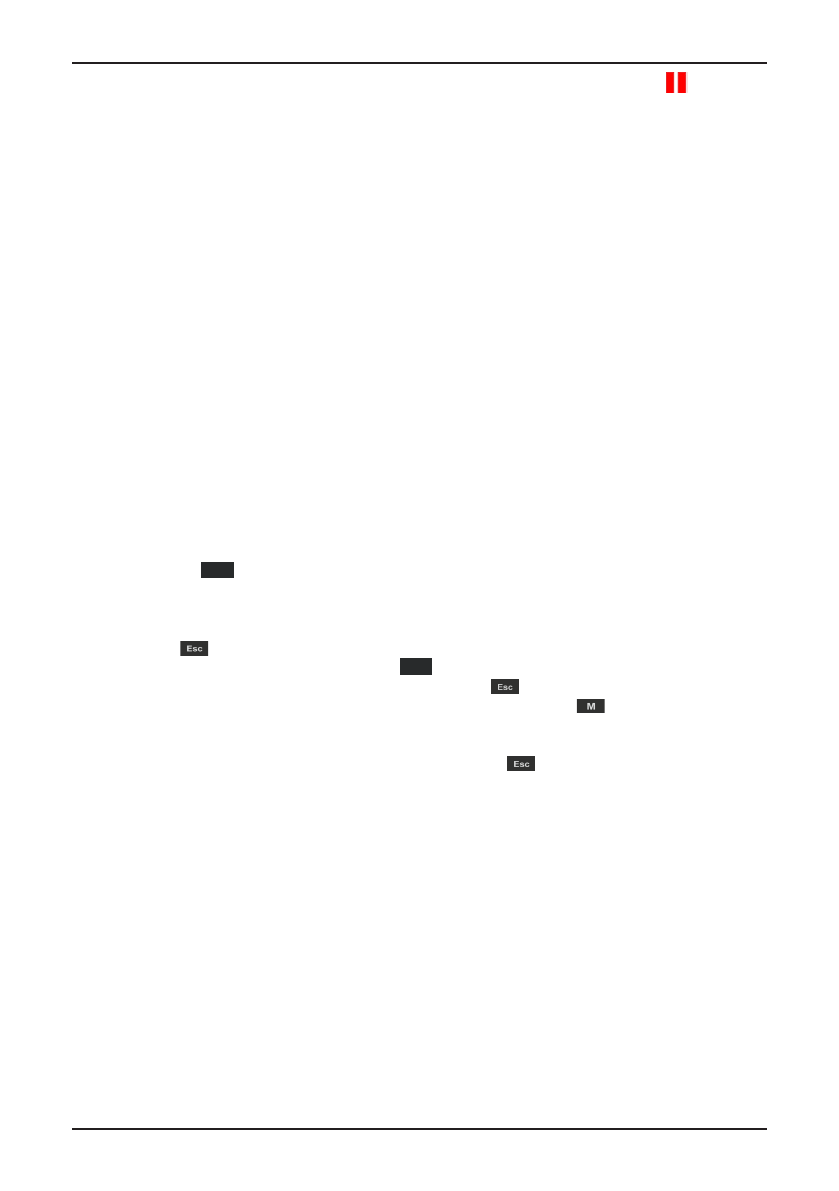
TOUCH BUTTONS:
ON / STANDBY (OFF)
PLUS / UP
BACK / CANCEL / ENTER
MANUAL MODE
MINUS / DOWN
MENU
ENTER / SELECT
Upon power up ( after long mains power interrupts ), the screen will be in standby mode with
very low brightness. In order to wake up / activate the Timer, this button has to be pressed.
Pressing this button
for 2 seconds
when the Timer is active but no cooking program is in
progress, will result in entering the standby mode again.
When scrolling through menus, this button has the function of returning to the previous step or
menu , progressive activation will end with the idle mode screen. In case of a running cooking
program, pressing this button is used to pause and/or cancel the program.
This button is used for accessing the main menu screen. In some cases, it will directly link to
the menu(s) allowed only; when pressed during a running cooking program, the alarm
adjustment menu, when pressed after pausing a cooking program with
to the cooking edit
menu.
Used for scrolling upwards within menu items or for increasing any timing parameter during
any adjustment mode.
Used for scrolling downwards within menu items or for decreasing any timing parameter
during any adjustment mode.
To select a highlighted menu item or accept any ( adjusted ) parameter visible on the screen.
кнопки во время приготовления, Вы можете:
1. Продолжить приготовление, нажав кнопку
OK
.
2. Отменить (выключить) приготовление, нажав на кнопку
f9bfe9485f3c399a21d8cbb26971479bbbf7cfb281ce8cb24cfabbb2592e0d3d
OT4100-MP-00 USER MANUAL
Page
2
/
16
TOUCH BUTTONS:
ON / STANDBY (OFF)
PLUS / UP
BACK / CANCEL / ENTER
MANUAL MODE
MINUS / DOWN
MENU
ENTER / SELECT
Upon power up ( after long mains power interrupts ), the screen will be in standby mode with
very low brightness. In order to wake up / activate the Timer, this button has to be pressed.
Pressing this button
for 2 seconds
when the Timer is active but no cooking program is in
progress, will result in entering the standby mode again.
When scrolling through menus, this button has the function of returning to the previous step or
menu , progressive activation will end with the idle mode screen. In case of a running cooking
program, pressing this button is used to pause and/or cancel the program.
This button is used for accessing the main menu screen. In some cases, it will directly link to
the menu(s) allowed only; when pressed during a running cooking program, the alarm
adjustment menu, when pressed after pausing a cooking program with
to the cooking edit
menu.
Used for scrolling upwards within menu items or for increasing any timing parameter during
any adjustment mode.
Used for scrolling downwards within menu items or for decreasing any timing parameter
during any adjustment mode.
To select a highlighted menu item or accept any ( adjusted ) parameter visible on the screen.
.
3. Изменить (откорректировать) текущую программу, нажав на кнопку
f9bfe9485f3c399a21d8cbb26971479bbbf7cfb281ce8cb24cfabbb2592e0d3d
OT4100-MP-00 USER MANUAL
Page
2
/
16
TOUCH BUTTONS:
ON / STANDBY (OFF)
PLUS / UP
BACK / CANCEL / ENTER
MANUAL MODE
MINUS / DOWN
MENU
ENTER / SELECT
Upon power up ( after long mains power interrupts ), the screen will be in standby mode with
very low brightness. In order to wake up / activate the Timer, this button has to be pressed.
Pressing this button
for 2 seconds
when the Timer is active but no cooking program is in
progress, will result in entering the standby mode again.
When scrolling through menus, this button has the function of returning to the previous step or
menu , progressive activation will end with the idle mode screen. In case of a running cooking
program, pressing this button is used to pause and/or cancel the program.
This button is used for accessing the main menu screen. In some cases, it will directly link to
the menu(s) allowed only; when pressed during a running cooking program, the alarm
adjustment menu, when pressed after pausing a cooking program with
to the cooking edit
menu.
Used for scrolling upwards within menu items or for increasing any timing parameter during
any adjustment mode.
Used for scrolling downwards within menu items or for decreasing any timing parameter
during any adjustment mode.
To select a highlighted menu item or accept any ( adjusted ) parameter visible on the screen.
.
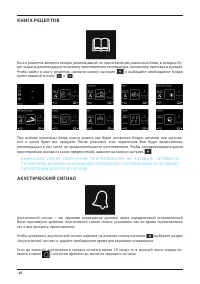
По окончанию приготовления с функцией таймера, духовка отключится и раздастся звуковой
сигнал. Чтобы отключить звуковой сигнал, нажмите на кнопку
f9bfe9485f3c399a21d8cbb26971479bbbf7cfb281ce8cb24cfabbb2592e0d3d
OT4100-MP-00 USER MANUAL
Page
2
/
16
TOUCH BUTTONS:
ON / STANDBY (OFF)
PLUS / UP
BACK / CANCEL / ENTER
MANUAL MODE
MINUS / DOWN
MENU
ENTER / SELECT
Upon power up ( after long mains power interrupts ), the screen will be in standby mode with
very low brightness. In order to wake up / activate the Timer, this button has to be pressed.
Pressing this button
for 2 seconds
when the Timer is active but no cooking program is in
progress, will result in entering the standby mode again.
When scrolling through menus, this button has the function of returning to the previous step or
menu , progressive activation will end with the idle mode screen. In case of a running cooking
program, pressing this button is used to pause and/or cancel the program.
This button is used for accessing the main menu screen. In some cases, it will directly link to
the menu(s) allowed only; when pressed during a running cooking program, the alarm
adjustment menu, when pressed after pausing a cooking program with
to the cooking edit
menu.
Used for scrolling upwards within menu items or for increasing any timing parameter during
any adjustment mode.
Used for scrolling downwards within menu items or for decreasing any timing parameter
during any adjustment mode.
To select a highlighted menu item or accept any ( adjusted ) parameter visible on the screen.
.
В Н И М А Н И Е! П О С Л Е О К О Н Ч А Н И Я П Р И ГОТО В Л Е Н И Я Н Е З А Б УД ЬТ Е П Е Р Е В Е СТ И
Р Е Г УЛ Я ТО Р Ы ДУХО В К И В В Е РХ Н Е Е П О Л О Ж Е Н И Е! Н А П О М И Н А Н И Е О П Е Р Е В ОД Е
Р Е Г УЛ Я ТО Р О В Д Л И ТС Я 10 С Е К У Н Д.
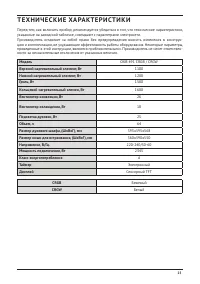
Характеристики

Остались вопросы?Не нашли свой ответ в руководстве или возникли другие проблемы? Задайте свой вопрос в форме ниже с подробным описанием вашей ситуации, чтобы другие люди и специалисты смогли дать на него ответ. Если вы знаете как решить проблему другого человека, пожалуйста, подскажите ему :)


