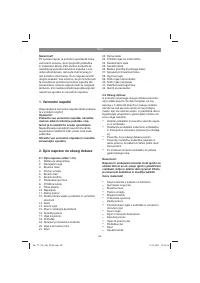
Заточные станки Einhell TC 380, 380 Вт (4419257) - инструкция пользователя по применению, эксплуатации и установке на русском языке. Мы надеемся, она поможет вам решить возникшие у вас вопросы при эксплуатации техники.
Если остались вопросы, задайте их в комментариях после инструкции.
"Загружаем инструкцию", означает, что нужно подождать пока файл загрузится и можно будет его читать онлайн. Некоторые инструкции очень большие и время их появления зависит от вашей скорости интернета.


GB
- 21 -
Keep the noise emissions and vibrations to a
minimum.
•
Only use appliances which are in perfect wor-
king order.
•
Service and clean the appliance regularly.
•
Adapt your working style to suit the appliance.
•
Do not overload the appliance.
•
Have the appliance serviced whenever ne-
cessary.
•
Switch the appliance off when it is not in use.
Limit the operating time!
All stages of the operating cycle must be conside-
red (for example, times in which the electric tools
are switched o
ff
and times in which the tool is
switched on but operates without load).
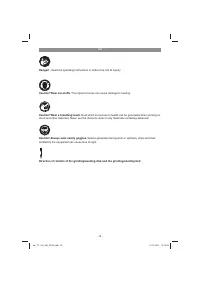
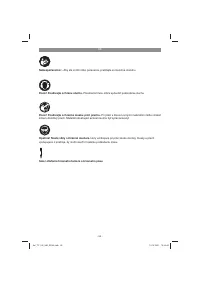
Caution!
Residual risks
Even if you use this electric power tool in
accordance with instructions, certain resi-
dual risks cannot be rules out. The following
hazards may arise in connection with the
equipment’s construction and layout:
1. Lung damage if no suitable protective dust
mask is used.
2. Damage to hearing if no suitable ear protec-
tion is used.
3. Health damage caused by hand-arm vib-
rations if the equipment is used over a pro-
longed period or is not properly guided and
maintained.
5. Before starting the equipment
Before you connect the equipment to the mains
supply make sure that the data on the rating plate
are identical to the mains data.
Warning!
Always pull the power plug before making
adjustments to the equipment.
•
All covers and safety devices have to be pro-
perly fitted before the equipment is switched
on.
•
It must be possible for the grinding/sanding
belt and disk to run freely.
•
When working with wood that has been pro-
cessed before, watch out for foreign bodies
such as nails or screws, etc.
•
Before you actuate the On/Off switch, make
sure that the abrasive paper is correctly fitted
and that the equipment‘s moving parts run
smoothly.
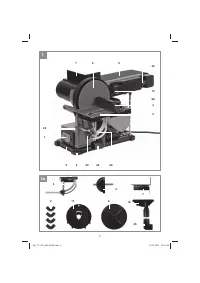
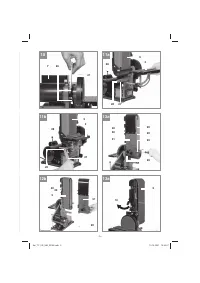
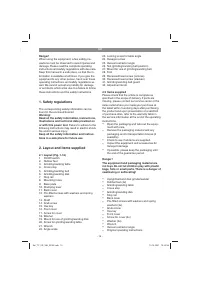
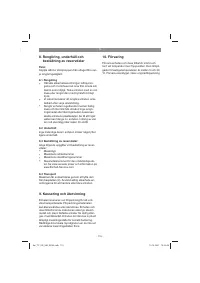
5.1 Setting up the equipment (Fig. 3)
•
Plug the rubber feet (2) onto the base plate
(9).
•
The equipment has to be set up where it can
stand securely.
•
Before starting work, firmly screw the grinder/
sander to the workbench or similar using the
2 mounting holes (8) in the base plate (9).
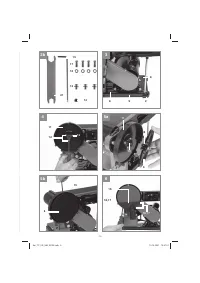
5.2 Assembly (Fig. 4 - 9)
•
Fasten the back cover (11) with the screws
(12).
•
Plug the grinding/sanding disk (6) onto the
shaft (13).
•
Important! The flat surface on the shaft (13)
and the hole in the grinding/sanding disk (6)
must lie on top of each other so that the grub
screw (14) is pressed onto the flat surface.
•
Secure the grinding/sanding disk (6) by tigh-
tening the grub screw (14) using the hex key
(15) (see Fig. 5b).
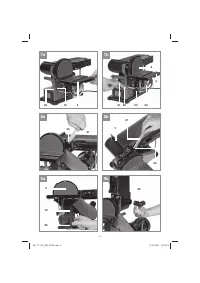
•
Fasten the front cover (16) with the screws
(17) and washers (18).
•
Push the grinding/sanding table (3) into the
mount (19). Secure it by tightening the screw
(20) using the wrench (21).
•
Caution!
Ensure that the distance between
the grinding/sanding table (3) and the grin-
ding/sanding disk (6) is as small as possible.
By doing this you will reduce the risk of work-
pieces getting jammed.
•
Caution!
The grinding/sanding disk (6) must
be able to run freely.
•
The grinding/sanding table (3) can be infinite-
ly adjusted from 0° to 45° with the scale (22)
and the locking screw (23).
•
Fit the cross stop (4) to the grinding/sanding
table (3). The adjustable cross stop (4) helps
ensures safe guidance of the workpiece.
•
To enable the stop rail (7) to be fitted, you first
have to remove the hexagon screw (24) using
the wrench (21). Then fit the stop rail (7) and
secure it again with the hexagon screw (24).
•
The vacuum extractor angle (25) which is
supplied with the equipment can be fastened
in two different positions. If you are working
with the grinding/sanding disk (6), you should
fasten the vacuum extractor angle (25) as
shown in Fig. 9a. If you are using the grinding/
sanding belt (5) for your work, fasten the va-
cuum extractor angle as shown in Fig. 9b.
Anl_TC_US_380_SPK9.indb 21
Anl_TC_US_380_SPK9.indb 21
19.10.2021 15:42:36
19.10.2021 15:42:36
Характеристики

Остались вопросы?Не нашли свой ответ в руководстве или возникли другие проблемы? Задайте свой вопрос в форме ниже с подробным описанием вашей ситуации, чтобы другие люди и специалисты смогли дать на него ответ. Если вы знаете как решить проблему другого человека, пожалуйста, подскажите ему :)


