
Вытяжки Weissgauff GAMMA 50 PB - инструкция пользователя по применению, эксплуатации и установке на русском языке. Мы надеемся, она поможет вам решить возникшие у вас вопросы при эксплуатации техники.
Если остались вопросы, задайте их в комментариях после инструкции.
"Загружаем инструкцию", означает, что нужно подождать пока файл загрузится и можно будет его читать онлайн. Некоторые инструкции очень большие и время их появления зависит от вашей скорости интернета.
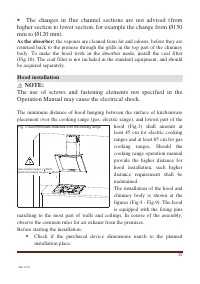

Disassembly and remove (if possible) any furniture remaining in the
hood installation area, in order to ensure the easy access to ceiling or
wall, where the hood shall be mounted. If it is not possible, protect the
furniture elements remaining in the adjacent area.
Check, if there is a socket near the mounting area, and control if the
hood may be connected to the ventilation channel for vapours
evacuation.
Check if there are no cables (electrical, hydraulic, etc.) in places in
which the drilling will be performed.
Prepare the following tools: tape ruler, pencil, drill / electric
screwdriver, drilling tool Ø8, screwdriver, builder’s level.
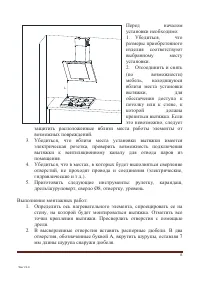
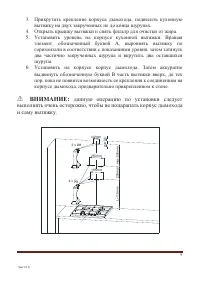
Assembly operation:
1.
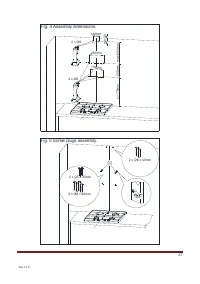
Define the axis of cooking range, and project it onto the wall, where the
hood will be mounted. Sign all characteristic points of hood fastening.
Make the openings with the drill. (Fig. 4)
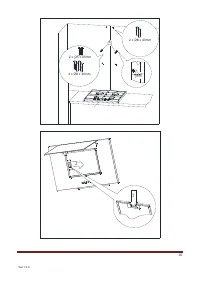
2.
Into the openings, insert the screw plugs. In two openings marked with
A screw also the screws (leaving 7 mm of screw length outside the
screw plug, Fig.5).
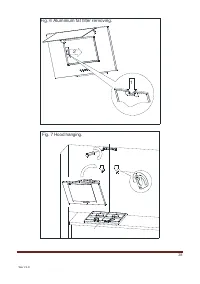
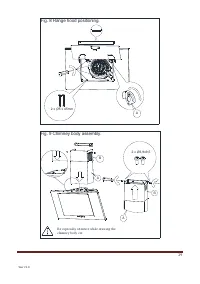
3.
Open the hood cover and remove the fat filter (Fig.6).
4.
Screw the chimney body fastening element, hang the hood on two
untightened screws (Fig. 7).
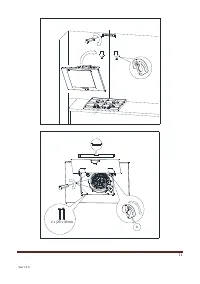
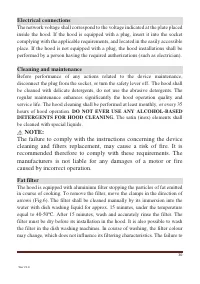
5.
Place the level on the hood body. Rotating the element marked with
A,
adjust the hood level according the level’s indications, and then tighten
two screws previously screwed partially and screw in two remaining
screws (Fig. 8).
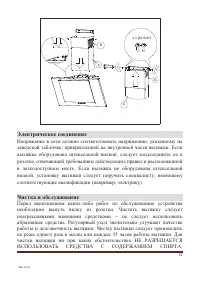
Place the chimney body on the hood body. Then, draw delicately the
hood part signed with
B
upwards, until it becomes possible to screw it
to the fastening element previously attached to the wall (Fig. 9).
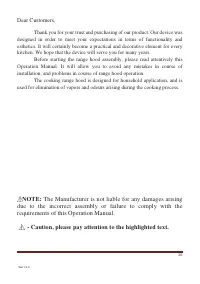
NOTE:
this assembly operation shall be performed very
carefully, in order to avoid the scratching of chimney body
and hood itself.
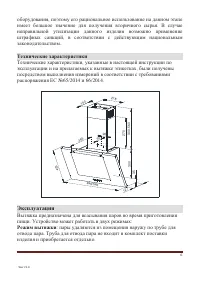
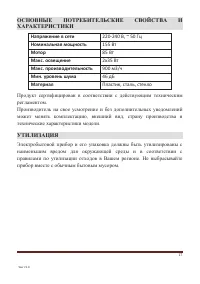
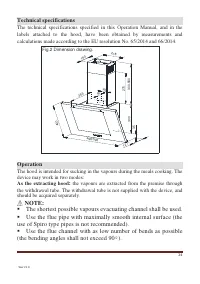
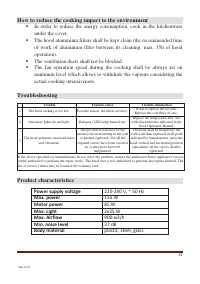
Характеристики

Остались вопросы?Не нашли свой ответ в руководстве или возникли другие проблемы? Задайте свой вопрос в форме ниже с подробным описанием вашей ситуации, чтобы другие люди и специалисты смогли дать на него ответ. Если вы знаете как решить проблему другого человека, пожалуйста, подскажите ему :)


