
Вытяжки Smeg KSET610X - инструкция пользователя по применению, эксплуатации и установке на русском языке. Мы надеемся, она поможет вам решить возникшие у вас вопросы при эксплуатации техники.
Если остались вопросы, задайте их в комментариях после инструкции.
"Загружаем инструкцию", означает, что нужно подождать пока файл загрузится и можно будет его читать онлайн. Некоторые инструкции очень большие и время их появления зависит от вашей скорости интернета.


English
Installation
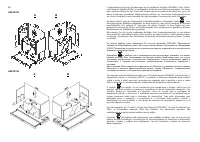
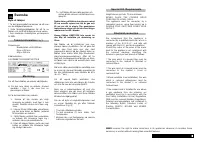
To fix the cooker hood please choose one of
the following options:
a) Fix it to the upper part of the furniture
Figure 3 must be used where the position
of the holes is indicated.
b) Fix it to the internal laterals of the
furniture:
1.- Screw two screws to each side of the
furniture interior following figure 5
instructions. Leave them 3 mm loose for
adjustment.
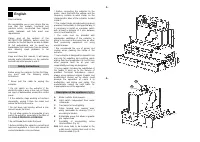
2.- Screw the provided brackets to the top
part of the hood, keeping the internal
furniture width.
3.- Hold and rise the hood until the slots of
their brackets fit in the screws (step 1)
of the furniture.
4.- Keeping the appliance hold, push it
towards furniture
’
s bottom until screws
fits into a stable position inside the slots.
5.- Rise the hood a little until a definitive
position is obtained and tight the loosen
four screws to the brackets.
The lower part of the extractor must be
installed a minimum height of 60 cm
above the hob for electric cookers and 65
cm for gas cookers. (If the installation
instructions of a gas cooker indicate a
greater distance this must be observed).
The KSET910X cooker hood only can be
installed in furniture of 90 cm.
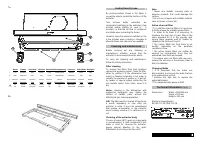
Once the hood is installed, the front facia
can be fitted. For this the frontal surface of
the hood is firstly cleaned with alcohol
(manufacturer
’
s safety recommendations for
the handling of solvents are always to be
followed). Then remove the protective paper
of the adhesive on the fascia, it can now be
placed in its correct position, applying
pressure on the adhesive area.
When the extractor is working at the same
time
as
other
non-electrical
cooking
equipment, the outlet air pressure must not
exceed 4 Pa (4 x 10
-5
bar).
To achieve optimum performance the length
of the outlet hose should not exceed 4
meters, or include more than two 90
º
angles
(elbows)
Although
venting
to
the
outside
is
recommended, active carbon filters may be
used, which allow the purified air to be
returned to the kitchen through the outlet
pipe.
If you wish to substitute the front panel and
replace it with one matching the kitchen
units, follow the following instructions (Fig.2):
* Withdraw the movable group.
* Remove the screws (T) that support the
front.
* Install the new front fixing it with the same
screws that held the old one.
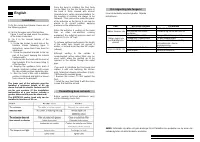
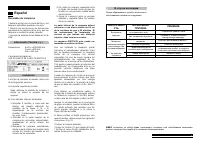
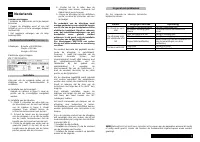
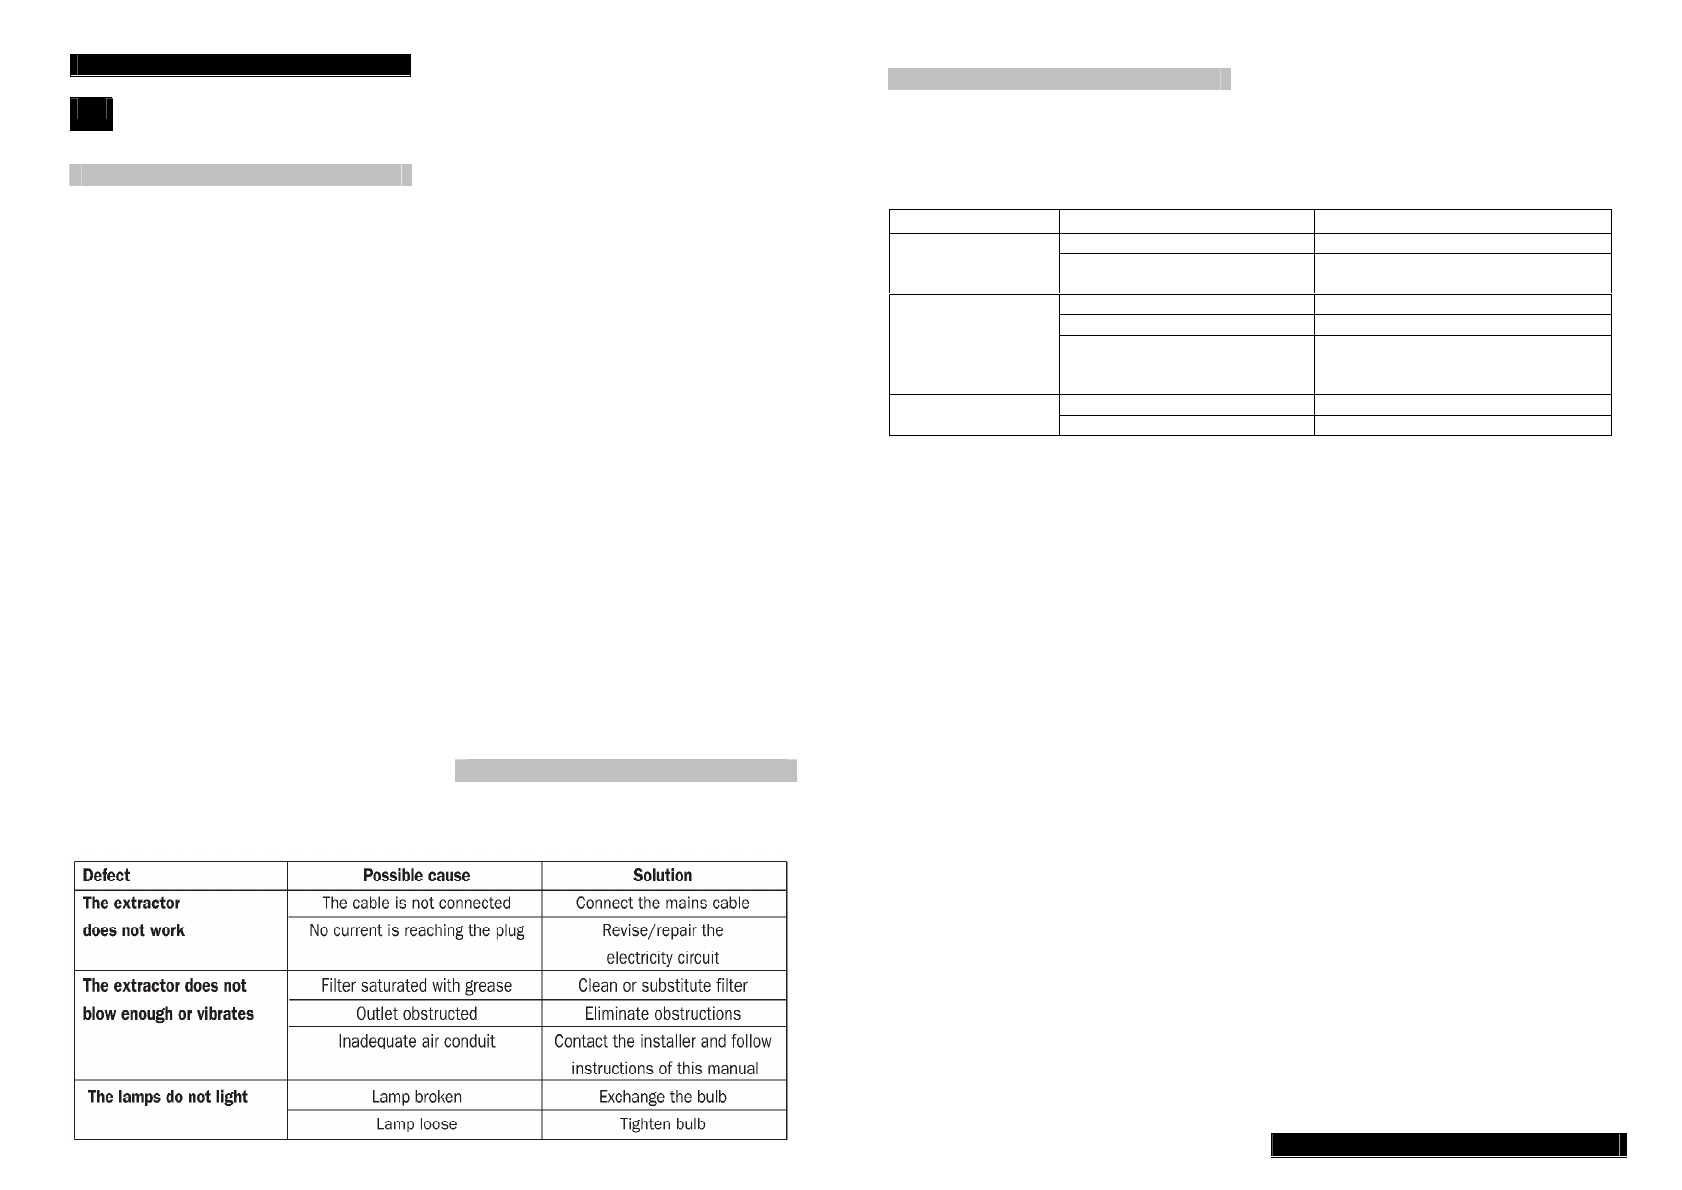
If something does not work
Before seeking technical assistance carry
out the following checks first:
Om n
å
gonting inte fungerar
Innan du kontaktar verkstad g
å
efter f
ö
ljande
instruktioner:
FEL
M
Ö
JLIG ORSAK
L
Ö
SNING
Kontakten
ä
r inte isatt
S
ä
tta i kontakten
Fl
ä
kten fungerar inte Det kommer inte str
ö
m i
kontakten
F
ö
rs
ä
kra dig om att det finns el
Filtret
ä
r fullt med fett
Reng
ö
r filtret eller byt ut det
Tillt
ä
ppning i utg
å
ngsr
ö
ret
Ta bort tillt
ä
ppningen
Fl
ä
kten suger inte
upp tillr
ä
ckligt eller
vibrerar
Fel utg
å
ngsr
ö
r
Kontakta installat
ö
ren och f
ö
lj
instruktionerna i denna
bruksanvisning
Lamporna
ä
r utbr
ä
nda
Byt ut lamporna
Lamporna t
ä
nds inte
L
ö
sa lampor
Skruva
å
t lamporna
SMEG.
f
ö
rbeh
å
ller sig r
ä
tten att g
ö
ra
ä
ndringar f
ö
r att f
ö
rb
ä
ttra sina produkter om de anser det
n
ö
dv
ä
ndigt utan att detta f
ö
rs
ä
mrar produkten.
Характеристики

Остались вопросы?Не нашли свой ответ в руководстве или возникли другие проблемы? Задайте свой вопрос в форме ниже с подробным описанием вашей ситуации, чтобы другие люди и специалисты смогли дать на него ответ. Если вы знаете как решить проблему другого человека, пожалуйста, подскажите ему :)


