
Вытяжки Novex DP 6520 S - инструкция пользователя по применению, эксплуатации и установке на русском языке. Мы надеемся, она поможет вам решить возникшие у вас вопросы при эксплуатации техники.
Если остались вопросы, задайте их в комментариях после инструкции.
"Загружаем инструкцию", означает, что нужно подождать пока файл загрузится и можно будет его читать онлайн. Некоторые инструкции очень большие и время их появления зависит от вашей скорости интернета.


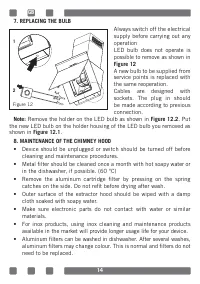


10
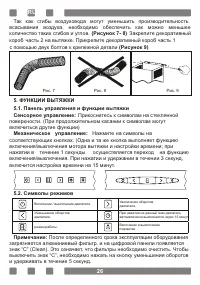
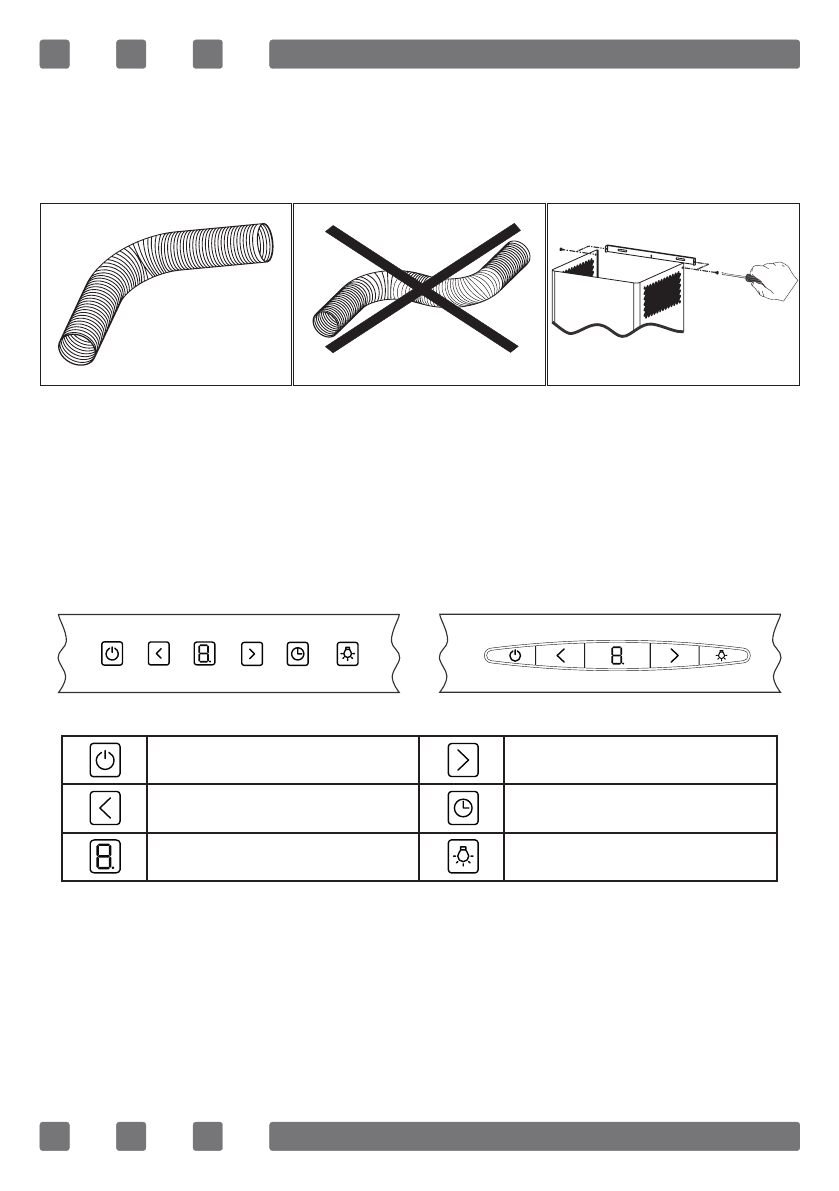
Twists and bends on the aluminum pipe may cause minimizing the air suction
so avoid unnecessary bends and twists as much as possible.
(Figure 7-8)
Place the inner duct and outer duct carefully on the product. Fix the inner
duct to inner duct connection plate with 2 screws.
(Figure 9)
5. FUNCTIONS OF THE CHIMNEY HOOD
5.1. Control Panel
Digital Control:
Touch the symbols on the keys. (On/Off function and timer
are on the same key; if pressed for 1 sec on-off function will operate.If
pressed for 3 sec. 15 minutes timer will operate.
Touch Control: Touch the symbols on the glass surface. If Press a symbol
longer (more 3 sec) may operate various functions.
5.2. Symbols Functions
Note: When the product operates for a certain time, the aluminum filters
get dirty and the digital display shows “C” Clean sign. This means the
filters should be cleaned. Press the speed reduction key for 5 secs in
order to delete “C” sign from the display.
CAUTİON:
When the timer key is pressed for 3 secs digital display starts
to change.Air-circulation system of the chimney hood becomes active.
The chimney hood runs for 10 minutes in the lowest speed. Then the
system automatically shuts down.
Figure 7
Figure 8
Figure 9
Switches on and off the motor.
(Except for the lighting)
Increases the speed when the motor
is running.
Decreases the speed when the motor
is running.
If pressed this symbol, the motor
turns itself off 15 minutes later.
Display
Only switches on and off the lighting
system.
GB
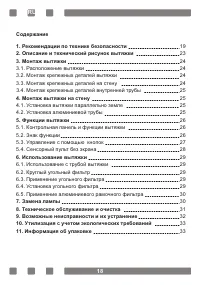
Содержание
- 19 РЕКОМЕНДАЦИИ ПО ТЕХНИКЕ БЕЗОПАСНОСТИ
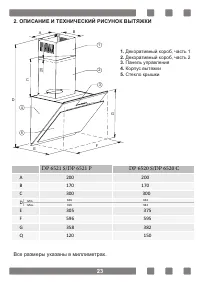
- 23 ОПИСАНИЕ И ТЕХНИЧЕСКИЙ РИСУНОК ВЫТЯЖКИ; Все размеры указаны в миллиметрах.
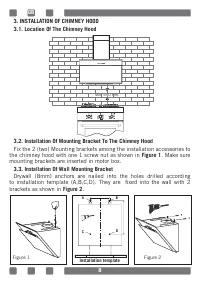
- 24 Рисунке 1; , прикрутите их с помощью 1; Рисунке 2
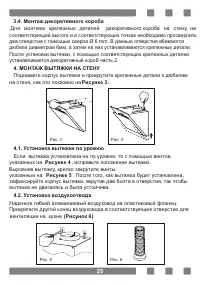
- 25 МОНТАЖ ВЫТЯЖКИ НА СТЕНУ; Если вытяжка установлена не по уровню, то с помощью винтов,; Рисунке 4
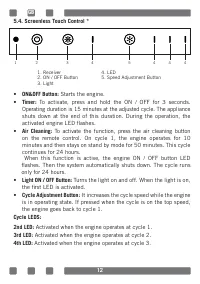
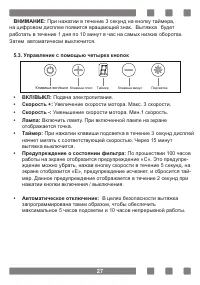
- 28 Таймер; Двигатель включается при нажатии клавиши ВКЛ / ВЫКЛ и; Клавиша регулировки скорости:; Увеличивает скорость работы; Светодиоды оборотов мотора:
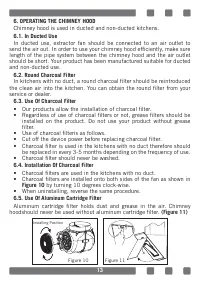
- 30 Применение алюминиевого жирового фильтра; Алюминиевый жировой фильтр задерживает пыль и жир. Вытяжка ни
- 31 Будьте осторожны при работе вытяжки с воздухово-; Для эффективной работы вытяжки:; количество изгибов воздуховода.
- 32 Прежде чем связаться с сервисным центром проверьте, подключен; Сервисное обслуживание и расходные материалы


