Вытяжки Monsher Indiga 55 W - инструкция пользователя по применению, эксплуатации и установке на русском языке. Мы надеемся, она поможет вам решить возникшие у вас вопросы при эксплуатации техники.
Если остались вопросы, задайте их в комментариях после инструкции.
"Загружаем инструкцию", означает, что нужно подождать пока файл загрузится и можно будет его читать онлайн. Некоторые инструкции очень большие и время их появления зависит от вашей скорости интернета.

28
English
If possible, disconnect and move freestanding or slide-in range from cabinet
opening to provide easier access to rear wall/ceiling. Otherwise put a thick,
protective covering over countertop, cooktop or range to protect from damage
and debris. Select a flat surface for assembling the unit. Cover that surface with a
protective covering and place all canopy hood parts and hardware in it.
In addition check whether near the installation area of the hood (in the area
accessible also with the hood mounted) an electric socket is available and it is
possible to connect a fumes discharge device to the outside (only suction version).
Carry out all the masonry work necessary (e.g. installation of an electric socket
and/or a hole for the passage of the discharge tube).
Expansion wall plugs are provided to secure the hood to most types of walls/
ceilings. However, a qualified technician must verify suitability of the materials in
accordance with the type of wall/ceiling. The wall/ceiling must be strong enough
to take the weight of the hood. Do not tile, grout or silicone this appliance to the
wall. Surface mounting only.
OPERATION
Use the high suction speed in cases of concentrated kitchen vapours. lt is
recommended that the cooker hood suction is switched оп for 5 minutes prior
to cooking and to leave in operation during cooking and for another 15 minutes
approximately after terminating cooking.
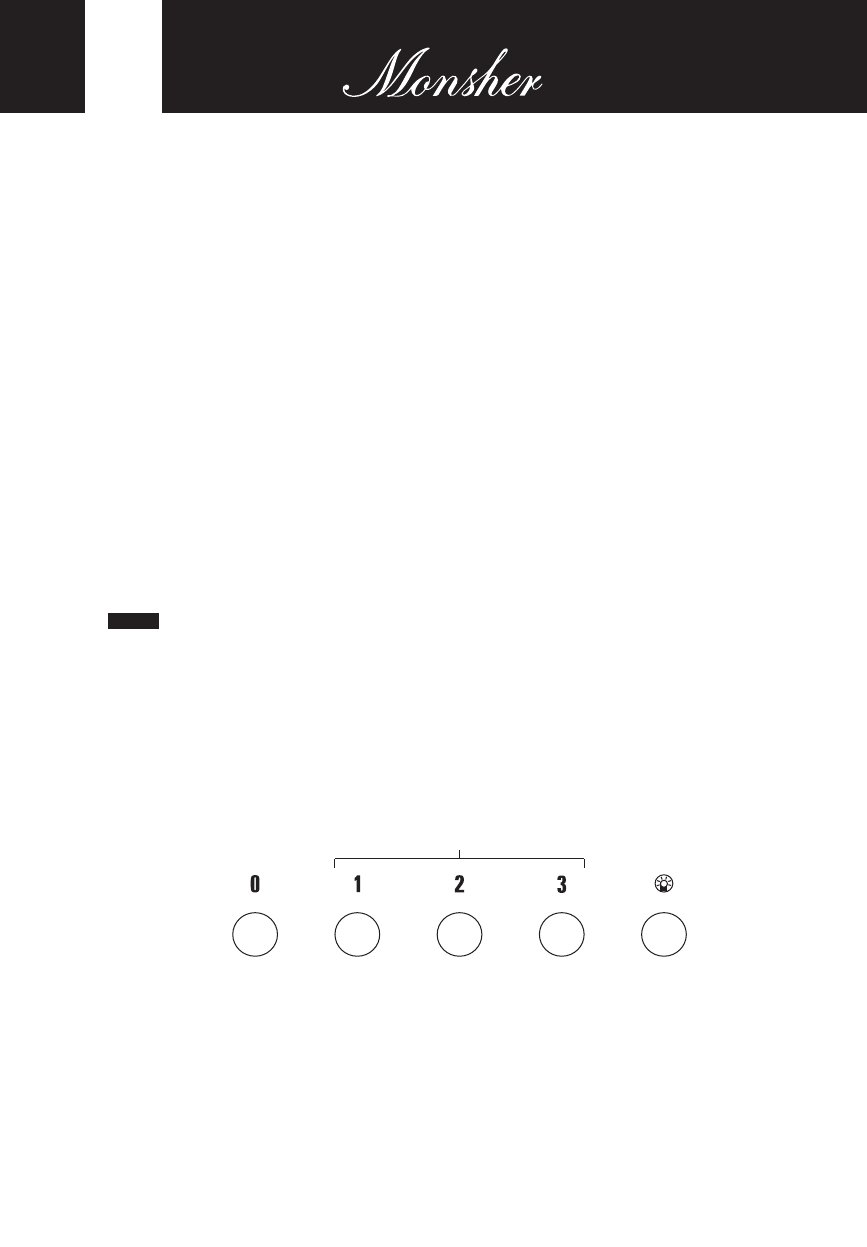
To select the functions of the hood, simply touch the controls.
“1” –ON/OFF suction speed (power) 1
“2” – ON/OFF suction speed (power) 2
“3” – ON/OFF suction speed (power) 3
“0” – motor OFF button
“L” – ON/OFF lights
This adjustment helps to select the optimal fan speed with minimum noise.
1 2 3
1
2
3
Содержание
- 37 действия на окружающую среду:; ки или подобное квалифицированное лицо.; ВНИМАНИЕ! Невыполнение установки винтов или крепежного устрой-; РАБОТА УСТРОЙСТВА В РЕЖИМЕ ПОГЛОТИТЕЛЯ
- 38 РАБОТА В РЕЖИМЕ ВЫТЯЖНОЙ СИСТЕМЫ; ВНИМАНИЕ! Выводная труба не входит в комплект и должна быть; около 10°) так, чтобы воздух быстрее мог выходить наружу. Если
- 43 ЭЛЕКТРИЧЕСКОЕ СОЕДИНЕНИЕ; ВНИМАНИЕ! Прежде чем подключить к сети питания электрическую
- 44 ФУНКЦИОНИРОВАНИЕ; минимальной его шумности.
- 45 УХОД; Прежде чем выполнить любую операцию по чистке или техни-; ОЧИСТКА; ВНИМАНИЕ! Не соблюдение правил чистки прибора и замены филь-; ФИЛЬТРЫ ЗАДЕРЖКИ ЖИРА; Удерживает частицы жира, исходящие от плиты.; Фильтр следует зачищать
- 46 УГОЛЬНЫЙ ФИЛЬТР; а) Снять металлический жироулавливающий фильтр; ЗАМЕНА ЛАМП; житесь с сервисным центром.; БРАННОЙ СВЕТОДИОДНОЙ ЛЕНТЫ ПРЯМО ГОЛЫМИ РУКАМИ.
- 50 ООО «КУППЕРСБЕРГ-СЕРВИС»; УСЛОВИЯ ГАРАНТИИ


