
Вытяжки Kuppersberg RAMZ 90 B - инструкция пользователя по применению, эксплуатации и установке на русском языке. Мы надеемся, она поможет вам решить возникшие у вас вопросы при эксплуатации техники.
Если остались вопросы, задайте их в комментариях после инструкции.
"Загружаем инструкцию", означает, что нужно подождать пока файл загрузится и можно будет его читать онлайн. Некоторые инструкции очень большие и время их появления зависит от вашей скорости интернета.


11
ENGLISH
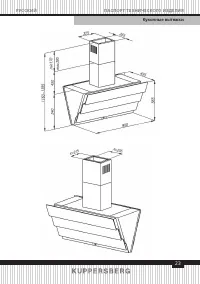
Cooker hood
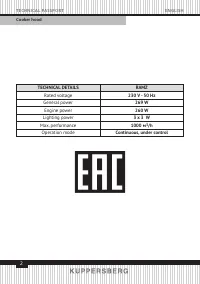
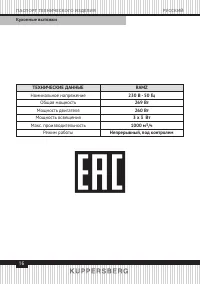
TECHNICAL PASSPORT
check that the mains cable is correctly
assembled. The hood is provided with
a special power cable; if the cable
is damaged, request a new one from
Technical Service.
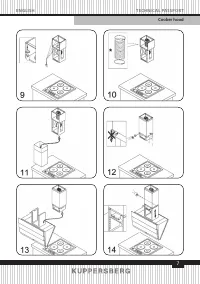
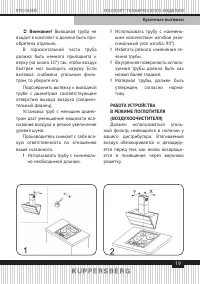
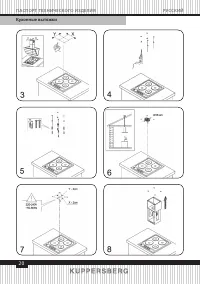
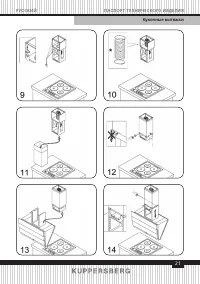
MOUNTING
Very heavy product; hood handling
and installation must be carried out by
at least two persons.
Before beginning installation:
• Check that the product purchased
is of a suitable size for the chosen
installation area.
• Remove the charcoal (*) filter/s if
supplied (see also relative paragraph). This/
these is/are to be mounted only if you want
lo use the hood in the filtering version.
• Check (for transport reasons) that
there is no other supplied material
inside the hood (e.g. packets with screws
(*), guarantees (*), etc.), eventually
removing them and keeping them.
• If possible, disconnect and move
freestanding or slide-in range from
cabinet opening to provide easier access
to rear wall/ceiling. Otherwise put a thick,
protective covering over countertop,
cooktop or range to protect from damage
and debris. Select a flat surface for
assembling the unit. Cover that surface
with a protective covering and place all
canopy hood parts and hardware in it.
• In addition check whether near the
installation area of the hood (in the area
accessible also with the hood mounted) an
electric socket is available and it is possible
to connect a fumes discharge device to the
outside (only suction version).
• Carry out all the masonry work
necessary (e.g. installation of an electric
socket and/or a hole for the passage of
the discharge tube).
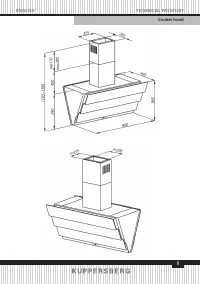
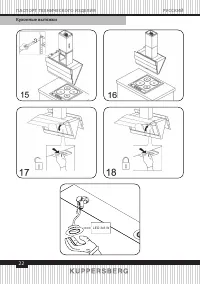
Expansion wall plugs are provided
to secure the hood to most types of
walls/ceilings. However, a qualified
technician must verify suitability of the
materials in accordance with the type
of wall/ceiling. The wall/ceiling must be
strong enough to take the weight of the
hood. Do not tile, grout or silicone this
appliance to the wall. Surface mounting
only.
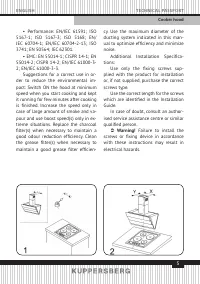
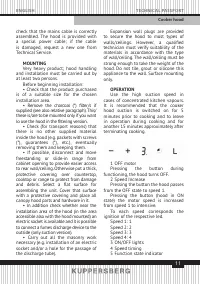
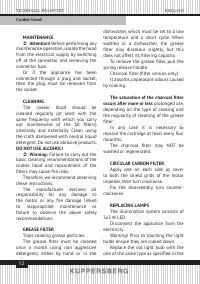
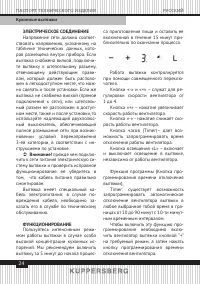
OPERATION
Use the high suction speed in
cases of concentrated kitchen vapours.
It is recommended that the cooker
hood suction is switched on for 5
minutes prior to cooking and to leave
in operation during cooking and for
another 15 minutes approximately after
terminating cooking.
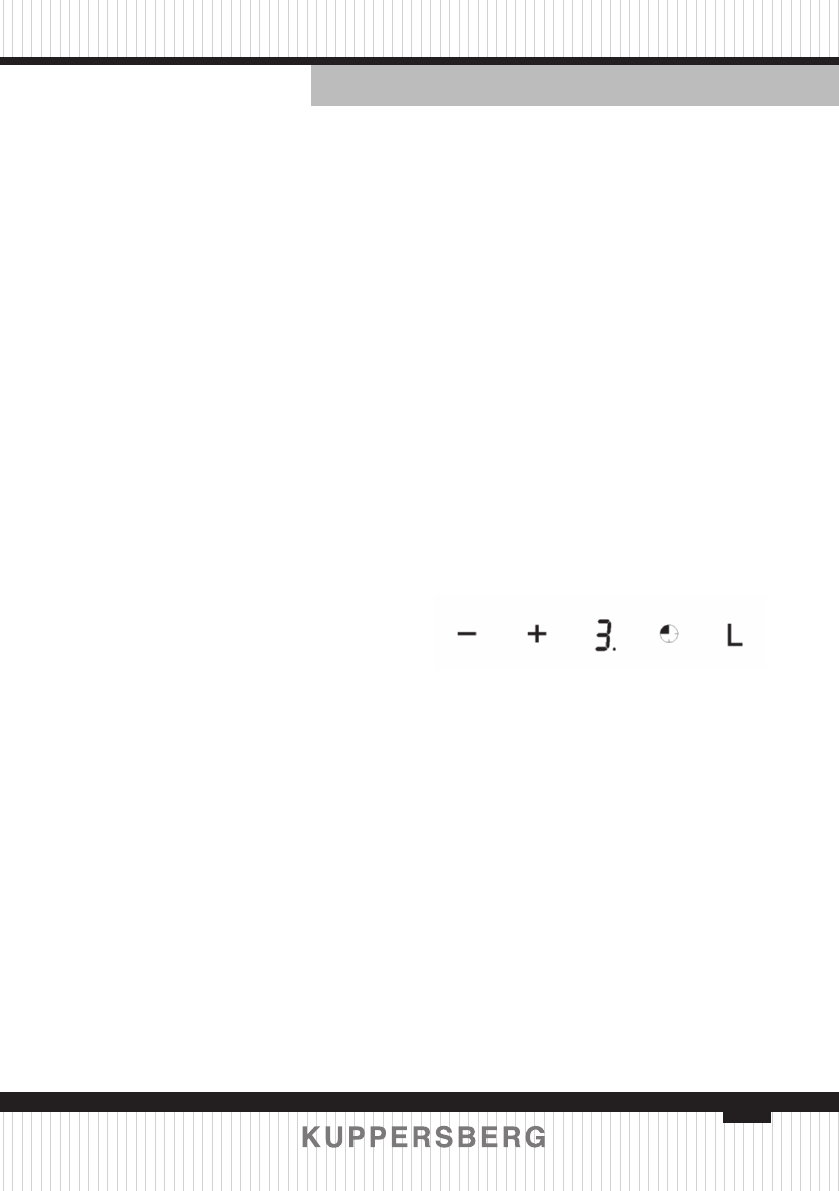
1 OFF motor
Pressing the button during
functioning, the hood turns OFF.
2 Speed Increase
Pressing the button the hood passes
from the OFF state to speed 1.
Pressing the button (hood in ON
state) the motor speed is increased
from speed 1 to intensive.
To each speed corresponds the
ignition of the respective led.
Speed 1: 1
Speed 2: 2
Speed 3: 3
Speed 4: 4
3 ON/OFF lights
4 Speed timing
5 Function state indicator
Характеристики

Остались вопросы?Не нашли свой ответ в руководстве или возникли другие проблемы? Задайте свой вопрос в форме ниже с подробным описанием вашей ситуации, чтобы другие люди и специалисты смогли дать на него ответ. Если вы знаете как решить проблему другого человека, пожалуйста, подскажите ему :)


