
Вытяжки Kuppersberg Ibox 60 X - инструкция пользователя по применению, эксплуатации и установке на русском языке. Мы надеемся, она поможет вам решить возникшие у вас вопросы при эксплуатации техники.
Если остались вопросы, задайте их в комментариях после инструкции.
"Загружаем инструкцию", означает, что нужно подождать пока файл загрузится и можно будет его читать онлайн. Некоторые инструкции очень большие и время их появления зависит от вашей скорости интернета.


23
ENGLISH
TECHNICAL PASSPORT
Cooker hood
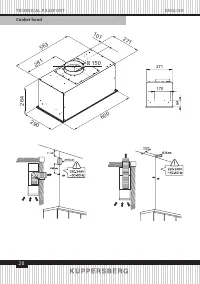
INSTALLATION
The minimum distance between
the supporting surface for the cooking
equipment on the hob and the lowest
part of the range hood must be not less
than 45cm from electric cookers and
50cm from gas or mixed cookers.
If the instructions for installation for
the gas hob specify a greater distance,
this must be adhered to.
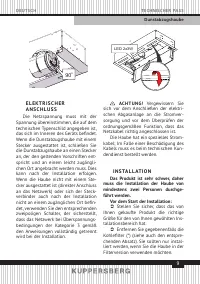
ELECTRICAL CONNECTION
The mains power supply must cor-
respond to the rating indicated on the
plate situated inside the hood. If pro-
vided with a plug connect the hood to a
socket in compliance with current regu-
lations and positioned in an accessible
area, after installation. If it not fitted
with a plug (direct mains connection)
or if the plug is not located in an ac-
cessible area, after installation, apply a
double pole switch in accordance with
standards which assures the complete
disconnection of the mains under con-
ditions relating to overcurrent category
III, in accordance with installation in-
structions.
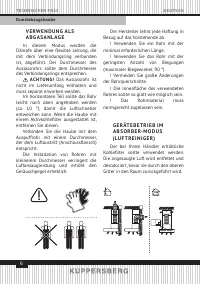
WA R N I N G!
Before re-connecting
the hood circuit to the mains supply and
checking the efficient function, always
check that the mains cable is correctly
assembled. The hood is provided with a
special power cable; if the cable is dam
-
aged, request a new one from Technical
Service.
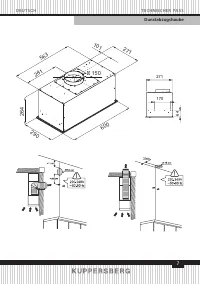
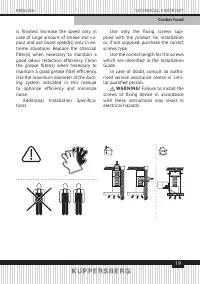
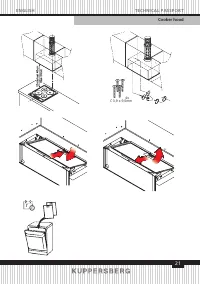
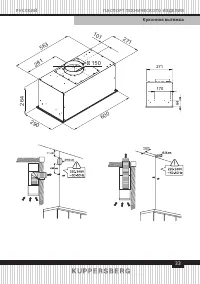
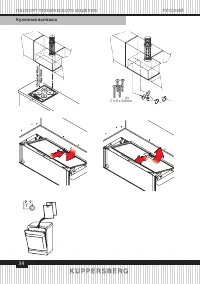
MOUNTING
Very heavy product; hood handling
and installation must be carried out by
at least two persons.
Before beginning installation:
Â
Check that the product purchased
is of a suitable size for the chosen
installation area.
Â
Remove the charcoal (*) filter/s if
supplied (see also relative paragraph).
This/these is/are to be mounted only if
you want lo use the hood in the filtering
version.
Â
Check (for transport reasons)
that there is no other supplied material
inside the hood (e.g. packets with
screws (*), guarantees (*), etc.), eventually
removing them and keeping them.
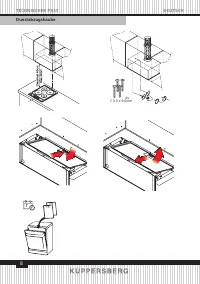
Â
If possible, disconnect and move
freestanding or slide-in range from
cabinet opening to provide easier
access to rear wall/ceiling. Otherwise
put a thick, protective covering over
countertop, cooktop or range to protect
from damage and debris. Select a flat
surface for assembling the unit. Cover
that surface with a protective covering
and place all canopy hood parts and
hardware in it.
Â
In addition check whether near
the installation area of the hood (in
the area accessible also with the hood
mounted) an electric socket is available
and it is possible to connect a fumes
discharge device to the outside (only
suction version).
Â
Carry out all the masonry work
necessary (e.g. installation of an electric
Содержание
- 29 Вы
- 31 Рекомендации по правильному
- 32 РАБОТА В РЕЖИМЕ ВЫТЯЖНОЙ; РАБОТА УСТРОЙСТВА В
- 35 ЭЛЕКТРИЧЕСКОЕ; Перед началом установки:
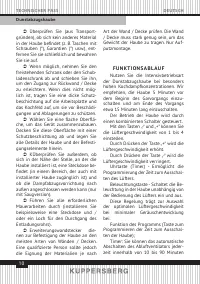
- 36 ФУНКЦИОНИРОВАНИЕ; Функция программы
- 37 Дистанционное управление
- 38 О Ч И С Т К А
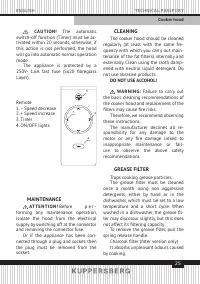
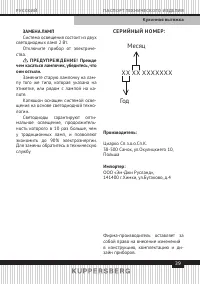
- 39 С Е Р И Й Н Ы Й Н О М Е Р:; Год; ЗАМЕНА ЛАМП
- 42 О О О; УС ТА Н О В КА, ГА РА Н Т И Й Н О Е И П О С Т ГА РА Н Т И Й Н О Е О Б С Л УЖ И В А Н И Е; Телефон горячей линии Kuppersberg:; Полный список авторизованных сервисных центров; УСЛОВИЯ ГАРАНТИИ


