
Вытяжки Falmec MOVE 60 - инструкция пользователя по применению, эксплуатации и установке на русском языке. Мы надеемся, она поможет вам решить возникшие у вас вопросы при эксплуатации техники.
Если остались вопросы, задайте их в комментариях после инструкции.
"Загружаем инструкцию", означает, что нужно подождать пока файл загрузится и можно будет его читать онлайн. Некоторые инструкции очень большие и время их появления зависит от вашей скорости интернета.


21
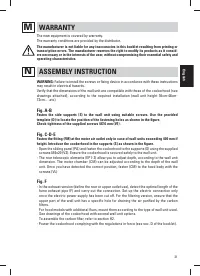
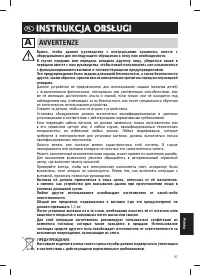
WARRANTY
M
The new equipment is covered by warranty.
The warranty conditions are provided by the distributor.
The manufacturer is not liable for any inaccuracies in this booklet resulting from printing or
transcription errors. The manufacturer reserves the right to modify its products as it consid-
ers necessary or in the interests of the user, without compromising their essential safety and
operating characteristics.
N
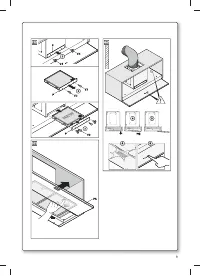
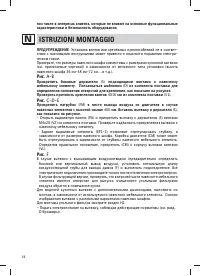
ASSEMBLY INSTRUCTION
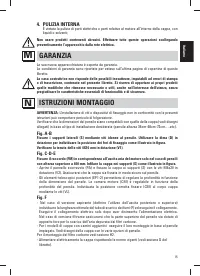
WARNING:
Failure to install the screws or fixing device in accordance with these instructions
may result in electrical hazards.
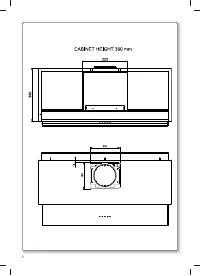
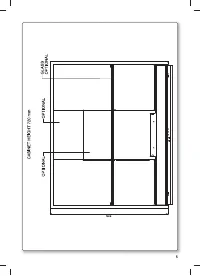
Verify that the dimensions of the wall unit are compatible with those of the cookerhood (see
drawings attached), according to the required installation (wall unit height 36cm-48cm-
72cm….etc).
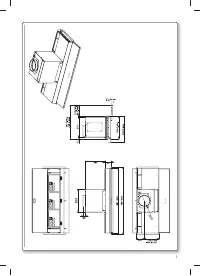
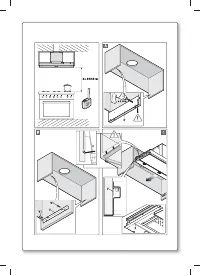
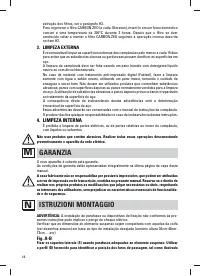
Fig. A-B
Fasten the side supports (S) to the wall unit using suitable screws. Use the provided
template (D) to locate the position of the fastening holes as shown in the fi gure.
Check tightness of the supplied screws 4X16 mm (V1).
Fig. C-D-E
Fasten the fi tting (FM) at the motor air outlet only in case of wall units exceeding 400 mm if
height. Introduce the cookerhood in the supports (S) as shown in the fi gure.
- Open the sliding panel (PA) and fasten the cookerhood to the supports (S) using the supplied
screws M4x20 (V2). Ensure the cookerhood is secured safely to the wall unit.
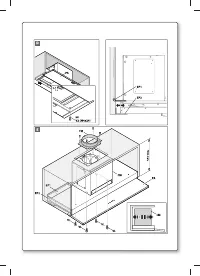
- The rear telescopic elements (EP1-2) allow you to adjust depth, according to the wall unit
dimension. The motor chamber (CM) can be adjusted according to the depth of the wall
unit. Once you have detected the correct position, fasten (CM) to the hood body with the
screws (VL)
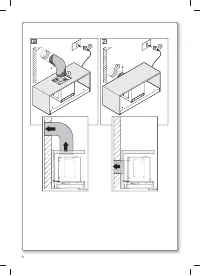
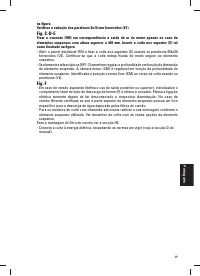
Fig. F
- In the exhaust version (defi ne the rear or upper outlet use), detect the optimal length of the
fume exhaust pipe (F) and carry out the connection. Set up the electric connection only
once the electric power supply has been cut off. For the fi ltering version, ensure that the
upper part of the wall unit has a specifi c hole for draining the air purifi ed by the carbon
fi lters.
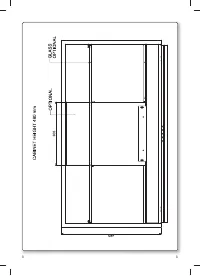
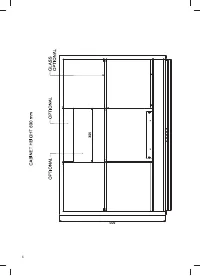
For hood models with additional fl ues, mount them according to the type of wall unit used.
See drawings of the cookerhood with several wall unit options.
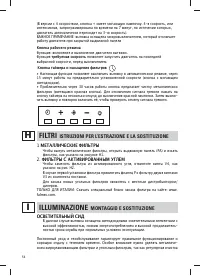
To assemble the carbon fi lter, refer to section H2.
- Power the cookerhood complying with the regulations in force (see sec. D of the booklet).
English
Характеристики

Остались вопросы?Не нашли свой ответ в руководстве или возникли другие проблемы? Задайте свой вопрос в форме ниже с подробным описанием вашей ситуации, чтобы другие люди и специалисты смогли дать на него ответ. Если вы знаете как решить проблему другого человека, пожалуйста, подскажите ему :)


