
Вытяжки Falmec MIRA TOP isola 40 - инструкция пользователя по применению, эксплуатации и установке на русском языке. Мы надеемся, она поможет вам решить возникшие у вас вопросы при эксплуатации техники.
Если остались вопросы, задайте их в комментариях после инструкции.
"Загружаем инструкцию", означает, что нужно подождать пока файл загрузится и можно будет его читать онлайн. Некоторые инструкции очень большие и время их появления зависит от вашей скорости интернета.


23
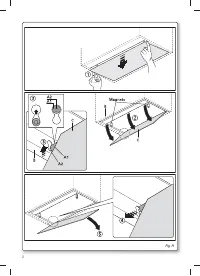
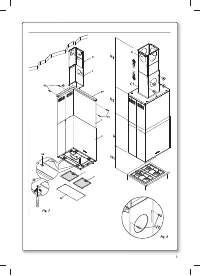
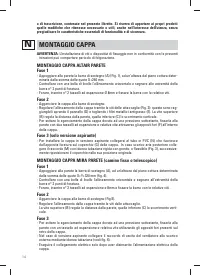
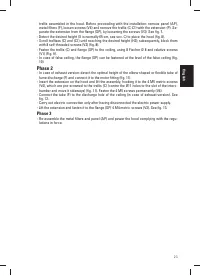
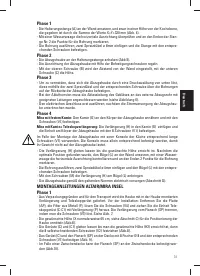
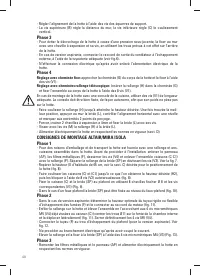
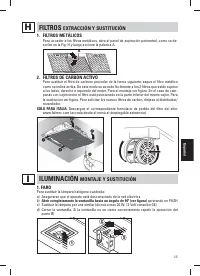
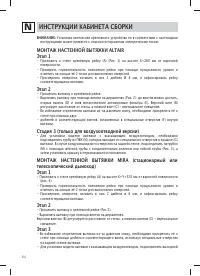
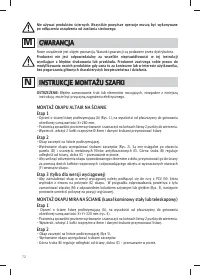
trellis assembled in the hood. Before proceeding with the installation: remove panel (AP),
metal filters (F), loosen screws (V4) and remove the trellis (C-C1) with the extension (P). Se-
parate the extension from the flange (SP), by loosening the screws (V3). See fig. 7.
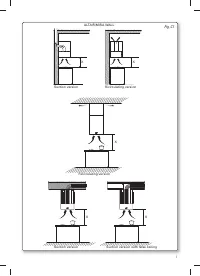
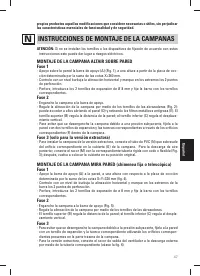
- Detect the desired height (X is normally 65 cm, see sec. C) to place the hood (fig. 8).
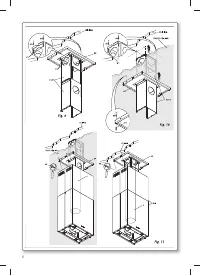
- Scroll trellises (C) and (C1) until reaching the desired height (H2); subsequently, block them
with 8 self-threaded screws (V2) (fig. 8).
- Fasten the trellis (C) and flange (SP) to the ceiling, using 8 Fischer Ø 8 and relative screws
(V1) (Fig. 9).
- In case of false ceiling, the flange (SP) can be fastened at the level of the false ceiling (fig.
10).
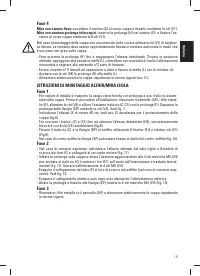
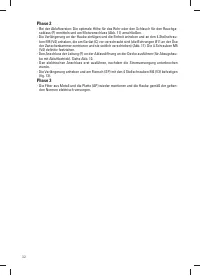
Phase 2
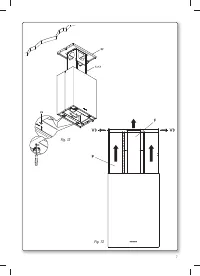
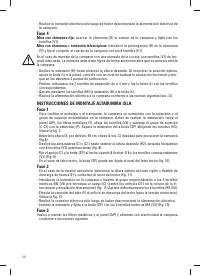
- In case of exhaust version: detect the optimal height of the elbow shaped or flexible tube of
fume discharge (F) and connect it to the motor fitting (fig. 11).
- Insert the extension on the hood and lift the assembly, hooking it to the 4 M5 metric screws
(V4), which are pre-screwed to the trellis (C) (centre the Ø11 holes to the slot of the interc-
hamber and move it sideways) (fig. 11). Fasten the 4 M5 screws permanently (V4).
- Connect the tube (F) to the discharge hole of the ceiling (in case of exhaust version). See
fig. 12.
- Carry out electric connection only after having disconnected the electric power supply.
- Lift the extension and fasten it to the flange (SP) 4 M4 metric screws (V3). See fig. 13.
Phase 3
- Re-assemble the metal filters and panel (AP) and power the hood complying with the regu-
lations in force.
English
Содержание
- 61 íÖïçàóÖëäàÖ ïÄêÄäíÖêàëíàäà; åéçíÄÜ; éëçéÇçõÖ áÄåÖóÄçàü; èéÑäãûóÖçàÖ ùãÖäíêéùçÖêÉàà
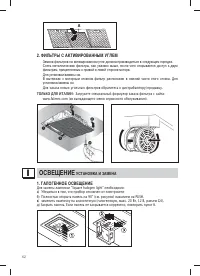
- 64 îàãúíêõ ë ÄäíàÇàêéÇÄççõå ìÉãÖå; éëÇÖôÖçàÖ; ìëíÄçéÇäÄ à áÄåÖçÄ; ÉÄãéÉÖççéÖ éëÇÖôÖçàÖ
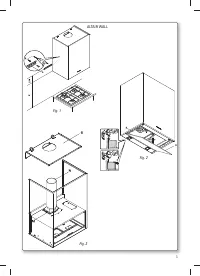
- 66 ALTAIR
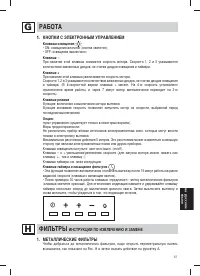
Характеристики

Остались вопросы?Не нашли свой ответ в руководстве или возникли другие проблемы? Задайте свой вопрос в форме ниже с подробным описанием вашей ситуации, чтобы другие люди и специалисты смогли дать на него ответ. Если вы знаете как решить проблему другого человека, пожалуйста, подскажите ему :)


