
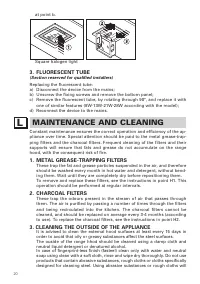
Вытяжки Falmec Kristal 60 ix (800) ECP - инструкция пользователя по применению, эксплуатации и установке на русском языке. Мы надеемся, она поможет вам решить возникшие у вас вопросы при эксплуатации техники.
Если остались вопросы, задайте их в комментариях после инструкции.
"Загружаем инструкцию", означает, что нужно подождать пока файл загрузится и можно будет его читать онлайн. Некоторые инструкции очень большие и время их появления зависит от вашей скорости интернета.


22
O
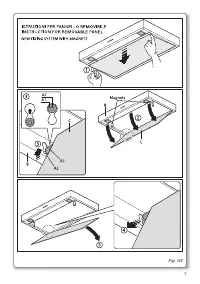
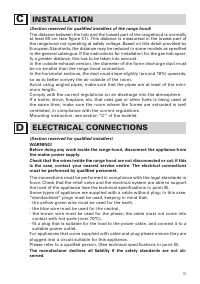
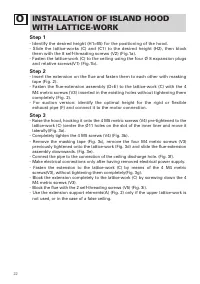
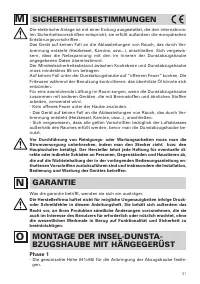
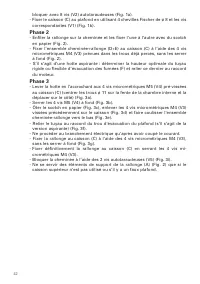
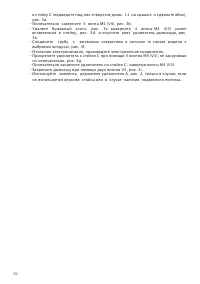
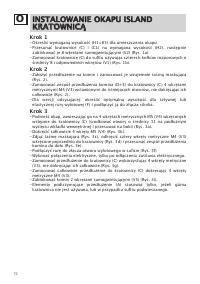
INSTALLATION OF ISLAND HOOD
WITH LATTICE-WORK
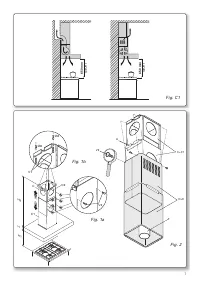
Step 1
- Identify the desired height (H1=65) for the positioning of the hood.
- Slide the lattice-works (C) and (C1) to the desired height (H2), then block
them with the 8 self-threading screws (V2) (Fig.1a).
- Fasten the lattice-work (C) to the ceiling using the four Ø 8 expansion plugs
and relative screws(V1) (Fig.1b).
Step 2
- Insert the extension on the flue and fasten them to each other with masking
tape (Fig. 2).
- Fasten the flue-extension assembly (D+E) to the lattice-work (C) with the 4
M4 metric screws (V3) inserted in the existing holes without tightening them
completely (Fig. 2).
- For suction version: identify the optimal height for the rigid or flexible
exhaust pipe (F) and connect it to the motor connection.
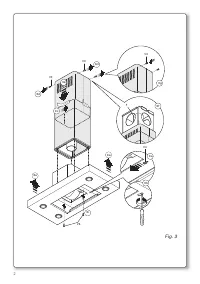
Step 3
- Raise the hood, hooking it onto the 4 M5 metric screws (V4) pre-tightened to the
lattice-work (C) (center the Ø11 holes on the slot of the inner liner and move it
laterally)(Fig. 3a).
- Completely tighten the 4 M5 screws (V4) (Fig. 3b).
- Remove the masking tape (Fig. 3c), remove the four M4 metric screws (V3)
previously tightened onto the lattice-work (Fig. 3d) and slide the flue-extension
assembly downwards. (Fig. 3e).
- Connect the pipe to the connection of the ceiling discharge hole. (Fig. 3f).
- Make electrical connections only after having removed electrical power supply.
- Fasten the extension to the lattice-work (C) by means of the 4 M4 metric
screws(V3), without tightening them completely(Fig. 3g).
- Block the extension completely to the lattice-work (C) by screwing down the 4
M4 metric screws (V3).
- Block the flue with the 2 self-threading screws (V5) (Fig. 3i).
- Use the extension support elements(A) (Fig. 2) only if the upper lattice-work is
not used, or in the case of a false ceiling.
Содержание
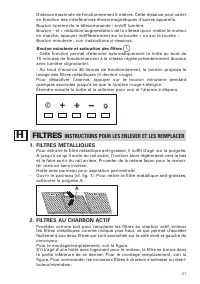
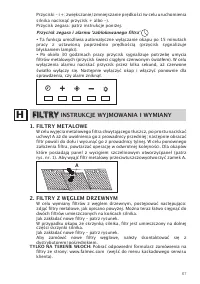
- 59 îàãúíêõ; àçëíêìäñàà èé àáÇãÖóÖçàû à áÄåÖçÖ; åÖíÄããàóÖëäàÖ îàãúíêõ
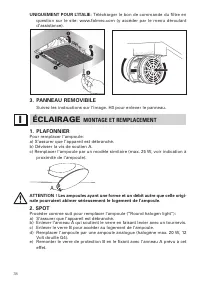
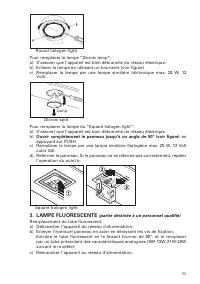
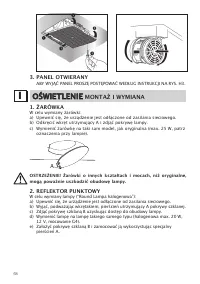
- 60 éëÇÖôÖçàÖ; ìëíÄçéÇäÄ à áÄåÖçÄ; ЛАМПОЧКА
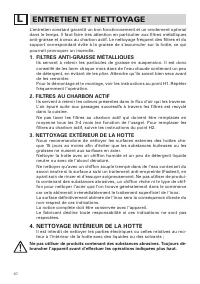
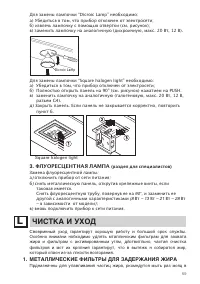
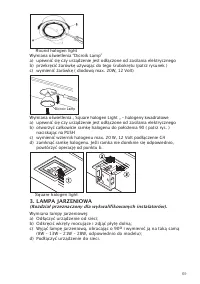
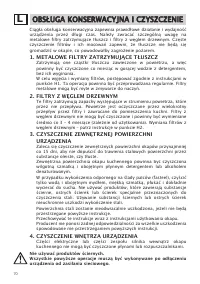
- 61 ФЛУОРЕСЦЕНТНАЯ; óàëíäÄ à ìïéÑ; åÖíÄããàóÖëäàÖ îàãúíêõ Ñãü áÄÑÖêÜÄçàü ÜàêÄ
- 63 ÉÄêÄçíàà; Этап
Характеристики

Остались вопросы?Не нашли свой ответ в руководстве или возникли другие проблемы? Задайте свой вопрос в форме ниже с подробным описанием вашей ситуации, чтобы другие люди и специалисты смогли дать на него ответ. Если вы знаете как решить проблему другого человека, пожалуйста, подскажите ему :)


