
Водонагреватели Timberk T-WSS80-FS40D-V - инструкция пользователя по применению, эксплуатации и установке на русском языке. Мы надеемся, она поможет вам решить возникшие у вас вопросы при эксплуатации техники.
Если остались вопросы, задайте их в комментариях после инструкции.
"Загружаем инструкцию", означает, что нужно подождать пока файл загрузится и можно будет его читать онлайн. Некоторые инструкции очень большие и время их появления зависит от вашей скорости интернета.


IM2021
22
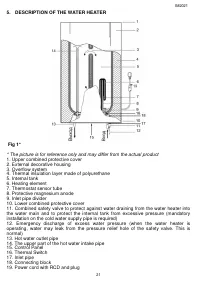
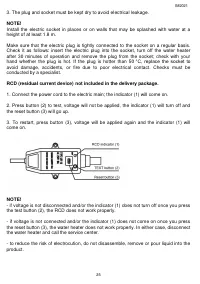
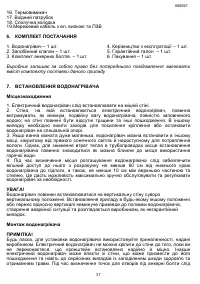
6. DELIVERY SET
1. W ater heater
– 1 pc.
2. Anchor bolt
– 2 pcs.
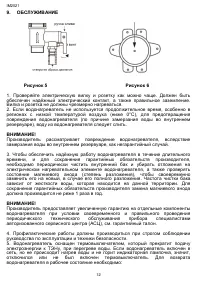
3. Safety relief valve
– 1 pc.
4. Manual
– 1 pc.
5. W arranty card
– 1 pc.
6. Package
– 1 pc.
**The design of the thermometer may be changed without prior notice. Depending on
the batch, the thermometer may be missing, which does not affect the performance of
the product.
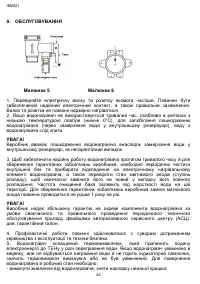
7. INSTALLATION OF THE WATER HEATER
Site
1. The electric water heater must be installed on a solid wall.
2. The wall on which the electric water heater is installed must be strong enough to
support at least twice the weight of the heater filled with water, and the wall must be
free of cracks and other damage. Otherwise, measures must be taken to reinforce the
support or install the water heater on a special frame.
3. If the bathroom is too small, the heater can be installed elsewhere, out of direct
sunlight and away from humidity. However, in order to reduce heat loss in the pipes,
the heater should be installed as close as possible to where hot water is used.
4. W hen determining the site for the water heater, make sure the heater is easily
accessible by leaving at least 60 cm between the bottom of the water heater and the
floor, and at least 10 cm between the top of the water heater and the ceiling. This will
enable easy maintenance and adjustment as required.
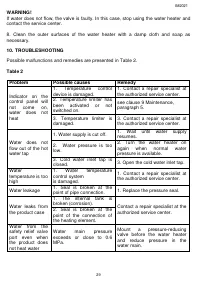
WARNING!
The water heater must be installed on a vertical wall in a vertical position. If installed in
any other position or misaligned, the water heater will inevitably malfunction, causing
an emergency. This will be treated by the manufacturer as a non-warranty case.
Water heater installation
NOTE!
Please use the accessories provided by the manufacturer to install the water heater.
The electric water heater must not be mounted on the wall before you make sure that
the bracket is securely installed. Any failure to do so may cause the electric water
heater to fall off the wall, which may cause its damage and even major incidents
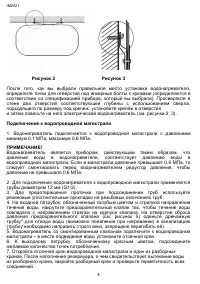
including bodily injuries. When marking spots for the anchor bolt holes, allow at least
60-cm clearance between the bottom of the water heater and the floor to ensure easy
maintenance when required.
Содержание
- 4 НАЗНАЧЕНИЕ ПРИБОРА
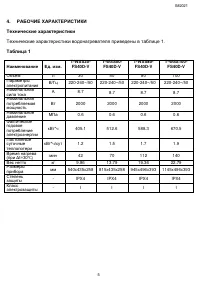
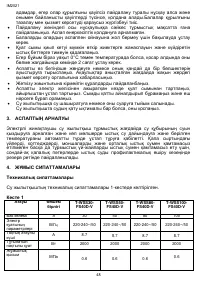
- 5 РАБОЧИЕ ХАРАКТЕРИСТИКИ; Наименование
- 7 КОМПЛЕКТ ПОСТАВКИ; изменять содержимое комплекта поставки данного прибора; УСТАНОВКА ВОДОНАГРЕВАТЕЛЯ
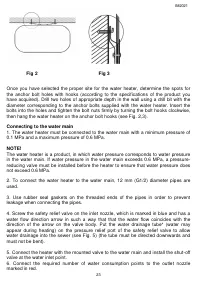
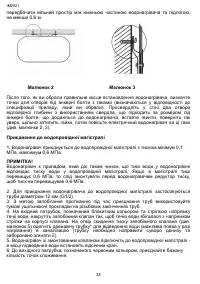
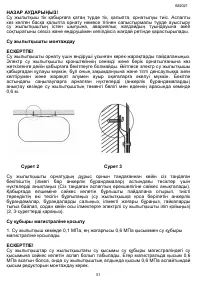
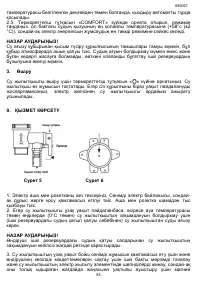
- 8 Рисунок 2 Рисунок 3; определите точки для отверстий под анкерные болты с крюками
- 9 повторное использование старых шлангов не допускается
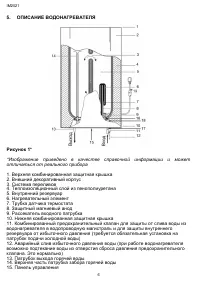
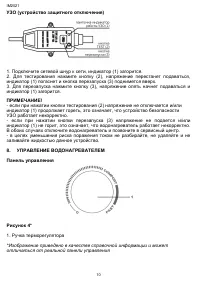
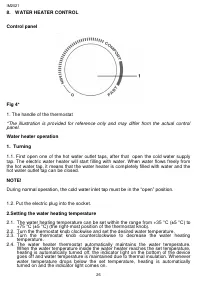
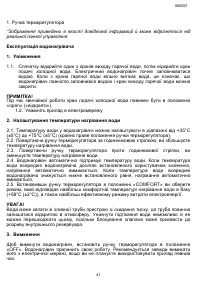
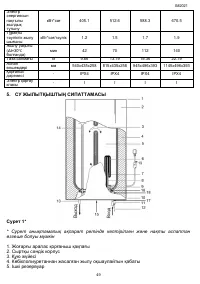
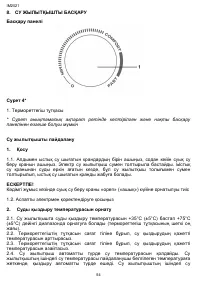
- 10 Ручка терморегулятора
- 11 Включение
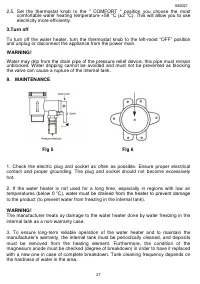
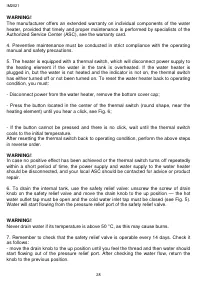
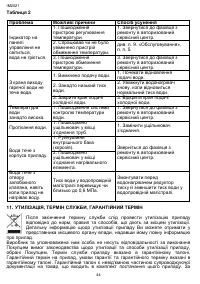
- 12 ОБСЛУЖИВАНИЕ
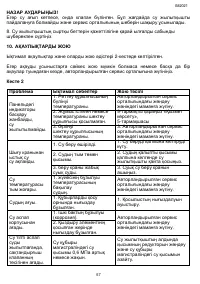
- 15 УТИЛИЗАЦИЯ, СРОК СЛУЖБЫ, ГАРАНТИЙНЫЙ СРОК
Характеристики

Остались вопросы?Не нашли свой ответ в руководстве или возникли другие проблемы? Задайте свой вопрос в форме ниже с подробным описанием вашей ситуации, чтобы другие люди и специалисты смогли дать на него ответ. Если вы знаете как решить проблему другого человека, пожалуйста, подскажите ему :)


