
Водонагреватели Timberk T-WSS100-FS40D-V - инструкция пользователя по применению, эксплуатации и установке на русском языке. Мы надеемся, она поможет вам решить возникшие у вас вопросы при эксплуатации техники.
Если остались вопросы, задайте их в комментариях после инструкции.
"Загружаем инструкцию", означает, что нужно подождать пока файл загрузится и можно будет его читать онлайн. Некоторые инструкции очень большие и время их появления зависит от вашей скорости интернета.


IM2021
23
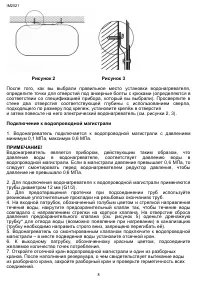
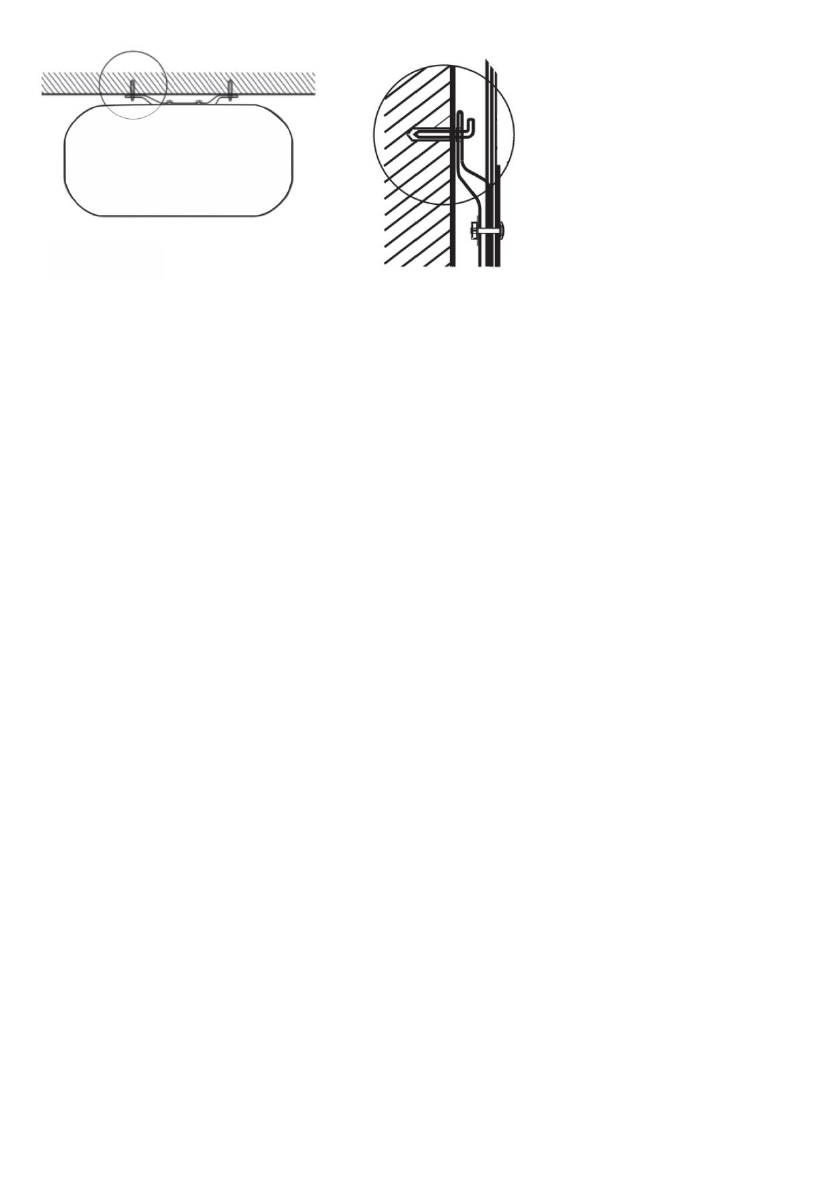
Fig 2 Fig 3
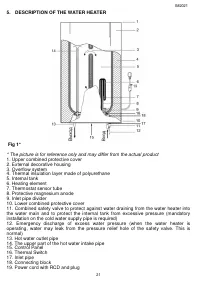
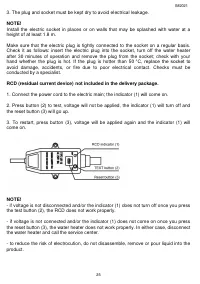
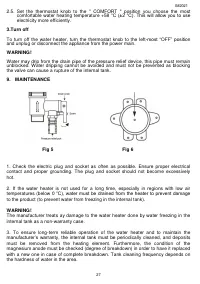
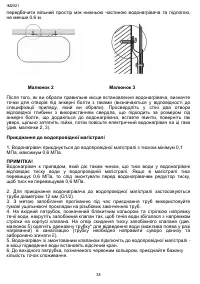
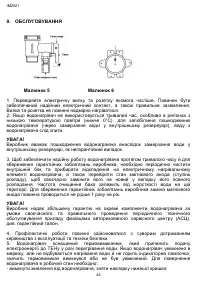
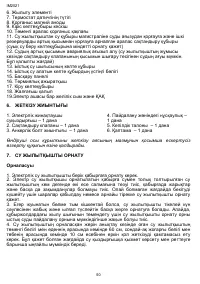
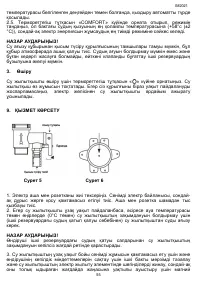
Once you have selected the proper site for the water heater, determine the spots for
the anchor bolt holes with hooks (according to the specifications of the product you
have acquired). Drill two holes of appropriate depth in the wall using a drill bit wit h the
diameter corresponding to the anchor bolts supplied with the water heater. Insert the
bolts into the holes and tighten the bolt nuts firmly by turning the bolt hooks clockwise,
then hang the water heater on the anchor bolt hooks (see Fig. 2,3).
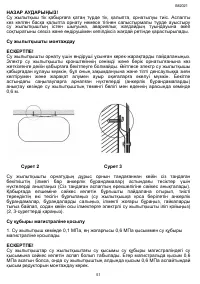
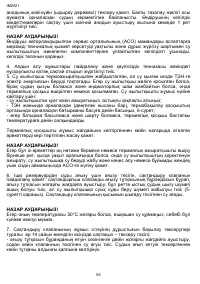
Connecting to the water main
1. The water heater must be connected to the water main with a minimum pressure of
0.1 MPa and a maximum pressure of 0.6 MPa.
NOTE!
The water heater is a product, in which water pressure corresponds to water pressure
in the water main. If water pressure in the water main exceeds 0.6 MPa, a pressure-
reducing valve must be installed before the heater to ensure that water pressure does
not exceed 0.6 MPa.
2. To connect the water heater to the water main, 12 mm (G1/2) diameter pip es are
used.
3. Use rubber seal gaskets on the threaded ends of the pipes in order to prevent
leakage when connecting the pipes.
4. Screw the safety relief valve on the inlet nozzle, which is marked in blue and has a
water flow direction arrow in such a way that that the water flow coincides with the
direction of the arrow on the valve body. Put the water drainage tube* (water may
appear during heating) on the pressure relief port of the safety relief valve to allow
water drainage into the sewer (see Fig. 5) (the tube must be directed downwards and
must not be bent).
5. Connect the heater with the mounted valve to the water main and install the shut -off
valve at the water inlet point.
6. Connect the required number of water consumption points to the outle t nozzle
marked in red.
Содержание
- 4 НАЗНАЧЕНИЕ ПРИБОРА
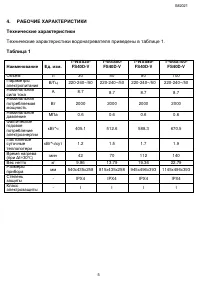
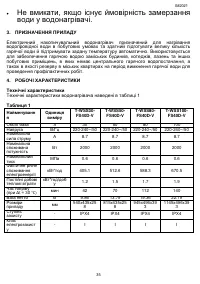
- 5 РАБОЧИЕ ХАРАКТЕРИСТИКИ; Наименование
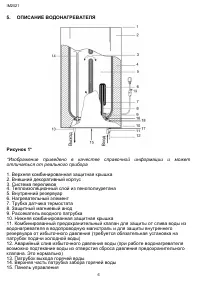
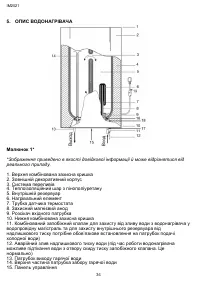
- 7 КОМПЛЕКТ ПОСТАВКИ; изменять содержимое комплекта поставки данного прибора; УСТАНОВКА ВОДОНАГРЕВАТЕЛЯ
- 8 Рисунок 2 Рисунок 3; определите точки для отверстий под анкерные болты с крюками
- 9 повторное использование старых шлангов не допускается
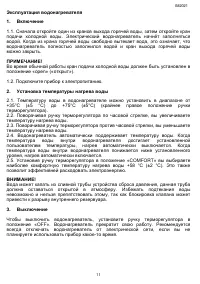
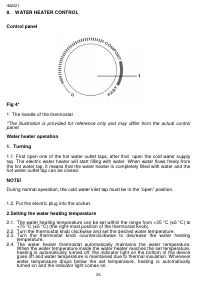
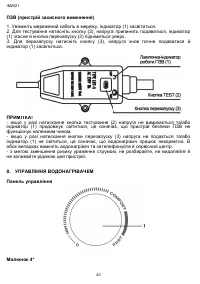
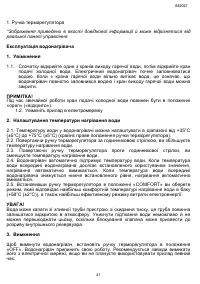
- 10 Ручка терморегулятора
- 11 Включение
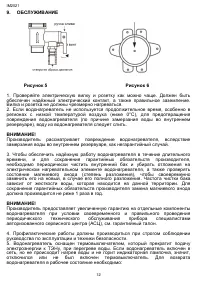
- 12 ОБСЛУЖИВАНИЕ
- 15 УТИЛИЗАЦИЯ, СРОК СЛУЖБЫ, ГАРАНТИЙНЫЙ СРОК
Характеристики

Остались вопросы?Не нашли свой ответ в руководстве или возникли другие проблемы? Задайте свой вопрос в форме ниже с подробным описанием вашей ситуации, чтобы другие люди и специалисты смогли дать на него ответ. Если вы знаете как решить проблему другого человека, пожалуйста, подскажите ему :)


