Видеорегистратор Prestigio Roadrunner 550 - инструкция пользователя по применению, эксплуатации и установке на русском языке. Мы надеемся, она поможет вам решить возникшие у вас вопросы при эксплуатации техники.
Если остались вопросы, задайте их в комментариях после инструкции.
"Загружаем инструкцию", означает, что нужно подождать пока файл загрузится и можно будет его читать онлайн. Некоторые инструкции очень большие и время их появления зависит от вашей скорости интернета.


EN
Quick Start Guide
Prestigio RoadRunner
EN-2
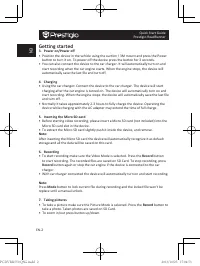
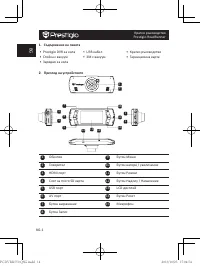
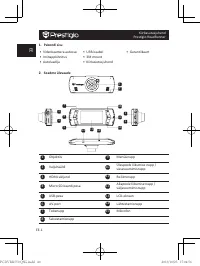
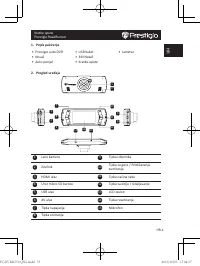
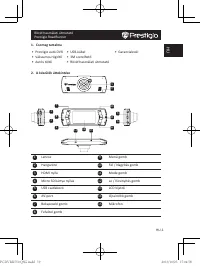
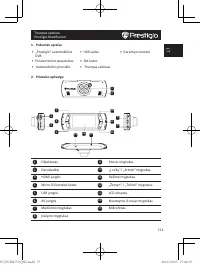
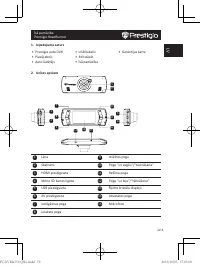
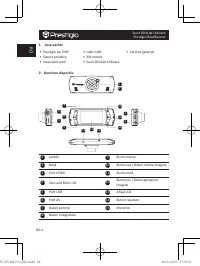
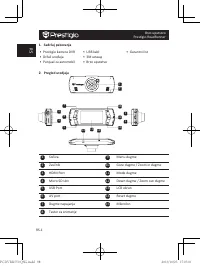
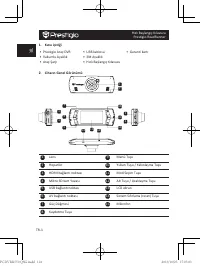
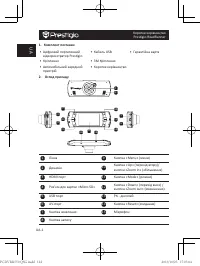
Getting started
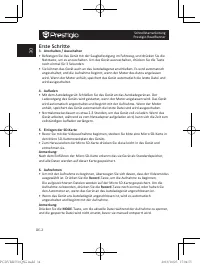
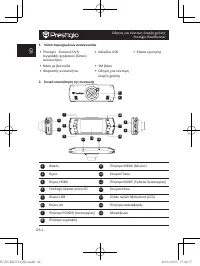
3. Power on/Power off
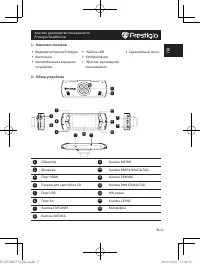
• Position the device in the vehicle using the suction / 3M mount and press the Power
button to turn it on. To power off the device press the button for 3 seconds.
• You can also connect the device to the car charger. It will automatically turn on and
start recording when the car engine starts. When the engine stops, the device will
automatically save the last file and turn off.
4. Charging
• Using the car changer: Connect the device to the car charger. The device will start
charging after the car engine is turned on. The device will automatically turn on and
start recording. When the engine stops, the device will automatically save the last file
and turn off.
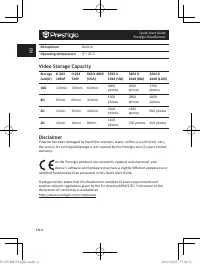
• Normally it takes approximately 2-3 hours to fully charge the device. Operating the
device while charging with the AC adapter may extend the time of full charge.
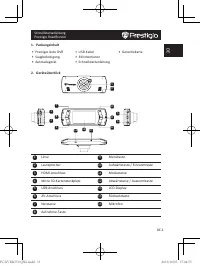
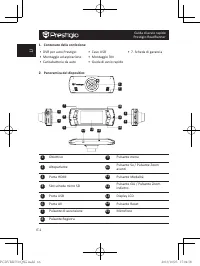
5. Inserting the Micro SD-card
• Before starting video recording, please insert a Micro SD card (not included) into the
Micro SD card slot in the device.
• To extract the Micro SD card slightly push it inside the device, and remove.
Note:
After inserting the Micro SD card the device will automatically recognize it as default
storage and all the data will be saved on this card.
6. Recording
• To start recording make sure the Video Mode is selected. Press the
Record
button
to start recording. The recorded files are saved on SD Card. To stop recording, press
Record
button again or stop the car engine if the device is connected to the car
charger.
• With car charger connected the device will automatically turn on and start recording.
Note:
Press
Mode
button to lock current file during recording and the locked file won’t be
replace until a manual unlock.
7. Taking pictures
• To take a picture make sure the Picture Mode is selected. Press the
Record
button to
take a photo. Taken photos are saved on SD Card.
• To zoom in/out press button up/down.
PCDVRR550 QSG.indd 2
2013/10/25 17:04:53


