
Варочная панель De Dietrich DPE7549XF - инструкция пользователя по применению, эксплуатации и установке на русском языке. Мы надеемся, она поможет вам решить возникшие у вас вопросы при эксплуатации техники.
Если остались вопросы, задайте их в комментариях после инструкции.
"Загружаем инструкцию", означает, что нужно подождать пока файл загрузится и можно будет его читать онлайн. Некоторые инструкции очень большие и время их появления зависит от вашей скорости интернета.


23
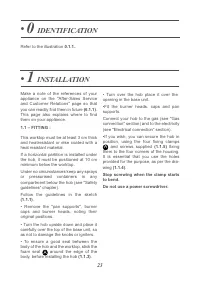
Refer to the illustration
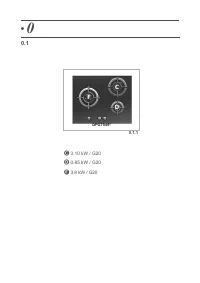
0.1.1.
.
•
0
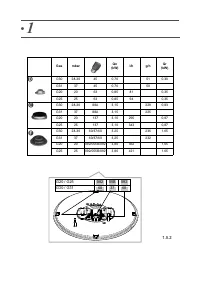
IDENTIFICATION
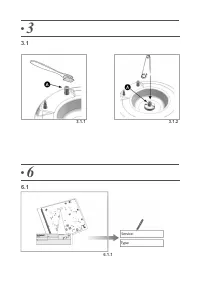
• Turn over the hob place it over the
opening in the base unit.
•Fit the burner heads, caps and pan
supports.
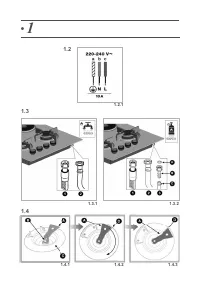
Connect your hob to the gas (see "Gas
connection" section) and to the electricity
(see "Electrical connection“ section).
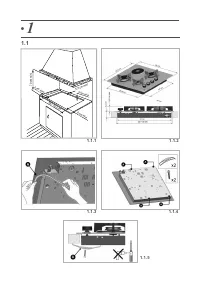
•If you wish, you can secure the hob in
position, using the four fixing clamps
and screws supplied
(1.1.5)
fixing
them to the four corners of the housing.
It is essential that you use the holes
provided for the purpose, as per the dra-
wing
(1.1.4)
.
Stop screwing when the clamp starts
to bend.
Do not use a power screwdriver.
A
•
1
INSTALLATION
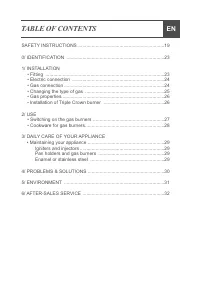
Make a note of the references of your
appliance on the "After-Sales Service
and Customer Relations" page so that
you can readily find them in future
(6.1.1)
.
This page also explains where to find
them on your appliance.
1.1 – FITTING :
This worktop must be at least 3 cm thick
and heatresistant or else coated with a
heat resistant material.
If a horizontal partition is installed under
the hob, it must be positioned at 10 cm
minimum below the worktop.
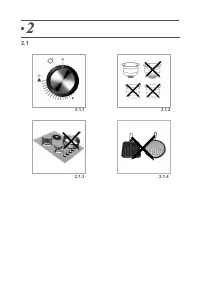
Under no circumstances keep any sprays
or pressurised containers in any
compartment below the hob (see "Safety
guidelines“ chapter).
Follow the guidelines in the sketch
(1.1.1)
.
• Remove the "pan supports", burner
caps and burner heads, noting their
original positions.
• Turn the hob upside down and place it
carefully over the top of the base unit, so
as not to damage the knobs or igniters.
• To ensure a good seal between the
body of the hob and the worktop, stick the
foam seal
around the edge of the
body, before installing the hob
(1.1.3)
.
A
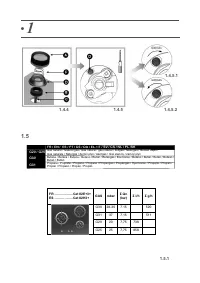
Характеристики

Остались вопросы?Не нашли свой ответ в руководстве или возникли другие проблемы? Задайте свой вопрос в форме ниже с подробным описанием вашей ситуации, чтобы другие люди и специалисты смогли дать на него ответ. Если вы знаете как решить проблему другого человека, пожалуйста, подскажите ему :)


