
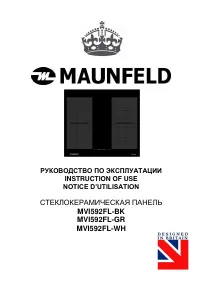
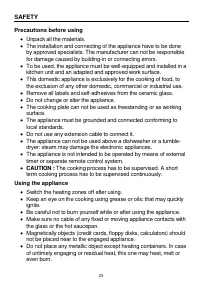
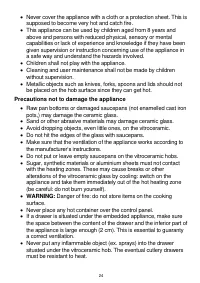
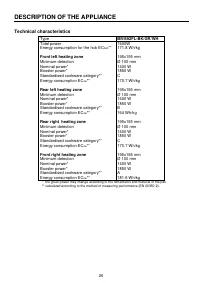
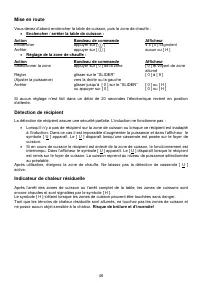
Варочная панель Maunfeld MVI59.2FL-WH - инструкция пользователя по применению, эксплуатации и установке на русском языке. Мы надеемся, она поможет вам решить возникшие у вас вопросы при эксплуатации техники.
Если остались вопросы, задайте их в комментариях после инструкции.
"Загружаем инструкцию", означает, что нужно подождать пока файл загрузится и можно будет его читать онлайн. Некоторые инструкции очень большие и время их появления зависит от вашей скорости интернета.


30
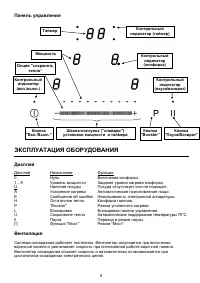
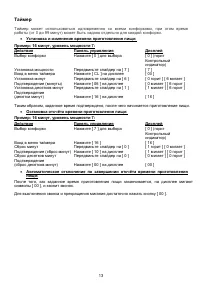
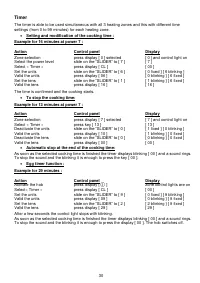
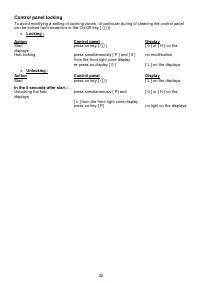
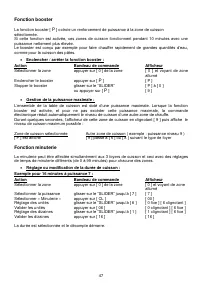
Timer
The timer is able to be used simultaneous with all 3 heating zones and this with different time
settings (from 0 to 99 minutes) for each heating zone.
•
Setting and modification of the cooking time :
Example for 16 minutes at power 7 :
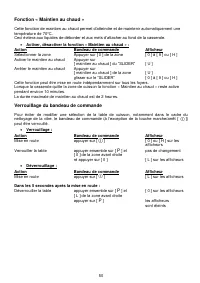
Action
Control panel
Display
Zone selection
press display [ 0 ] selected
[ 0 ] and control light on
Select the power level
slide on the “SLIDER“ to [ 7 ]
[ 7 ]
Select « Timer »
press display [ CL ]
[ 00 ]
Set the units
slide on the “SLIDER“ to [ 6 ]
[ 0 fixed ] [ 6 blinking ]
Valid the units
press display [ 06 ]
[ 0 blinking ] [ 6 fixed ]
Set the tens
slide on the “SLIDER“ to [ 1 ]
[ 1 blinking ] [ 6 fixed ]
Valid the tens
press display [ 16 ]
[ 16 ]
The time is confirmed and the cooking starts.
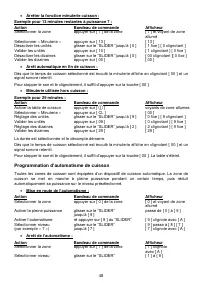
•
To stop the cooking time:
Example for 13 minutes at power 7 :
Action
Control panel
Display
Zone selection
press display [ 7 ] selected
[ 7 ] and control light on
Select « Timer »
press key [ 13 ]
[ 13 ]
Deactivate the units
slide on the “SLIDER“ to [ 0 ]
[ 1 fixed ] [ 0 blinking ]
Valid the units
press display [ 10 ]
[ 1 blinking ] [ 0 fixed ]
Deactivate the tens
slide on the “SLIDER“ to [ 0 ]
[ 0 blinking ] [ 0 fixed ]
Valid the tens
press display [ 00 ]
[ 00 ]
•
Automatic stop at the end of the cooking time:
As soon as the selected cooking time is finished the timer displays blinking [ 00 ] and a sound rings.
To stop the sound and the blinking it is enough to press the key [ 00 ].
•
Egg timer function :
Example for 29 minutes :
Action
Control panel
Display
Activate the hob
press display [
]
zone control lights are on
Select« Timer »
press display [ CL ]
[ 00 ]
Set the units
slide on the “SLIDER“ to [ 9 ]
[ 0 fixed ] [ 9 blinking ]
Valid the units
press display [ 09 ]
[ 0 blinking ] [ 9 fixed ]
Set the tens
slide on the “SLIDER“ to [ 2 ]
[ 2 blinking ] [ 9 fixed ]
Valid the tens
press display [ 29 ]
[ 29 ]
After a few seconds the control light stops with blinking.
As soon as the selected cooking time is finished the timer displays blinking [ 00 ] and a sound rings.
To stop the sound and the blinking it is enough to press the display [ 00 ]. The hob switches off.
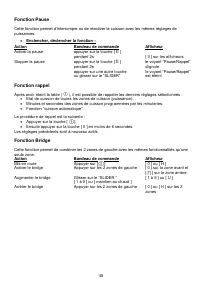
Содержание
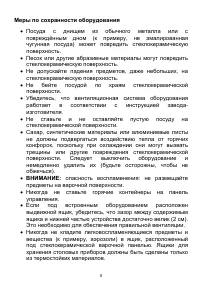
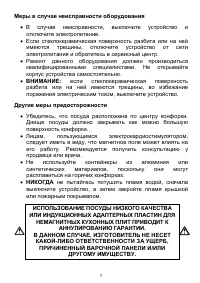
- 4 БЕЗОПАСНОСТЬ; Предварительные меры предосторожности
- 5 Эксплуатация оборудования
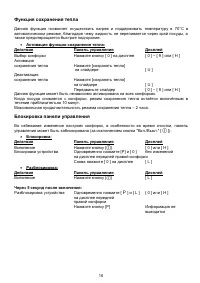
- 6 Меры по сохранности оборудования
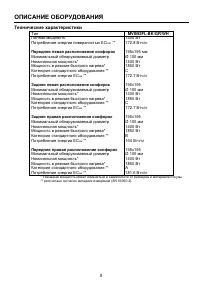
- 8 ОПИСАНИЕ ОБОРУДОВАНИЯ; Технические характеристики; Передняя левая pасположение конфорок; Задняя левая pасположение конфорок; Задняя правая pасположение конфорок; Передняя правая pасположение конфорок
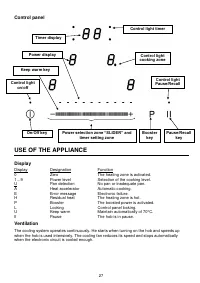
- 9 Панель управления; ЭКСПЛУАТАЦИЯ ОБОРУДОВАНИЯ; Дисплей
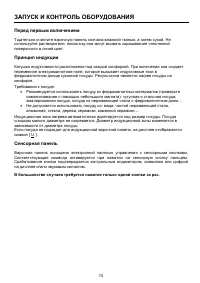
- 10 ЗАПУСК И КОНТРОЛЬ ОБОРУДОВАНИЯ; Перед первым включением
- 11 Запуск
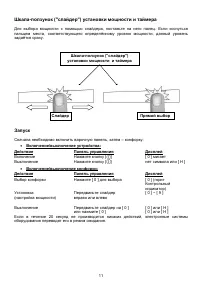
- 12 Опасность возгорания и пожара.; Управление мощностью:
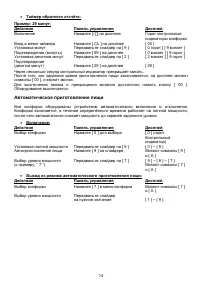
- 13 Таймер
- 14 Автоматическое приготовление пищи
- 15 II
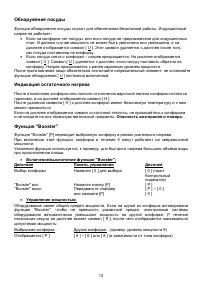
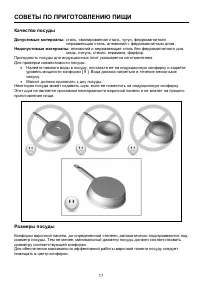
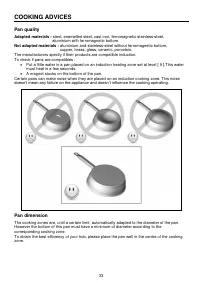
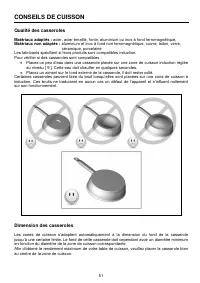
- 17 СОВЕТЫ ПО ПРИГОТОВЛЕНИЮ ПИЩИ; Качество посуды; Допустимые материалы:; Недопустимые материалы:; Размеры посуды
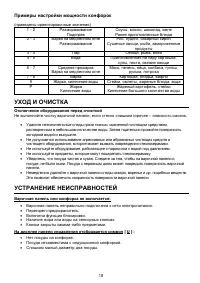
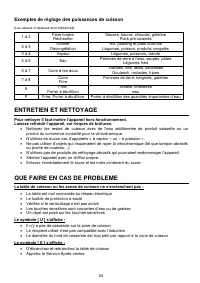
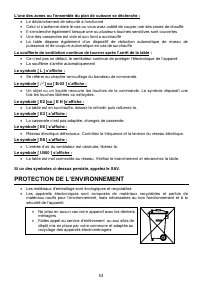
- 18 Примеры настройки мощности конфорок; УХОД И ОЧИСТКА; Отключение оборудования перед очисткой; УСТРАНЕНИЕ НЕИСПРАВНОСТЕЙ; Варочная панель или конфорка не включается:
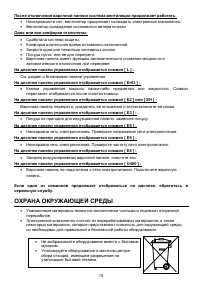
- 19 Одна или все конфорки отключены:; ОХРАНА ОКРУЖАЮЩЕЙ СРЕДЫ
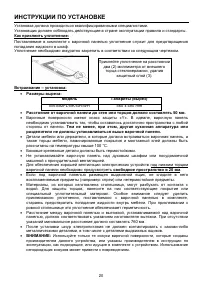
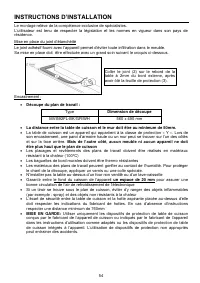
- 20 ИНСТРУКЦИИ ПО УСТАНОВКЕ
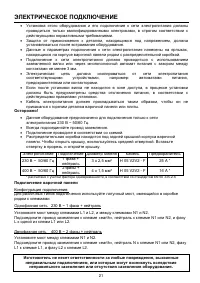
- 21 ЭЛЕКТРИЧЕСКОЕ ПОДКЛЮЧЕНИЕ; Подключение варочной панели
- 59 Гарантийная карта


