Увлажнители Timberk THU UL 22 E - инструкция пользователя по применению, эксплуатации и установке на русском языке. Мы надеемся, она поможет вам решить возникшие у вас вопросы при эксплуатации техники.
Если остались вопросы, задайте их в комментариях после инструкции.
"Загружаем инструкцию", означает, что нужно подождать пока файл загрузится и можно будет его читать онлайн. Некоторые инструкции очень большие и время их появления зависит от вашей скорости интернета.


www.timberk.com • electric humidifier
5
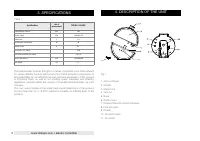
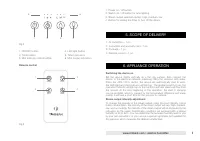
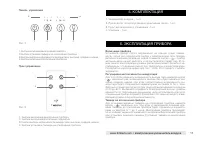
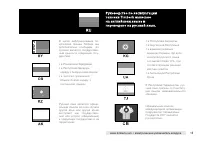
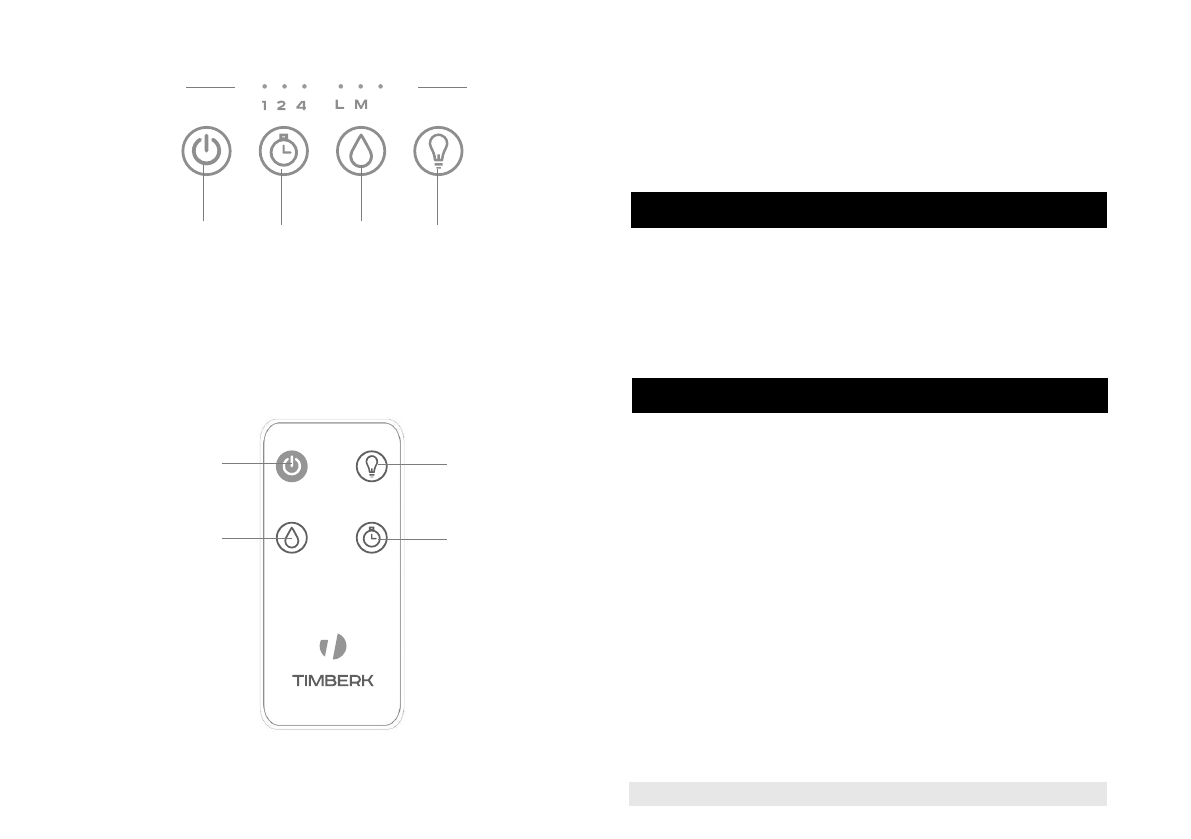
1. ON/OFF button
2. Timer button
3. Mist intensity control button
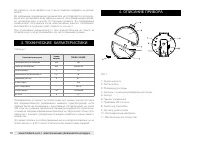
1. Power on / off button
2. Switch on / off button for tank lighting
3. Steam output selection button: high, medium, low
4. Button for setting the timer to turn off the device
Fig.2
Fig.3
1
2
3
4
4. LED light button
5. Timer indicators
6. Mist display indicators
Remote control
on/off
mist
light
timer
5. SCOPE OF DELIVERY
1. Air humidifier – 1 pc.
2. Instruction and warranty card - 1 pc.
3. Package – 1 pc.
4. Remote control – 1 pc.
6. APPLIANCE OPERATION
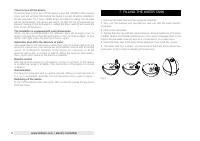
Switching the device on
Set the device strictly vertically on a flat, dry surface, then connect the
device to the electrical network, previously filling the reservoir with water.
Press the «ON / OFF» button, the device will automatically start to work,
the LED light and mist indicator will light up. The appliance will turn on, the
operation indicator will light up on the control panel and steam will flow from
the sprayer. At the very beginning of this operation, the level of spraying
can be unstable, which is caused by the temperature difference and water
quality. It will take a short time for this process to stabilize.
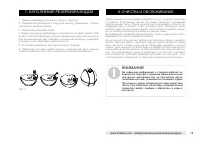
Steam output intensity adjustment
To change the intensity of the steam output, press the mist intensity control
button several times, the intensity of the steam output will vary: high, medium,
low, and accordingly the intensity of the steam output will be displayed by the
indicators on the panel. Comfortable conditions are achieved with a relative
humidity of 40 to 60%. You can determine the favorable humidity level for you
by your own sensations, or you can use a special hygrometer (not supplied) for
this purpose, which measures the relative humidity level.
1
2
3
4
5
6
H
Содержание
- 8 СОДЕРЖАНИЕ; Уважаемый покупатель!
- 9 ПРАВИЛА БЕЗОПАСНОСТИ
- 10 ТЕХНИЧЕСКИЕ ХАРАКТЕРИСТИКИ
- 11 ЭКСПЛУАТАЦИЯ ПРИБОРА; Включение прибора
- 13 ОЧИСТКА И ОБСЛУЖИВАНИЕ; НАПОЛНЕНИЕ РЕЗЕРВУАРА ВОДОЙ
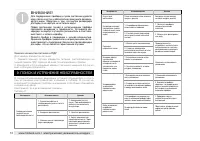
- 14 ПОИСК И УСТРАНЕНИЕ НЕИСПРАВНОСТЕЙ; В случае возникновения аварийных ситуаций обращайтесь к спосо-; Замена элементов питания в ПДУ
- 17 Гарантийные обязательства
- 19 Изготовитель не несет гарантийных обязательств за изделие в
- 20 Бланк гарантийного талона.; Заполняется фирмой-продавцом; Без подписи покупателя Гарантийный талон является недей-; ности (если прибор проверялся в его присутствии при продаже) приоб-
- 23 сообщите нам об этом, связавшись с нами по электронной почте,


