Утюги Philips GC8510/02 - инструкция пользователя по применению, эксплуатации и установке на русском языке. Мы надеемся, она поможет вам решить возникшие у вас вопросы при эксплуатации техники.
Если остались вопросы, задайте их в комментариях после инструкции.
"Загружаем инструкцию", означает, что нужно подождать пока файл загрузится и можно будет его читать онлайн. Некоторые инструкции очень большие и время их появления зависит от вашей скорости интернета.


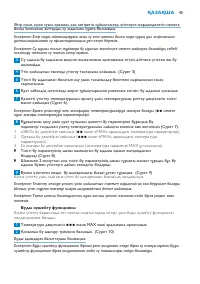


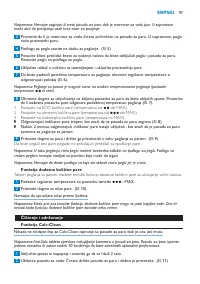


Note: Do not tilt or shake the steam generator when the water tank is full, otherwise water may spill out
of the filling hole.
3
Make sure that the water tank is firmly attached to the steam generator, otherwise the iron
does not produce any steam.
4
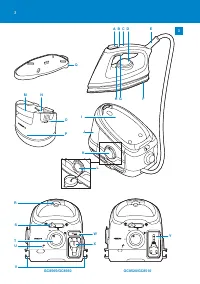
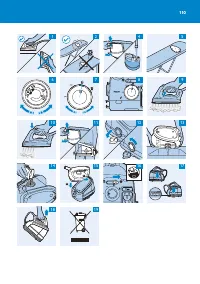
Place the iron resting mat on the ironing board. (Fig. 5)
5
Slide the carry lock slide to the left to unlock the iron from the steam generator. Place the
iron on the iron resting mat.
6
Put the mains plug in an earthed wall socket and switch on the steam generator.
7
To set the required ironing temperature, turn the temperature dial to the appropriate
position (Fig. 6).
Note: Steam ironing is only possible at higher ironing temperatures (temperature settings
2
or higher).
8
Turn the power knob to the desired steam setting to switch on the appliance. Make sure the
steam setting is suitable for the selected ironing temperature (Fig. 7).
1 Set to ECO steam (temperature settings
2
to MAX).
2 Set to moderate steam (temperature settings
3
to MAX).
3 Set to maximum steam (temperature setting to MAX).
,
The corresponding steam setting light flashes to indicate that the steam generator is heating
up (Fig. 8).
,
After approx. 2 minutes, the corresponding steam setting light stays on to indicate that the
steam generator is ready for steam ironing.
9
Press the steam trigger and keep it pressed while you steam iron. (Fig. 9)
To iron without steam, simply use the iron without pressing the steam trigger.
Note: You can safely put the hot iron on the iron resting mat during ironing. Do not place the mat with
hot iron on a surface that can be scorched by heat.
Note: Do not touch the iron resting mat for some time after you have removed the hot iron from it, as
the mat is hot.
steam boost function
During steam ironing, you can use the steam boost function to remove stubborn creases.
1
Set the temperature dial to a setting between
3
and MAX.
2
Press the steam boost button. (Fig. 10)
Never direct the steam at people.
Note: Some water droplets may appear when you use the steam boost function for the first time. The
water droplets disappear after you have used the steam boost function for some time.
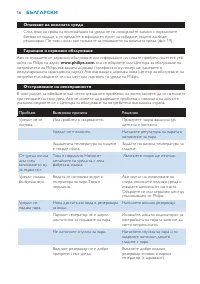
Cleaning and maintenance
Calc-Clean function
Never remove the Calc-Clean rinsing cap when the steam generator is hot.
Note: The Anti-Calc tablet helps to reduce scale build-up in the steam generator. Rinse the steam
generator once a month or after every 10 times of use for optimal steaming performance.
1
Unplug the appliance and let it cool down for 2 hours.
2
Remove the detachable water tank. Hold the steam generator with both hands and shake
well. (Fig. 11)
EnGlish
8


