
Триммеры Коса DEWALT FLEXVOLT 54 В BRUSHLESS DCMAS5713X1-QW - инструкция пользователя по применению, эксплуатации и установке на русском языке. Мы надеемся, она поможет вам решить возникшие у вас вопросы при эксплуатации техники.
Если остались вопросы, задайте их в комментариях после инструкции.
"Загружаем инструкцию", означает, что нужно подождать пока файл загрузится и можно будет его читать онлайн. Некоторые инструкции очень большие и время их появления зависит от вашей скорости интернета.


10
English
C
Lubrication
Your power tool requires no additional lubrication.
MAINTENANCE
Your power tool has been designed to operate over a long
period of time with a minimum of maintenance. Continuous
satisfactory operation depends upon proper tool care and
regular cleaning.
WARNING:
To reduce the risk of serious personal
injury, turn tool off and disconnect battery pack
before making any adjustments or removing/
installing attachments or accessories.
An accidental
start‑up can cause injury.
The charger and battery pack are not serviceable.
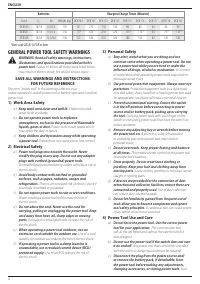
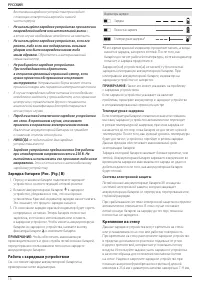
Switching On and Off (Fig. A, G)
To turn the appliance on, push the lock‑off tab
3
forward,
squeeze the lock‑off lever
2
and then the variable speed trigger
switch
1
. To turn the appliance off, release the variable speed
trigger switch and lock‑off lever.
WARNING:
Never attempt to lock the trigger in the
on position.
Speed Control Switch (Fig. A, G)
This attachment gives you the choice to operate at a more
efficient speed to extend the runtime for larger jobs, or
accelerate the tool speed for high‑ performance cutting.
To extend runtime
, pull the speed control switch
5
back
toward the battery housing into the "LO" position. This mode is
best for larger projects that require more time to complete.
To accelerate the attachment,
push the speed control switch
forward toward the auxillary handle into the "HI" position. This
mode is best to cut through heavier growth and for applications
that need higher RPM.
nOTE:
When in "HI" mode, runtime will be decreased as
compared to when attachment is in "LO" mode.
WARNING:
Hold the tool using only the designated
gripping surfaces: The powerhead handle and the
auxiliary handle.
WARNING:
Do not use the pole as a gripping surface.
Proper hand position requires one hand on the powerhead
handle
22
and one hand on the auxiliary handle
6
.
Proper Hand Position (Fig. A, K)
WARNING:
To reduce the risk of serious personal injury,
ALWAYS
use proper hand position as shown.
WARNING:
To reduce the risk of serious personal
injury,
ALWAYS
hold securely in anticipation of a
sudden reaction.
installing attachments or accessories.
An accidental
start‑up can cause injury.
OPERATION
Instructions for Use
WARNING:
Always observe the safety instructions and
applicable regulations.
WARNING:
To reduce the risk of serious personal
injury, turn tool off and disconnect battery pack
before making any adjustments or removing/
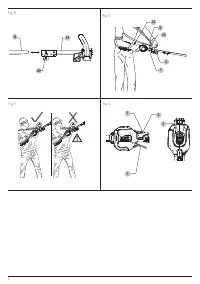
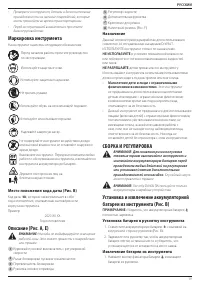
Attaching and Adjusting the Shoulder Strap
(Fig. E)
WARNING:
The shoulder strap
should only be slung over
one shoulder and not across the body.
WARNING:
Use of a shoulder strap ( 8 is required while
using this tool.
Attach the strap to the tool as shown in Fig. E and adjust for
proper balance and support.
1. Attach the strap mount.
2. Snap the shoulder strap latch
23
onto the strap
mount
7
located on the unit, just in front of the ON/OFF
trigger as shown in Fig. E. Adjust the strap so it fits over
your shoulder and provides proper balance and support.
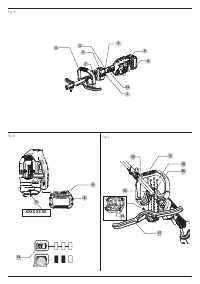
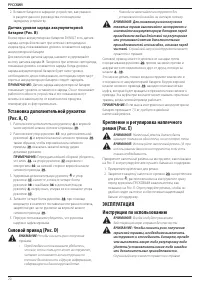
Powerhead (Fig. D)
WARNING:
To reduce risk of injury:
• Before any use, be sure everyone using this unit
reads and understands all manufacturer's safety
instructions and other information contained in
manufacturer's manual.
• Never apply power without an attachment being
properly mounted to the powerhead.
WARNING: To reduce the risk of serious personal
injury, turn unit off and remove the battery pack
before making any adjustments or removing/
installing attachments or accessories, or prior to
cleaning.
An accidental start‑up can cause injury.
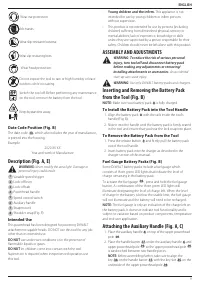
The powerhead can separate from the attachment by turning
the knob
20
counterclockwise and gently pulling them apart
by their poles
8
,
19
.
This should only be done with the power switch off and the
battery pack removed. Inside the upper powerhead pole
19
is
a mechanical coupling that will spin if the powerhead is turned
on. This coupling can cause severe injury if contacted while the
powerhead is operating.
nOTE:
A double shoulder harness is required if the mass of the
tool and battery pack exceed 7.5 kg.
3. Hold the auxiliary handle
6
and handle barrier
17
in place
while sliding the four handle bolts
18
with washers
36
into
the auxiliary handle
6
from the top, pushing them into the
base of the handle barrier
17
.
4. Tighten the four handle bolts
18
with the supplied hex
wrench, securing the two handle pieces to the upper
powerhead pole
19
.
5. Ensure the handle is securely attached before using.
Содержание
- 15 ) Эксплуатация электроинструмента и уход; Батареи
- 16 ) Сервисное обслуживание
- 17 Зарядные устройства; Электробезопасность; Использование удлинительного кабеля
- 18 Температурная задержка; Крепление на стену; Работа с зарядным устройством
- 19 Транспортировка; Аккумуляторные батареи; ВНИМАТЕЛЬНО ПРОЧТИТЕ ВСЕ ИНСТРУКЦИИ; Инструкции по очистке зарядного устройства
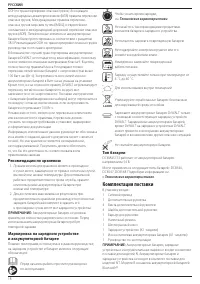
- 20 Комплектация поставки; Тип батареи; Рекомендации по хранению
- 21 Установка батареи в рукоятку инструмента; СБОРКА И РЕГУЛИРОВКА; Назначение; НЕ исПОЛЬЗуйТЕ; Маркировка инструмента
- 23 Защита окружающей среды; Чтобы продлить рабочий цикл
- 24 Аккумуляторная батарея


