
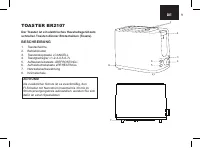
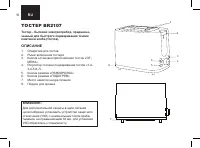
Тостеры BRAYER BR2107 - инструкция пользователя по применению, эксплуатации и установке на русском языке. Мы надеемся, она поможет вам решить возникшие у вас вопросы при эксплуатации техники.
Если остались вопросы, задайте их в комментариях после инструкции.
"Загружаем инструкцию", означает, что нужно подождать пока файл загрузится и можно будет его читать онлайн. Некоторые инструкции очень большие и время их появления зависит от вашей скорости интернета.

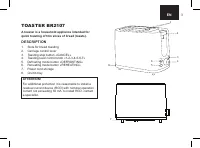


7
EN
Notes:
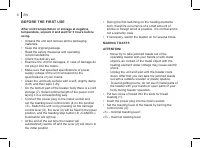
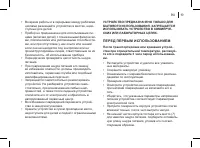
- the toasting level depends on the sort of bread
and thickness of slices. Optimal thickness of the
slices should not exceed 25 mm;
- select the toasting level by setting the control knob
(4) to the needed position.
- do not use very thin slices of bread, because they
do not center in the toaster.
•
Press on the carriage control lever (2) until fixed, the
toasting stop button (3) «CANCEL» illumination will
light up.
• When the toasts are ready, the toaster will be
switched off automatically, the lever (2) will return to
its initial position.
TOASTING STOP BUTTON (3) «CANCEL»
•
If you need to switch the toaster off or stop the
toasting process, press the button (3) «CANCEL».
•
The toaster will be switched off, and the lever (2) will
return to the initial position.
DEFROSTING MODE BUTTON (5) «DEFROSTING»
•
To toast frozen bread, put the slices in to the slots
for bread toasting (1). Set the required toasting level
with the control knob (4), press the carriage control
lever (2) until it latches and then press the button (5)
« DEFROSTING»; the button (5) «DEFROSTING»
and the stop button (3) «CANCEL» illumination will
light up.
REHEATING MODE BUTTON (6) «REHEATING»
• To reheat cold toast, put the toasts in to the slots (1),
press on the carriage control lever (2) until it latches,
then press the «reheat» button (6) «REHEATING»,
the button (6) «REHEATING» and the stop button (3)
«CANCEL» illumination will light up.
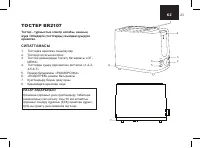
CRUMB TRAY
• Bread crumbs are accumulated in the tray (8),
regularly clean the tray (8).
•
Switch the toaster off and unplug the power cord plug
from the mains socket, wait until the toaster cools
down.
•
Remove the crumb tray (8), clean it off the crumbs
and install the tray back to its place.
CLEANING AND CARE
• Before cleaning unplug the unit and leave it open to
cool down.
• Wipe the toaster maker body with a slightly damp
cloth, and then wipe it dry.
• Do not use metal brushes, abrasives, or solvents to
clean the toaster maker, of the toaster maker body.
• Regularly clean the tray (8).
Attention! To avoid electric shock do not immerse
the toaster maker, the power cord or the plug into
water or other liquids.
Характеристики

Остались вопросы?Не нашли свой ответ в руководстве или возникли другие проблемы? Задайте свой вопрос в форме ниже с подробным описанием вашей ситуации, чтобы другие люди и специалисты смогли дать на него ответ. Если вы знаете как решить проблему другого человека, пожалуйста, подскажите ему :)


