
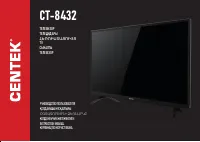
Телевизоры Centek CT-8432 - инструкция пользователя по применению, эксплуатации и установке на русском языке. Мы надеемся, она поможет вам решить возникшие у вас вопросы при эксплуатации техники.
Если остались вопросы, задайте их в комментариях после инструкции.
"Загружаем инструкцию", означает, что нужно подождать пока файл загрузится и можно будет его читать онлайн. Некоторые инструкции очень большие и время их появления зависит от вашей скорости интернета.


26
2.
SCOPE OF SUPPLY
-
TV — 1 pc.
-
Remote control — 1 pc.
-
Battery for remote control — 2 pcs.
-
Removable leg — 2 pcs.
-
Screw — 4 pcs.
-
User Manual — 1 pc.
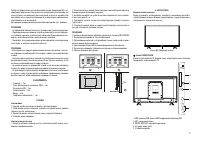
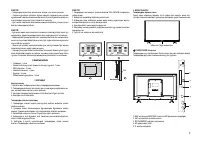
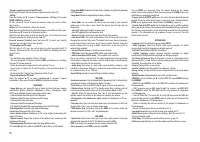
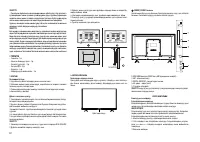
3. MONTAGE
Montage of stand legs
1. Open the box and remove the TV with accessories.
2. To avoid damage to the TV, cover the table with a soft cloth, put the TV on the
table with the screen down.
3. Screw the legs into the corresponding positions on the TV body.
4. The installation of the legs is completed.
Montage the TV on the wall
1. Carefully place the TV on a table, covered with a soft cloth, to avoid scratches.
2. Unscrew the bolts on the bottom rack of the stand with a screwdriver. Remove
the stand. Do these operations carefully.
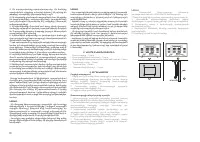
З. Set the bracket so,that it can be fixed to the wall in accordance with pictures
3 and 4.
4. Drill 4 holes on the wall (the scale is given for reference) and screw 4 bolts
there.
5. Use a screwdriver to fix the bolts on the back wall of the TV, as shown in
the picture
4. Place the TV on the wall.
NOTE:
1. Fixing the montage on the TV complies with the VESA 200x200 standard.
2. It is not necessary to use a bracket on the wall.
3. When carrying out assembly operations, there should be no other objects
near the wall and under the wall.
4. Installation must be carried out by a qualified specialist.
5. When installing, follow the requirements of the bracket assembly instructions.
6. The pictures are provided for reference.
4
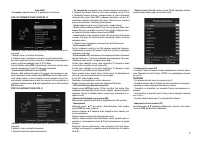
2. ÊÎÌÏËÅÊÒÀÖÈß È ÌÎÍÒÀÆ ÒÅËÅÂÈÇÎÐÀ
ÊÎÌÏËÅÊÒÍÎÑÒÜ
- Òåëåâèçîð - 1 øò.;
- Ðóêîâîäñòâî ïîëüçîâàòåëÿ - 1 øò.;
- Ïóëüò äèñòàíöèîííîãî óïðàâëåíèÿ (ÏÄÓ) - 1 øò.;
- Êàáåëü ïèòàíèÿ (ïðèêðåïëåí ê òåëåâèçîðó) - 1 øò.;
- Êîìïîíåíòíûé êàáåëü YUV - 1 øò.;
- Ñúåìíàÿ íîæêà - 2 øò.;
- Áàòàðåÿ ÀÀÀ-òèïà äëÿ ÏÄÓ - 2 øò.;
- Áîëò M4õ10 - 3 øò.
ÌÎÍÒÀÆ ÒÅËÅÂÈÇÎÐÀ ÍÀ ÑÒÅÍÅ
1. Àêêóðàòíî ïîëîæèòå òåëåâèçîð
íà ñòîë, çàñòåëåííûé ìÿãêîé
òêàíüþ, âî èçáåæàíèå ïîÿâëåíèÿ
öàðàïèí.
2. Îòêðóòèòå âèíòû íà íèæíåé ñòîé-
êå ïîäñòàâêè îòâåðòêîé. Ñíèìè-
òå ïîäñòàâêó. Äàííûå îïåðàöèè
ïðîèçâîäèòå àêêóðàòíî.
Ç. Íàñòðîéòå êðîíøòåéí òàê, ÷òîáû
îí ìîã áûòü çàêðåïëåí íà ñòåíå â
ñîîòâåòñòâèè ñ ðèñóíêàìè 3 è 4.
4. Ïðîñâåðëèòå íà ñòåíå 4 îòâåð-
ñòèÿ (ìàñøòàá äàí äëÿ ñïðàâêè)
è çàêðóòèòå òóäà 4 áîëòà.
5. Îòâåðòêîé çàêðåïèòå áîëòû íà çàäíåé ñòåíêå òåëåâèçîðà, êàê ïîêàçàíî íà
ðèñóíêå 4. Ðàçìåñòèòå òåëåâèçîð íà ñòåíå.
ÏÐÈÌÅ×ÀÍÈÅ:
1. Êðåïëåíèå äëÿ ìîíòàæà íà òåëåâèçîðå ñîîòâåòñòâóåò ñòàíäàðòó VESA 200õ100.
2. Èñïîëüçîâàòü êðîíøòåéí íà ñòåíå íå îáÿçàòåëüíî.
3. Ïðè ïðîâåäåíèè îïåðàöèé ïî ñáîðêå âáëèçè ñòåíû è ïåðåä ñòåíîé íå äîëæíî
áûòü íèêàêèõ äðóãèõ ïðåäìåòîâ.
4. Ìîíòàæ äîëæåí îñóùåñòâëÿòüñÿ êâàëèôèöèðîâàííûì ñïåöèàëèñòîì.
5. Ïðè ìîíòàæå ñîáëþäàéòå òðåáîâàíèÿ èíñòðóêöèè ïî ñáîðêå êðîíøòåéíà.
6. Ðèñóíêè äàíû äëÿ ñïðàâêè.
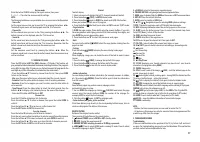
4. START OF WORK
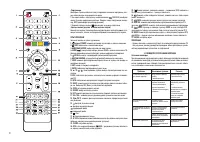
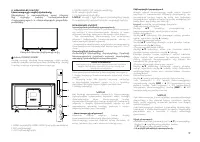
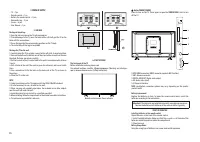
The front panel of the TV
Before installation and use, please read
the relevant sections carefully «Предостережение» (Warning) and «Инструк-
ция по технике безопасности» (Safety instruction).
Remote control sensor Power indicator
Button POWER/STANDBY
Press to turn on the TV. Press again to open the
SOURCE MENU
. Hold to turn
off the TV.
HDMI1(ARC)
HDMI2
ANT1
DIGITAL
AUDIO OUT
AV
COMMON INTERFACE
1. HDMI: HDMI connectors (HDMI1 connector supports ARC function).
2. ANT: Antenna connector.
3. DIGITAL AUDIO OUT: Digital audio output.
4. AV: Audio-video (mini).
5. CI: General interface.
NOTE:
input/output connection options may vary, depending on the specific
product model.
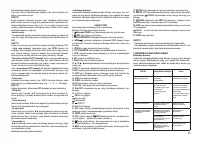
Battery replacement
Replace the batteries in time. To make the remote control work, install the
batteries according to the instructions.
Attention!
If the batteries are installed incorrectly, an explosion may occur.
Replace the batteries with batteries of the same or similar type only.
START OF OPERATION
Installing batteries in the remote control
1.Open the cover on the back of the remote control.
2. Install two AAA batteries. Make sure that the «+» and «-» at the ends of the
batteries match the pointers inside the compartment.
3. Close the cover.
Battery Usage Notes:
Using the wrong type of batteries can cause leaks and/or explosion.
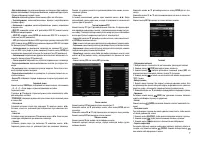
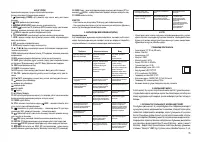
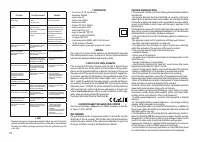
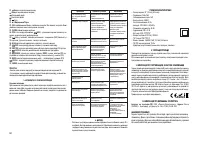
Характеристики

Остались вопросы?Не нашли свой ответ в руководстве или возникли другие проблемы? Задайте свой вопрос в форме ниже с подробным описанием вашей ситуации, чтобы другие люди и специалисты смогли дать на него ответ. Если вы знаете как решить проблему другого человека, пожалуйста, подскажите ему :)


